ADTHDIndoorCamera
QuickInstallationGuide
WallMounting
FCCID:P27RC845
17
RC845 Indoor Full HD Camera Installation Guide
5 Wall Mounting
This section provides details for final mounting of the RC845 HD
Camera. You should ensure that the camera is configured and
enrolled in the platform before permanently mounting it.
Note: Ensure that the camera is configured and enrolled in ADT Control
or Pulse before permanently mounting it.
1. Locate an unused, non-switchable, indoor outlet to plug the AC/DC Power
Adapter into. This outlet should be located as close as possible to the
location where the camera will be permanently mounted.
Caution: Do not plug in the power adapter until all the connections are
completed and the camera is fully mounted.
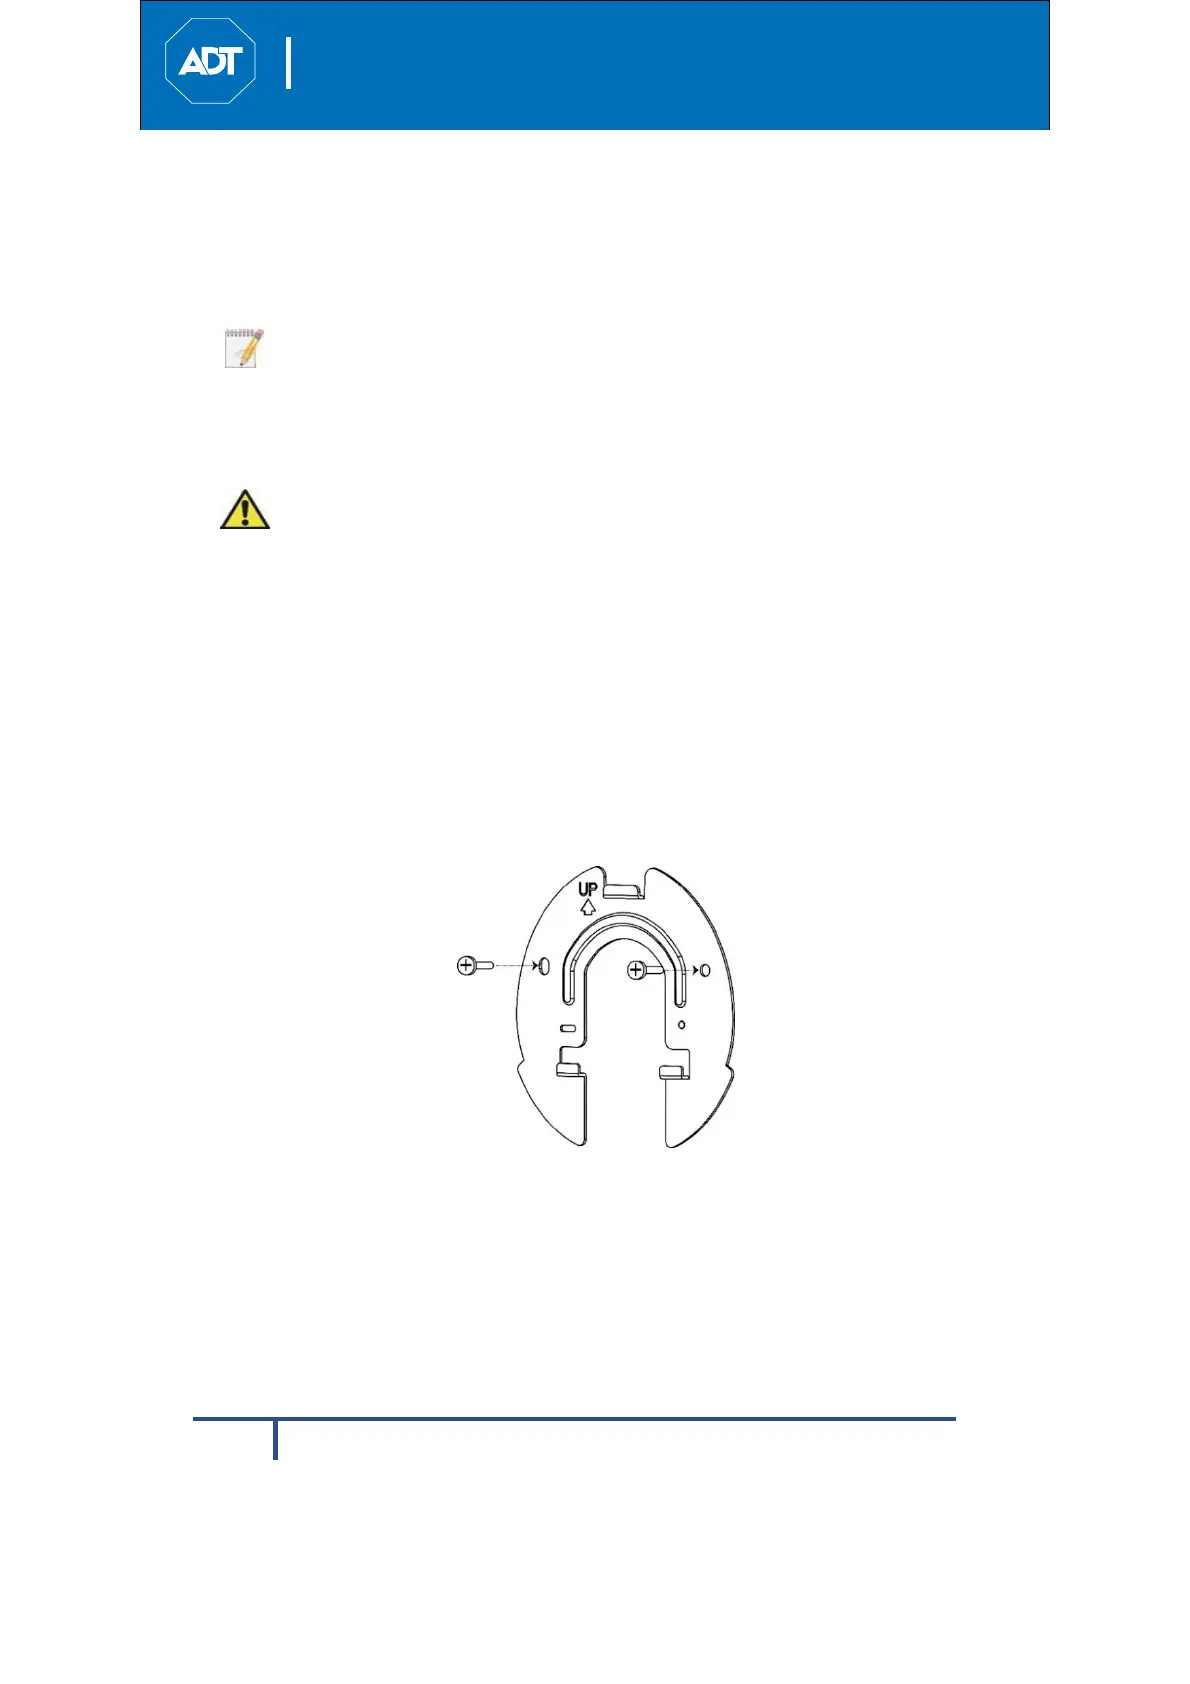
2. Locate the mounting plate at the bottom of the camera stand and slide the
mounting plate forward to release it from the stand.
3. Hold the mounting plate at the location where you would like to mount the
camera and mark the location of the two mounting holes.
4. Hold the stand at the location where you would like to mount the camera
and mark the location of the two mounting holes.
5. Drill two pilot holes on the mounting surface at the marked location.
6. If using the anchors, insert them into the mounting holes.
7. Align the two mounting holes on the camera stand with the two pilot holes
and mount the mounting plate to the surface using the two supplied
screws.
Figure 5-1 Installing the Camera Stand