Chapter 1 Installation and setup
8
Anoxomat® III User’sGuide
Connecting the gas supply to a 220V system
See Installing the gas supply before you begin.
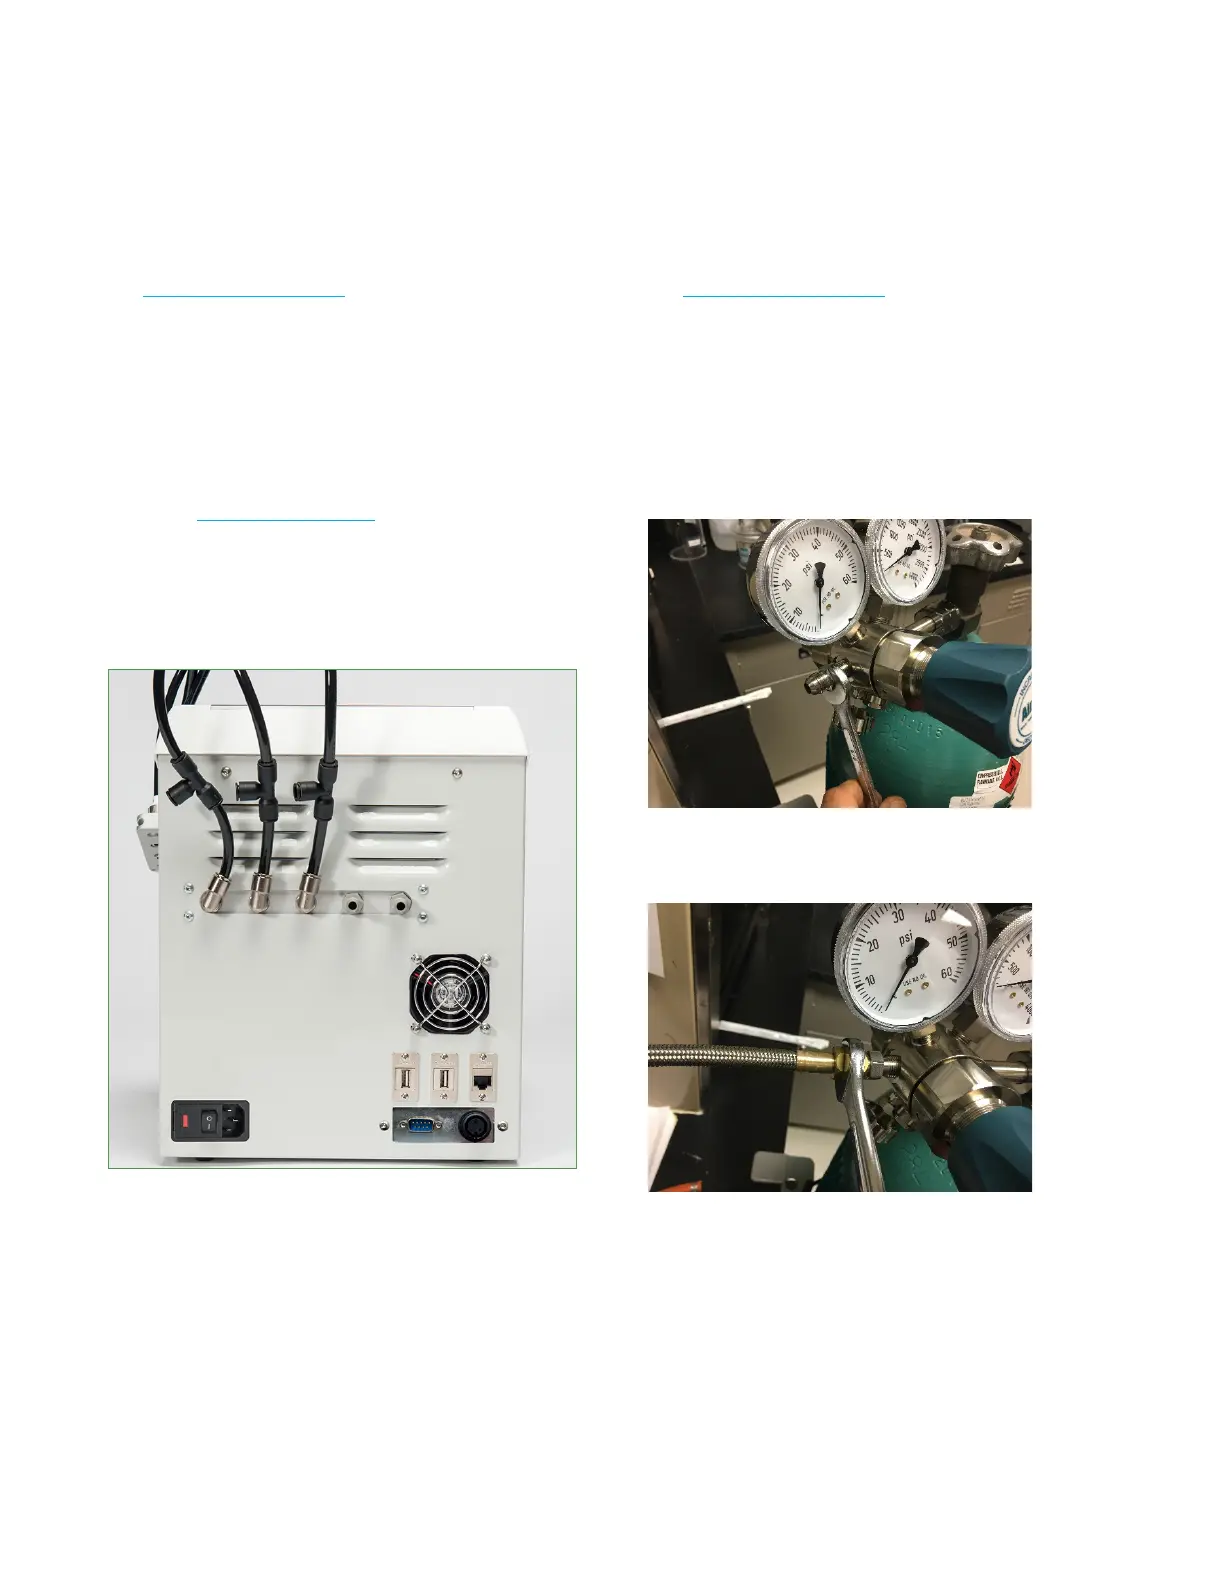
1. Mount the regulator on the gas cylinder
using the adjustable wrench.
2. Tighten the regulator per manufacturer’s
recommendations to avoid gas leakage.
3. Set the regulator's gas pressure to zero.
4. Using the provided tube clamps on each end, connect
the gas tube to the regulator and the gas input #1
(see the Rear connector panel).
5. Tighten the gas tube clamps.
Rear connector panel
This image is for reference only. Your Anoxomat system
may have dierent connections.
This
6. Open the gas cylinder’s main supply and set the
regulator gas pressure to 1.75 ± .15 bar
(25.5 psi ± 2 psi).
7. Repeat for each gas connection.
Connecting the gas supply to a 100V or 110V system
See Installing the gas supply before you begin.
1. Mount the regulator on the gas cylinder using the
adjustable wrench.
2. Tighten the regulator per manufacturer's
recommendations to avoid gas leakage.
3. Set the regulator's gas pressure to zero.
4. Hand-tighten the gas fitting into the regulator.
Use a 5/8 in. wrench to fully tighten the fitting.
5. Hand-tighten the metal gas hose to the gas fitting.
Use an 11/16 in. wrench to fully tighten the hose.
 Loading...


