Networking Your Printer
5 adventprintersupport.custhelp.com
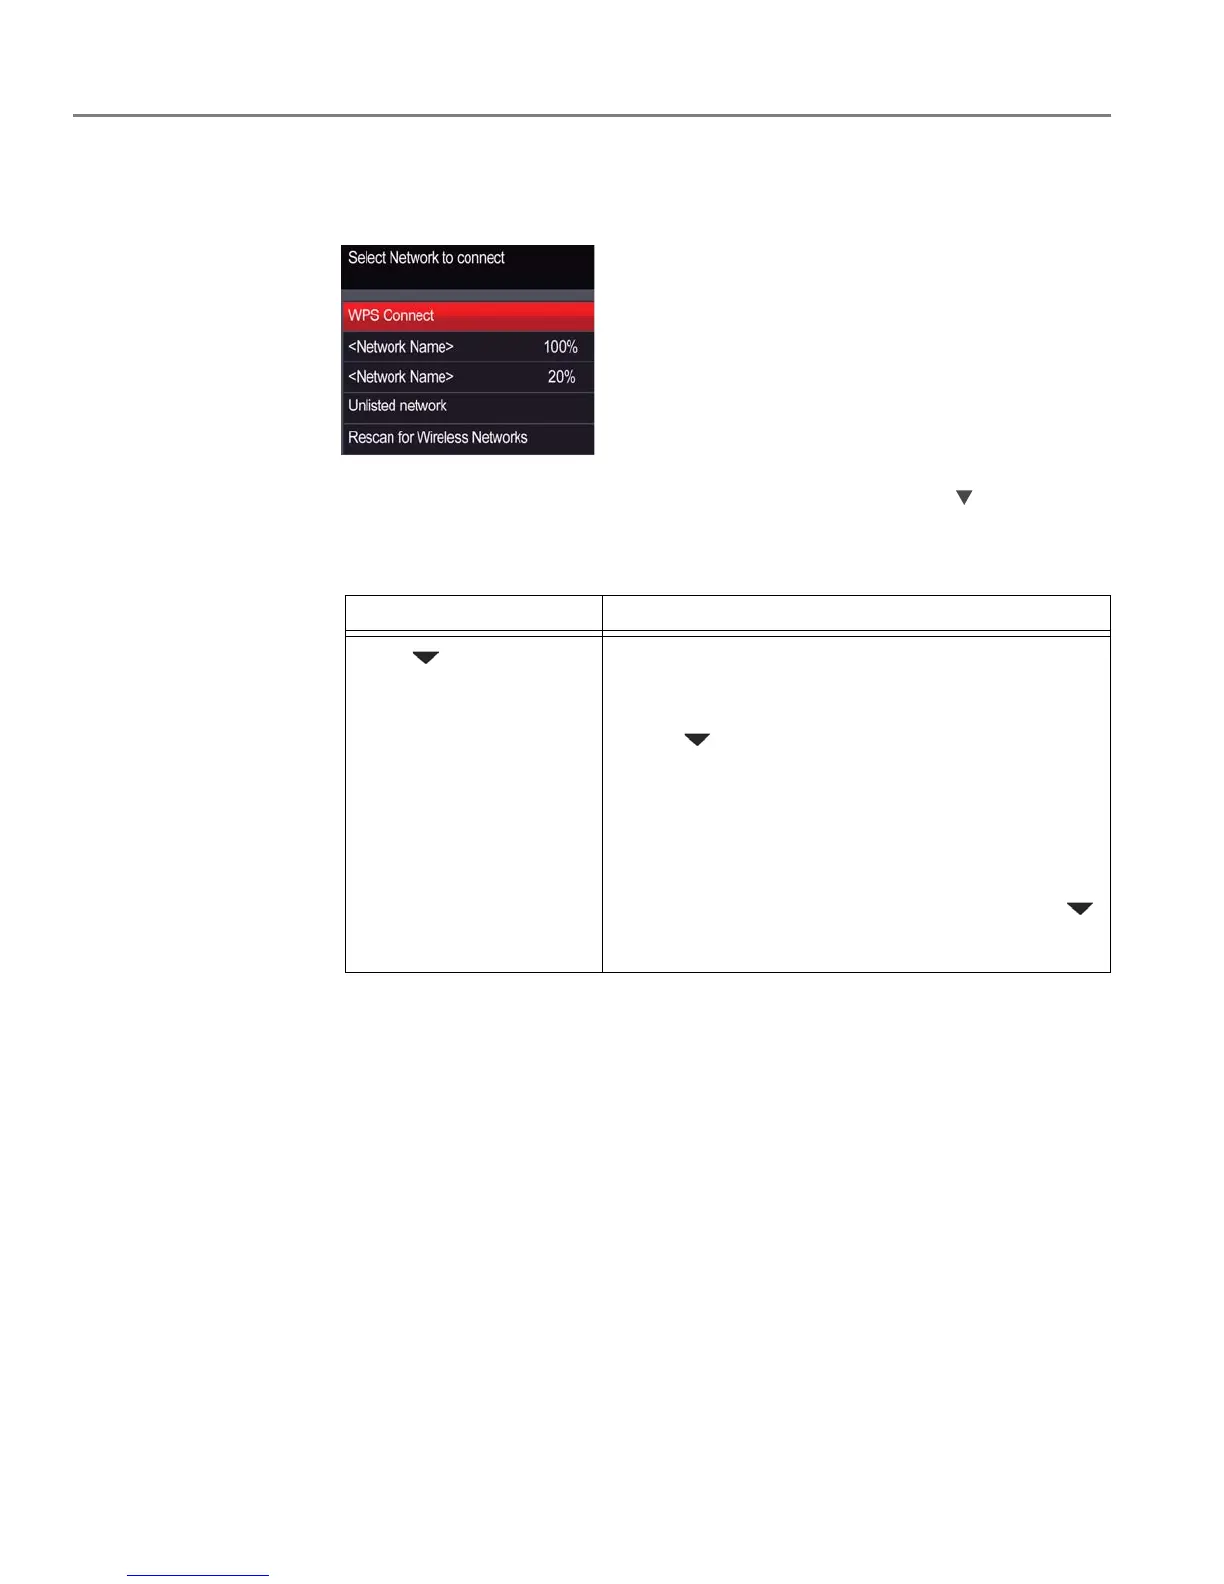
The Wi-Fi connectivity LED blinks as the printer searches for available wireless
networks within range, then displays the list in order of signal strength. For example:
If there are additional networks than can be shown on the LCD, a (page down)
symbol appears in the bottom right-hand side of the display.
4. If the name of your network is:
5. If your network has security enabled, use the LCD keyboard (see Using the LCD
keyboard, page 7) to enter your security string (case-sensitive).
6. When the confirmation message appears, press OK.
When the printer is successfully connected, the Wi-Fi connectivity LED stops
blinking and remains lit.
The printer with a wireless connection is listed as the name of the printer plus
a
number (for example, AdventTouchPrint+1133).
7. If you haven’t installed the ADVENT All-in-One Printer Software:
a. Go to adventprintersupport.custhelp.com/app/go/aiodownloads.
b. In the search results, click the link for ADVENT All-in-One Printer Software
for your computer operating system.
c. Follow the on-screen instructions.
Listed Not listed
Press to select your
network, then press OK.
Make sure your wireless router is turned on and
within range. If your wireless router does not
broadcast its SSID (network name):
1. Press to select Unlisted Network, then press OK.
2. Use the LCD keyboard (see Using the LCD
keyboard, page 7) to enter your network name.
3. Select WEP or WPA/WPA2 as required for your
network's security setup, then press OK.
NOTE: If the name of your network is still not listed,
or you want to change your network, press
to select Rescan for Wireless Networks,
then press
OK.