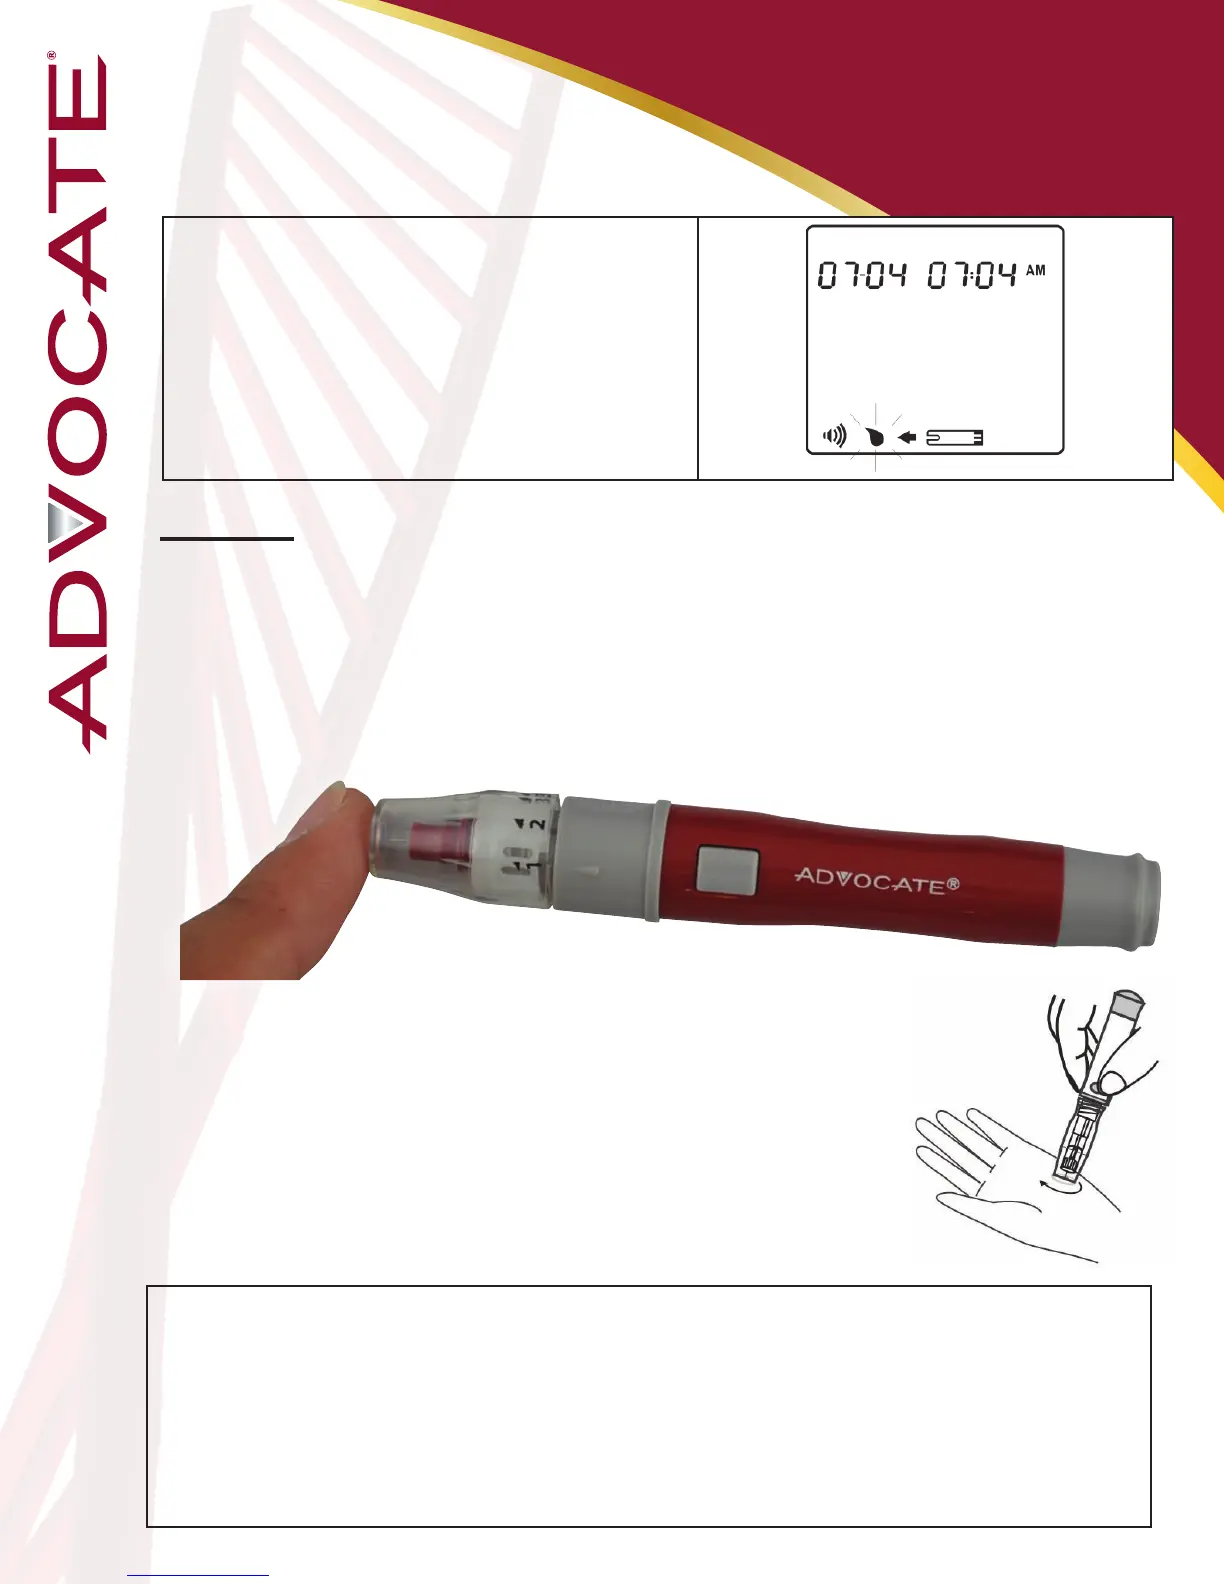
Step 3: Obtain a Drop of Blood
Before puncturing, clean the puncture site with 70% alcohol cotton
and let it air-dry.
Fingertip
Hold the lancing device rmly against the side of your ngertip
and press the release button. After hearing a click, the puncture is
complete.
25
General Mode
When the ashing apply blood symbol appears
on the display, press M buon twice and general
mode appears (no marker displays). Go to Step 3 for
obtaining a drop of blood.
Perform
Blood Glucose Test
Sampling for an alternate site (AST)
other than ngertip
Press and hold the lancing device against your palm,
forearm, upper arm, calf, or thigh for a few seconds,
then press the release button. Keep holding the
lancing device and cap against your skin until a
round drop of blood appears.
Warning:
- The risk of transmitting of disease such as viral hepatitis from shared use of lancing device has been increasingly reported by the FDA
and CDC*1,2. To prevent the transmission of disease and infection, the lancing device is intended only for the use of a single user and
should not be shared.
- Squeeze the punctured area gently to obtain blood and be careful NOT to smear the blood sample.
- Choose a different spot each time you test. Repeated punctures in the same spot may cause soreness and calluses.
- Before you decide to perform alternate site test, please refer to “Alternate Site Testing” for limitations or consult your healthcare
professional.
- It is recommended that you discard the rst drop of blood as it might contain tissue uid and serum, which may affect the test result.