22
CLEANING YOUR OVEN ACCESSORIES
Removing the trays and shelves from
your appliance
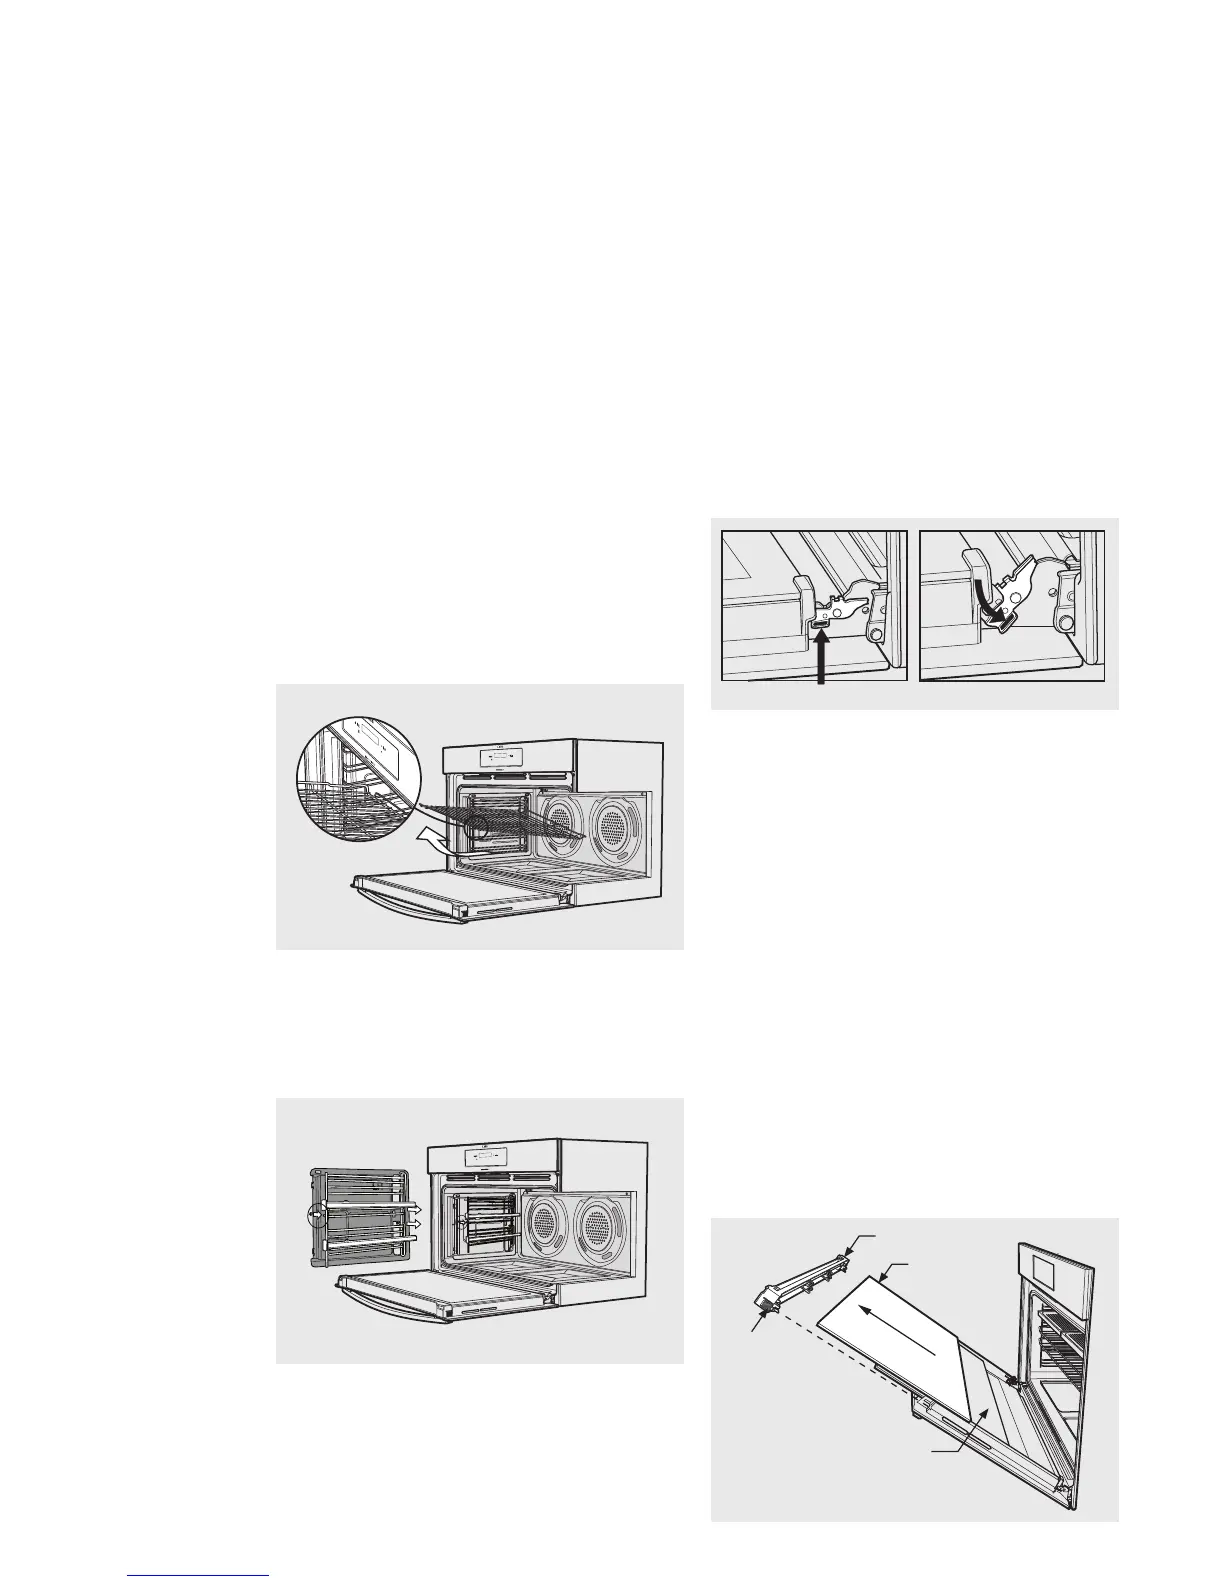
• Slidethedishandgrilltraytowardsyouuntilthey
reach the front stop.
• Tiltthemupatthefronttoclearthesidesupports,
taking care not to spill the contents.
• Liftthemclear.
• Washthetrayandshelvesinhotsoapywater.
• Reversetheabovestepstoputthegrilltrayand
shelves back again.
• Ensurethattheyareplacedbetweenthe2
support wires.
• Toremoveatrayfromaslidingposition:
• Pulltraytowardsyouuntilitstops.
• Liftthetrayclear.
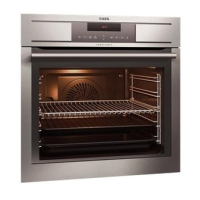
Removing the side racks or shelf
supports
• Grasptheshelfsupportatthefront.
• Pullitfirmlyinwards.
Cleaning your oven door
The oven door has been designed to allow the two
inner door glasses to be removed for cleaning without
removing the door from the product.
Removing the inner door glass for cleaning:
• Openthedoorfullytogainaccesstothehinges
• Pushdownthehingelockingtabasshowninthe
diagram on both sides of door
Locking tab up – normal position Locking tab down – for cleaning
• Gentlyclosethedooruntilitstopsinpartiallyopen
position on the locking tab (the door will not fully
close with the locking tab in the down position).
• Inthispositionthetopdoortrimcanberemovedby
pushing each side on the serrated surface to release
the clips and lift the trim away from the door.
• Toremovetheinnerglass,tilttopofglasstowards
the oven and lift out.
• Themiddleglassisremovedinthesameway.
• Theinnersideofouterglasscanbecleanedin-situ
when inner and middle glass is removed.
• Cleanglassusingdetergentandwarmwater,wipe
clean and dry thoroughly.
Re-assembling the door glass panels:
• Replacethemiddleglassbacktothedoor.
The middle glass is a clear pane and orientation
of the glass is not important.
• Replacetheinnerglassbacktothedoor,ensuring
the side with black ceramic paint faces away from
the oven cavity when door is closed.
• Fullyopenthedoorandreturnthelockingtabsto
their normal position and close the door.
Door top trim
Inner glass
Press here on
each side to release
trim clips
Middle glass



 To Next Page