30
INSTALLATION OF THE APPLIANCE (CONTINUED)
Slot-in installation (continued)
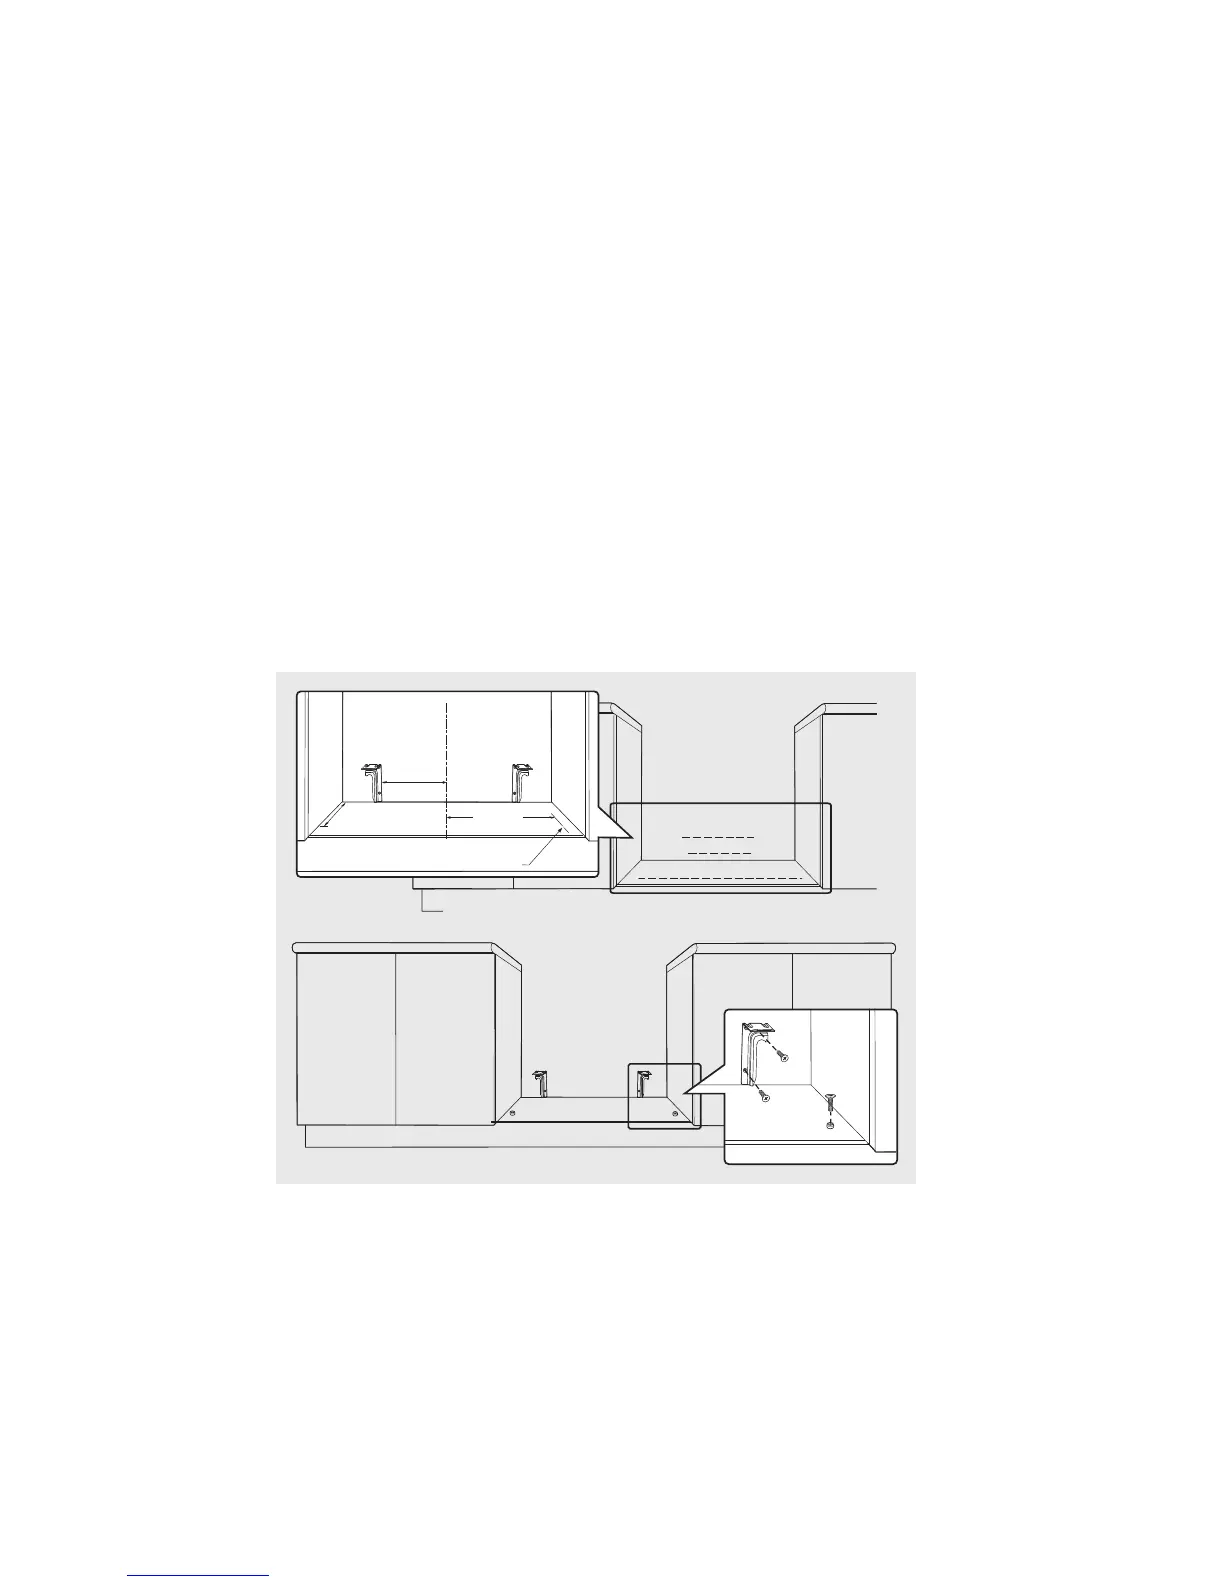
Installation of anti-tilt brackets and stops
• Thebracketsaretobesecuredtothebackwall
with appropriate fasteners.
• Thebottomedgeofthethebracketsreston
the horizontal support surface.
• Twostopsaretobescrewedtotheplinthin
locations as shown (stops provided). The stops
locate into slots in the base of the appliance to
prevent the product from being pulled forward
when installed.
• Measurementsfromtherearwallaretobe
adjusted if there are tiles etc. that come
between the appliance and the wall.
+
+
+
+
+
+
+
+
C
L
183mm
414mm
475mm
Location of holes for front stops
Measurements are to be adjusted to account for the thickness of any skirting
board or tiles coming between the back of the appliance and the wall
Front stops
Installation sequence for freestanding
or slot in installation
• Checkthattherequiredservicesarecorrectly
positioned (see electrical & gas services
requirements).
• Ensurecabinetryhasthecorrectdetails.
• Installanti-tiltbracketsandchainhookorfront
stops as appropriate.
• Removeallpackagingfromcooker,remove
all loose parts ie. Trivets, burner crowns,
oven shelves.
• Removeplasticfilmfromcooker.
• Fitsplashbacktocooker.
• Slidecookerintopositiontocheckfitmentto
anti-tilt bracket. For freestanding installation,
check the height and level of the cooker. Adjust
cooker feet as required.
• Connectgasandelectricalservices.
• Placeintoposition.
• CompleteCertificateofCompliance.
• Onceservicesareconnected,productcan
be lifted onto the plinth and pushed back
carefully, ensuring the appliance engages into
both brackets at the rear and the front stops.
• Iftheproductrequiresremovalforservice,it
must be lifted at the front approximately 5mm
to clear the front stops prior to being
pulled forward.



 To Next Page