P
h
i
l did it!
From NB ONE Reviews
NOTE
Set your radio transmitter as a normal plane (Even if you are using the flight controller on a
flying wing). The FlightController will do all the required mixing according to the plane type you
select using the dip switches.
Once everything is connected, turn on the aircraft (remove your propellers when testing new
stuff!!!). The FlightController needs about 5 sec to boot and you should not move it or do
anything on your aircraft when booting is running.
Once you get the confirmation signal from the ESC then you can check your moving surfaces.
First step is changing the flight mode to (2) Manual Mode (LED Mode = OFF) and check if the
surfaces are moving to the right directions (If not then invert the channel on your transmitter).
After that switch to (1) Attitude Mode (equal to Stabilize for the Arduplane fellows) (LED Mode =
RED) and check if the surfaces are correcting on the right directions.
If not use the screw driver and move the corresponding adjusting pot to the other side (For
instance from A to B side) to reverse the direction of the servo correction (If you are not familiar
with flight controllers ask help to an experience fellow on your airfield).
The adjusting pot is also used to adjust the gains for each channel. I had good results putting
my pots at 1/4 from the top arrow.
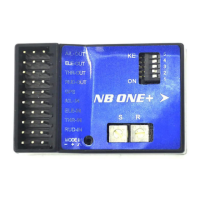
For the NB ONE+
Change Direction of the Output:
Use the screwdriver and move the respective DIP Switch into the other direction.
See Page 7
14 of 21