10
Ø Pipe thickness Tightening torque
1/4” ≥0,8 15 - 20
3/8” ≥0,8 30 - 40
1/2” ≥0,8 45 - 55
5/8” ≥0,8 60 - 65
7/8” ≥0,8
Fig. D
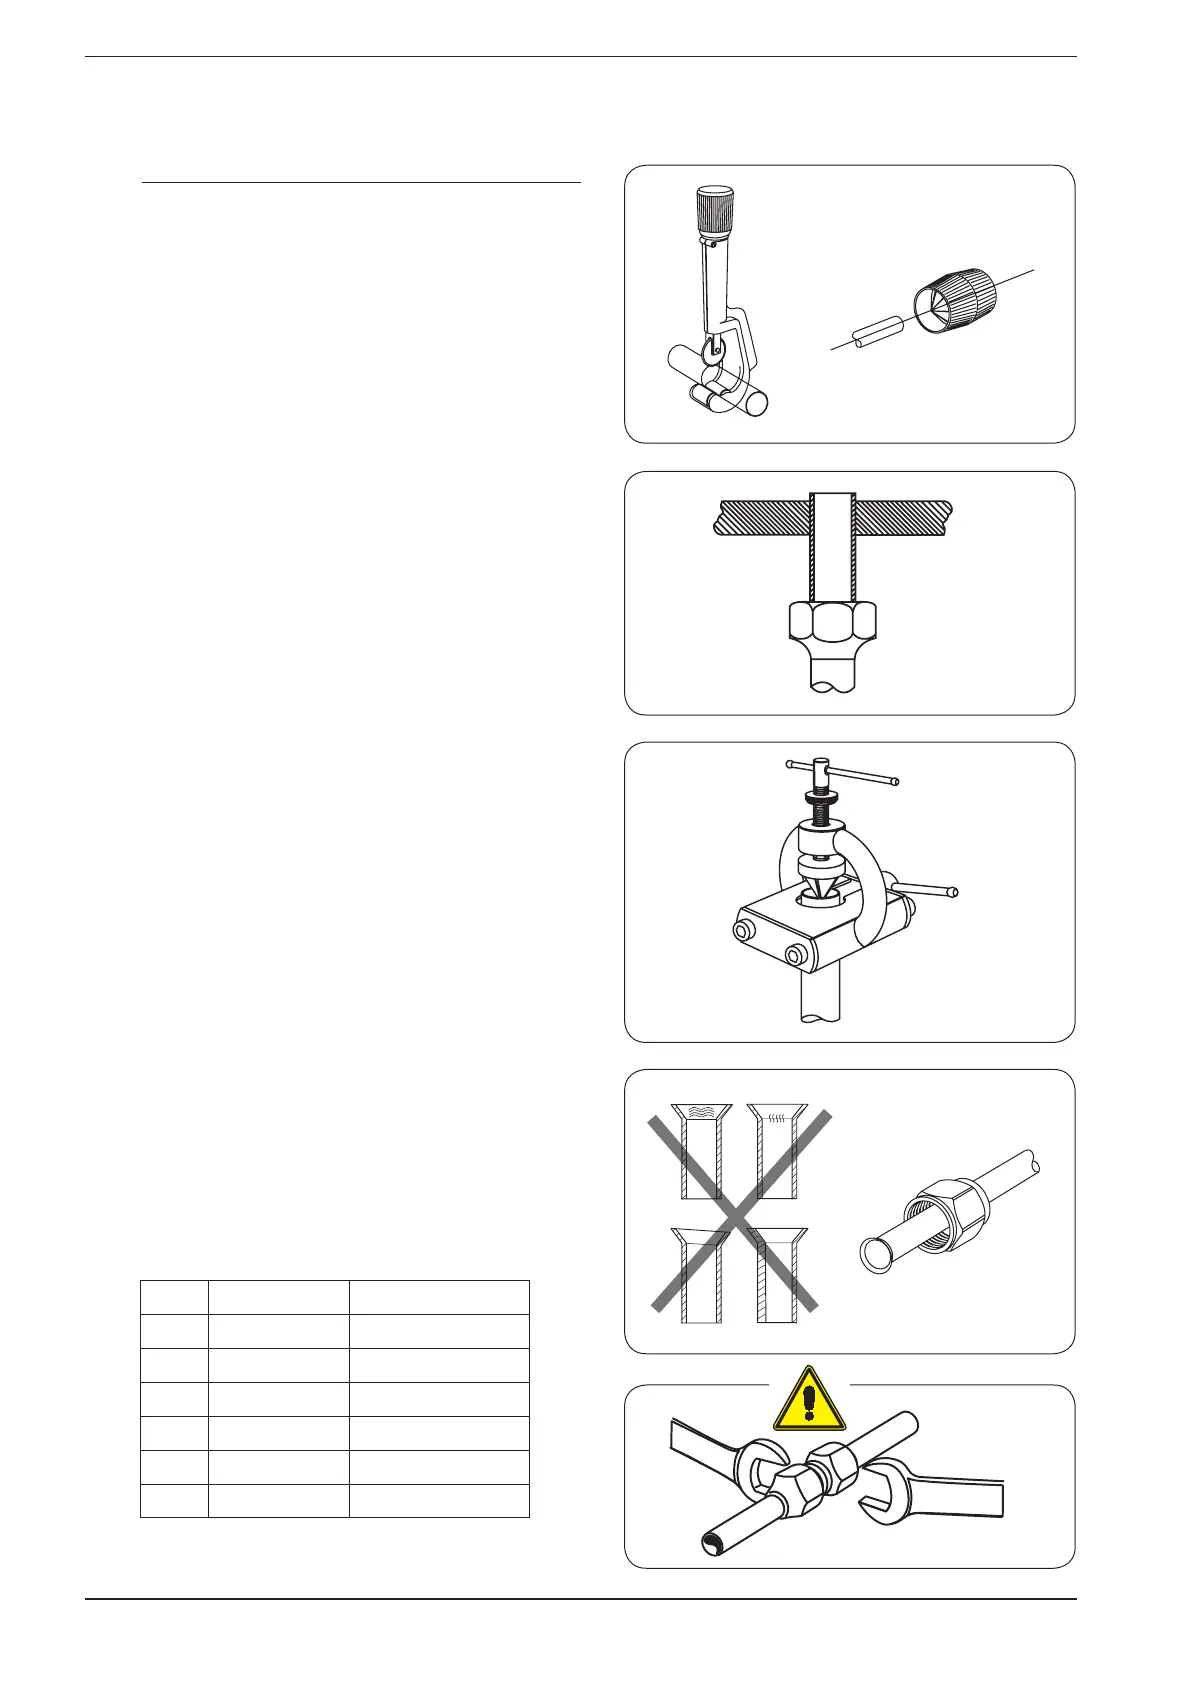
Fig. A
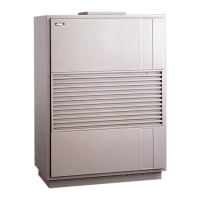
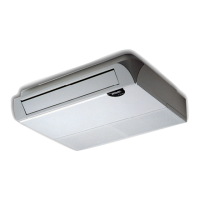
Fig. B
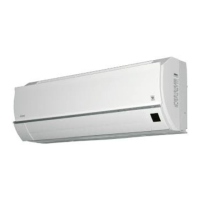
Fig. C
Fig. E
8.1. FITTING THE REFRIGERANT LINES
• Refrigerant R410A
• Use copper pipes for gas and liquid, as indicated in the relative
table (see the connection pipes table).
• Before assembling the insulated copper pipes on the refrigerant
lines, seal both ends of each pipe to protect the inside from dust
and humidity. The inside of the pipes must be perfectly clean and
free of any foreign bodies.
• Try to avoid bending the pipes. If you must bend them, the bend
radius should be greater than 100mm.
• The refrigerant lines in multi-split systems must meet strict limitations
related to the type of outdoor units used; for more information on
the limits and types of refrigerant connections refer to the technical
manuals or manual installation of outdoor units.
The multi-split systems can have systems connecting refrigerator, and joints,
which differ according to the type of product; However, once made va-
rious refrigerant lines (using accessories giungione refrigerator and gas di-
stribution provided by the system), the connection of indoor units to the
remaining lines of the system, follow the following points:
1. Shape the refrigerant lines from the indoor unit until they are at jun-
ctions provided on refrigerant lines of the system.
2. Prepare the lines on the side of the indoor units as follows:
• Accurately measure the inner and outer tube.
• Use a tube slightly longer than the measurement date.
• Cut the copper tube to length with the cutter and smooth the
ends using a pipe reamer (Fig. A);
• Insulate pipes and fit conical nuts before running the collar end of
the tubes (Fig. B);
• To perform the collars tapered at 45 ° using a conical tool for ed-
ging (Fig. C);
• Deburring the inside of tubes
• During the reaming, the pipe end must be higher of the reamer to
prevent the entry of dust in the pipe.
• Be sure the inside of the pipe is clean and free of residuals.
• Verify that the conical surface is in alignment with the tube, smo-
oth, free of fractures and with uniform thickness (Fig. D).
3. Check the height difference of the indoor and outdoor units to assess
the need of one or more siphons on refrigerant lines (for more details
refer to the section)
4. Before making the union of the lines with the unit, make sure that the
position is final.
5. Clean the surfaces of the joints so as to ensure perfect contact betwe-
en the clamping surfaces.
6. Lubricate with a thin layer of oil to the motor connections inside and
outside.
7. Connect and tighten the refrigerant lines at the indoor unit, use a key
and to avoid twisting the pipes (Fig. E).
8. Observe the tightening torque indicated in the table:
8. COOLING CONNECTIONS