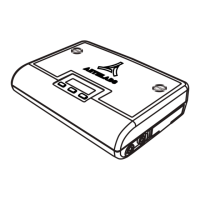
32 microAeth
®
MA Series MA200, MA300, MA350 Operating Manual microAeth
®
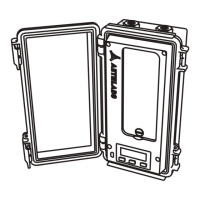
MA Series MA200, MA300, MA350 Operating Manual 33
AethLabsAethLabs
5.6.7. AutoSample
The AutoSample setting permits the user to select if the microAeth will automatically start sampling and
measurements.
Off: Automatic start of sampling and measurements will not occur.
Resume after power loss (Resume): If the instrument was previously sampling and experienced a power
failure. If this setting is on, the instrument will automatically start sampling and measurements when it turns
on from a loss of power or some other event that caused the instrument to turn off.
External power control (Ext Power): If the 5V barrel jack of the instrument is supplied with power, the
instrument will automatically turn on and start sampling and measurements. If power is removed from the
5V barrel jack of the instrument, the instrument will automatically stop sampling and measurements and
turn off.
5.6.8. GPS (microAeth Manager only)
The GPS setting permits the user to select if GPS location recording is turned on or off.
5.6.9. Serial baud rate
The serial baud rate setting permits the user to select the serial baud rate of 57600, 115200, 230400,
460800, 921600, or 1000000 to use when measurement data is transmitted through the serial port.
NOTE: When installing rmware using the instrument bootloader, the baud rate is always 1000000 even if
the baud rate setting has been changed.
5.6.10. Serial data mode
The serial data mode setting permits users to select the serial data mode of the serial port. The following
three options are available:.
Off: No measurement data will be transmited via the serial port. On-board user interface data and the
output of Display All Settings and Display FlowCal Info will still be transmitted when selected and at startup.
Streaming: Measurement data will be transmited via the serial port while sampling and measurements are
occuring. On-board user interface data and the output of Display All Settings and Display FlowCal Info will
still be transmitted when selected and at startup.
Polled: Measurement data and instrument status can be polled and the operating controls of the instrument
can be controlled using the command line inferface (CLI) via the serial port. See section 5.9. Command Line
Interface (CLI) for Polled Serial Data Mode for CLI commands. On-board user interface data and the output
of Display All Settings and Display FlowCal Info will still be transmitted when selected and at startup.
5.6.11. Serial data format (microAeth Manager only)
The serial data format setting permits the user to select the serial data format of the serial port of
measurement data in streaming and polled serial data modes. Two format options are available: Verbose
and Minimal. For more information about serial output formating structures, see section 6.2. Serial Output
Format Structures.
5.6.12. Tape advance ATN threshold
The tape advance ATN threshold setting permits the user to enter the attenuation (ATN) threshold natural
number value of 1 to 100 that will trigger an automatic tape advance to a new lter sampling location during
a sampling and measurement period. The attenuation (ATN) threshold value will trigger a tape advance
when the rst of the wavelength measurements reaches this threshold.
NOTE: The lowest wavelength light source enabled will typically trigger the attenuation (ATN) tape advance.
5.7. Using the microAeth Manager Software
5.7.1. microAeth Manager Software Installation
The microAeth Manager for macOS
®
and Windows
®
is available for download from the AethLabs website
at https://aethlabs.com/microaeth/software. Before instrallation, check with the computer’s system
administrator to make sure that the correct permissions have been granted on the computer to install and
run a new application. Please visit the AethLabs website for more information and to sign up for software
announcements and to receive notications of software and rmware updates.
Before installing or upgrading microAeth Manager, make sure to export and backup all data stored in
the microAeth Manager local database.
5.7.1.1. Installation on macOS
1) Delete any previous versions of the microAeth Manager from the computer.
2) Download the microAeth Manager software to the computer running macOS
®
.
3) Locate and open the le ‘microAeth_Manager_x.xx.dmg’ on the computer.
4) The virtual disk image will be mounted and a window will open showing the ‘microAeth Manager’
application le.
5) Drag the ‘microAeth Manager’ application le to the ‘Applications’ folder of the computer. The
application is now installed and ready for use with the microAeth MA series instruments.
6) When the microAeth Manager is rst opened after installation on the computer, a prompt may appear
with the following message and verication request, ‘“microAeth Manager” is an application downloaded
from the Internet. Are you sure you want to open it?’ Please conrm to start using the application.
5.7.1.2. Installation on Windows
1) Delete any previous versions of the microAeth Manager from the computer.
2) Download the microAeth Manager software to the computer running Windows
®
.
3) Locate and open the le ‘microAeth_Manager_x.xx.exe’ on the computer.
4) A prompt may appear with the following message and verication request, ‘Do you want to allow this
app from an unkown publisher to make changes to your device?’ Please conrm to start the installation
wizard.
5) The microAeth Manager installation wizard will guide the user through the process of choosing
the application installation location, creating a desktop shortcut icon, and opening the Device Driver
Installation Wizard for installing USB drivers required for the computer to communicate with the
microAeth MA series instruments.
6) A prompt may appear with a message and verication request to install the USB device software or
drivers required. Please conrm and complete both installation wizards.
7) The application is now installed and ready for use with the microAeth MA series instruments.
 Loading...