42 microAeth
®
MA Series MA200, MA300, MA350 Operating Manual microAeth
®
MA Series MA200, MA300, MA350 Operating Manual 43
AethLabsAethLabs
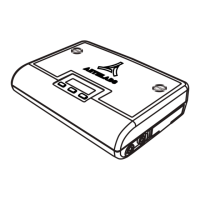
5.8. Using the on-board user interface
5.8.1. Overview
The on-board user interface of the microAeth MA Series instruments consitsts of a backlight screen and
three buttons. This interface can be used to congure specic settings and operate the instrument.
5.8.2. Configuration of Instrument Operating Parameters
5.8.2.1. Change Timebase
The on-board user interface on the front of the microAeth can be used to change the measurement
timebase setting of the instrument.
1) Use the left and right buttons to scroll through the top level menu options to the ‘Change Timebase’
option.
2) Press the center button to select the ‘Change Timebase’ option and to enter the change timebase
submenu.
3) Use the left or right buttons to scroll through timebase value options of 1, 5, 10, 30, 60, or 300
second(s).
4) Press the center button, 'OK' to select the current timebase value option. Once selected, the value is
saved and the user interface menu is automatically returned to the top menu level.
5.8.2.2. Change Flow
The on-board user interface on the front of the microAeth can be used to change the sampling ow
setpoint setting of the instrument.
1) Use the left and right buttons to scroll through the top level menu options to the ‘Change Flow’ option.
2) Press the center button to select the ‘Change Flow’ option and to enter the change ow submenu.
3) Use the left or right buttons to scroll through ow value options of 0, 50, 100, or 150 ml/min.
4) Press the center button, 'OK' to select the current ow value option. Once selected, the value is saved
and the user interface menu is automatically returned to the top menu level.
5.8.2.3. Change Tape Adv. ATN
The on-board user interface on the front of the microAeth can be used to change the attenuation (ATN)
threshold natural number value of 1 to 100 that will trigger an automatic tape advance to a new lter
sampling location during a sampling and measurement period. The attenuation (ATN) threshold value will
trigger a tape advance when the rst of the wavelength measurements reaches this threshold.
NOTE: The lowest wavelength light source enabled will typically trigger the attenuation (ATN) tape
advance.
1) Use the left and right buttons to scroll through the top level menu options to the ‘Change Tape Adv.
ATN’ option.
2) Press the center button to select the ‘Change Tape Adv. ATN’ option and to enter the change submenu.
3) Use the left or right buttons to scroll through attenuation (ATN) threshold tigger values of 1 to 100 in
incriments of 1.
4) Press the center button, 'OK' to select the current attenuation (ATN) threshold tigger value option. Once
selected, the value is saved and the user interface menu is automatically returned to the top menu level.
5.8.3. Operation and Status
Before starting measurements, it is recommended that the user verify all parameter settings. A description
of each operating parameter and its conguration is described in section 5.6. Instrument Operating
Parameters. Instrument settings can be viewed through the microAeth Manager software, or through
the serial terminal emulator interface using the Display All Settings menu. IMPORTANT: When a new
sampling and measurement session is started, the microAeth will automatically advance the lter
tape cartridge to a new sampling location. If a lter tape cartridge is not installed or is not installed
correctly, sampling and measurement will not start.
5.8.3.1. Start Measurement
The on-board user interface on the front of the microAeth is used to start sampling and measurements
using the latest saved settings.
1) Use the left and right buttons to scroll through the top level menu options to the ‘Start Measurement’
option.
2) Press the center button to select the ‘Start Measurement’ option. The microAeth screen will display
'SAMPLER PREPARING'. The microAeth will automatically advance the lter tape cartridge to a new
sampling location and run its start up routine. When sampling and measurement begins, the screen will
display 'SAMPLING' and 'Press Center to Stop'.
To skip the automatic tape advance when starting measurements, in step 2 press and hold the center
button for 6 seconds. While holding the center button, the microAeth screen will display 'SAMPLER
PREPARING'. Once 'Skipped Tape Advance' ashes on the screen, the center button can be released.
When sampling and measurements begin, the screen will display 'SAMPLING' and 'Press Center to Stop'.
NOT RECOMMENDED!
SKIPPING THE AUTOMATIC TAPE ADVANCE AT THE BEGINNING OF SAMPLING AND
MEASUREMENTS SHOULD ONLY BE USED WHEN GOOD DATA QUALITY IS NOT NEEDED.
When the automatic tape advance is skipped, a status code is added to each data line that is collected
during the sampling period where the automatic tape advance was skipped.
5.8.3.2. Stop Measurement
The on-board user interface on the front of the microAeth is used to stop sampling and measurements.
1) While the microAeth is sampling, the screen will display 'SAMPLING' and 'Press Center to Stop'.
2) Press and hold the center button for 2 seconds to stop sampling and measurement. ‘STOPPED’ will be
displayed on the screen and sampling and measurement will nish.
5.8.3.3. Advance Tape
The on-board user interface on the front of the microAeth can be used to manually advance the lter tape.
IMPORTANT: Manually advance the lter tape before a ow calibration or optical calibration to
ensure minimal loading of the sample spots.
1) Use the left and right buttons to scroll through the top level menu options to the ‘Advance Tape’’
option.
2) Press the center button to select the ‘Advance Tape’ option. The microAeth will advance the lter tape
cartridge to a new sampling location. The screen will display '-Releasing Tape' then '-Advancing Tape'
and then '-Clamping Tape' during the tape advance process.
 Loading...