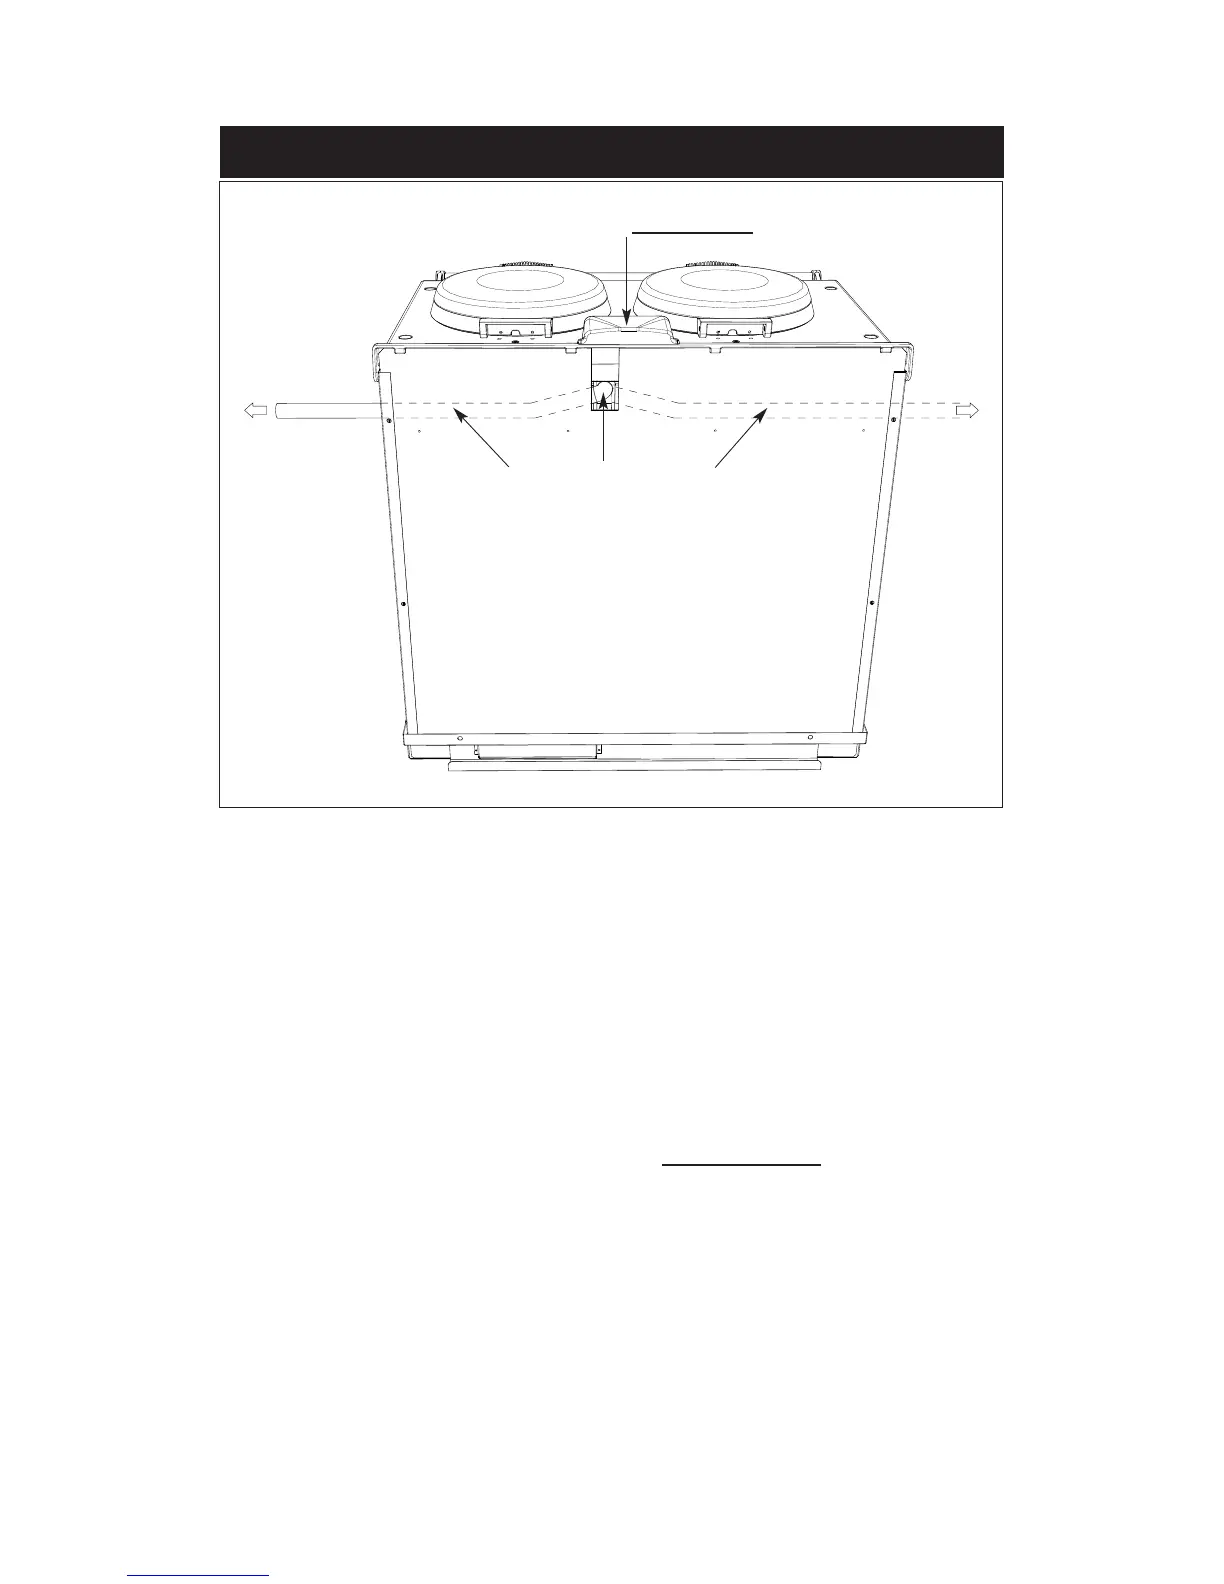
EXTERNAL VENT MODELS - VENT PIPE CONNECTION
Fig. 6 DESN 516653
The appliance is shown with the oven venting from the RH side.
Access to vent pipe fitting, through rectangular cut-out
It can also be vented from the rear and exiting through hole in back panel.
Reseal pipe connection with aluminium tape.
When installing a AGA DC5 which is venting to the left hand side, care must always be taken
to ensure the vent pipe is fully lagged (using insulation provided). Where the vent pipe passes
behind the hotcupboard, ensure that the mains cable is kept away from the hot surface of the
vent pipe.
Rear or right hand venting is preferable on AGA DC5 installations.
NOTE: Vent pipe outlet under shroud to be left open. DO NOT CAP OFF
.
11
NOTE: THE VENT OPENING UNDER THE SHROUD SHOULD BE
LEFT OPEN NOT CAPPED
.
EXTERNAL MODEL CAN BE VENTED FROM
LEFT HAND, RIGHT HAND OR
REAR OF APPLIANCE
 Loading...