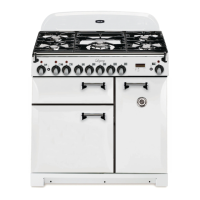
Assemble the Grates
Each grate is dierent. Make sure that the grates
are in the correct position and sitting down.
Fit the Plinth
Fit the inner plinth to the bottom front of the
cooker using the ve screws provided.
Fit the outer plinth (2 screws 1 each end) to the
inner plinth. The height of the outer plinth can be
adjusted by sliding it up or down via the slotted
hole.
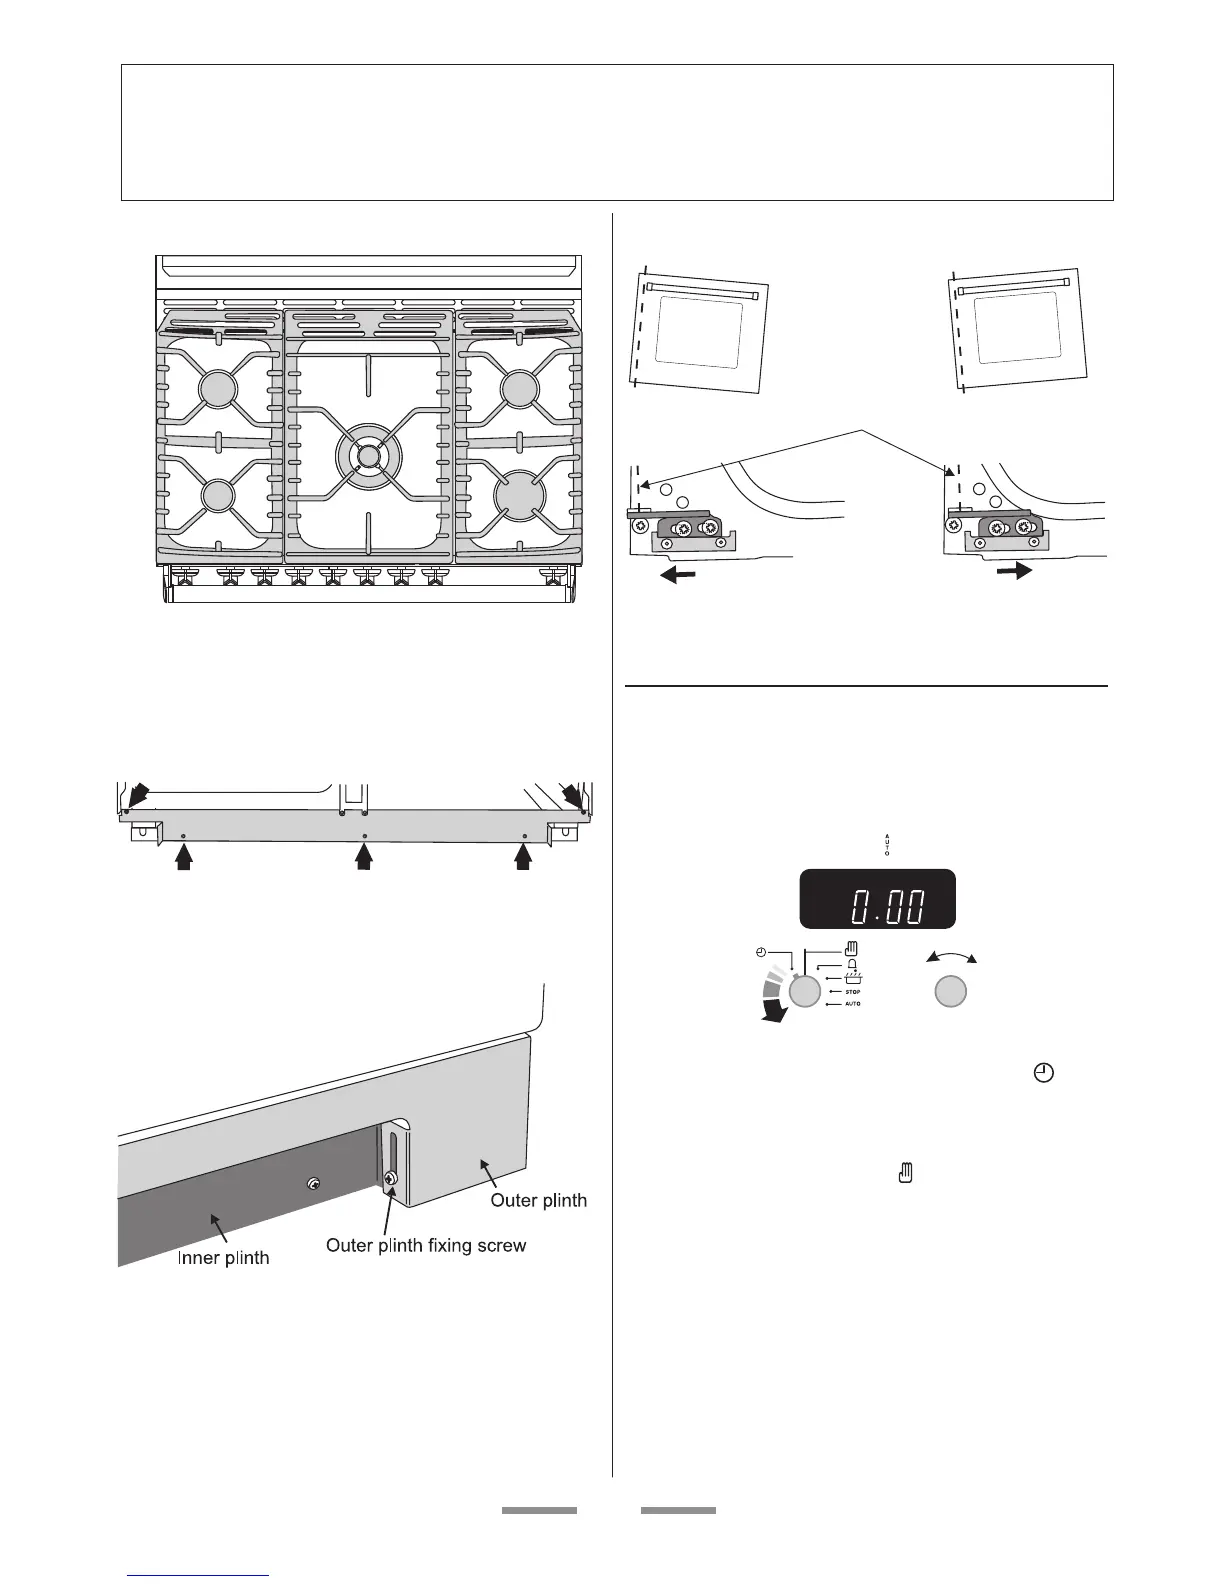
To Adjust the Oven Door Angle
The door bottom hinge can be adjusted to alter the
angle of the door.
Loosen the bottom hinge xing screws and use the
notch and a at bladed screwdriver to move the
position of the hinge to set the hinge position.
Retighten the hinge screws.
Eect of hinge adjustment – exaggerated for clarity
Centre line of hinge pin
Oven door omitted for clarity
Range Operational Checks
Oven Check
Set the clock to the time of day - the ovens will not
work if the clock is not set.
When the clock is rst connected the display will
ash (0.00 ) and ( ) alternately.
To set the clock to read the time of day turn and
hold the Setting knob to the clock symbol [ ] and
at the same time turn the Adjusting knob left or
right until the clock shows the time of day. This is a
12 hour clock. Let go of the Setting knob and it will
spring back to the vertical [ ] oven manual setting.
Turn on the oven and check that the oven fan starts
to turn and that the oven starts to heat up. Turn o
the oven.
 Loading...