19
• Using the MR80S in detector mode
1. Press the On/Off button to turn the detector on.
2. Press on the middle button (2) to select the detection mode (fine or
coarse). A symbol appears either on the right or left side of the LCD
display in order to inform you of the selected mode.
3. Press the sound button to select the level of sound (mute, normal, high).
Default mode is mute, indicated with no symbol. The sound symbol will
blink when you select normal loudness and be constant in high mode
4. Turn the capture window towards the laser beam and move the detector
up or down according to the information displayed on the LCD screen.
A down arrow indicates that you have to go down in order to find the level
position. An arrow facing up indicates that the detector should be raised.
When an horizontal line appears on the display, the detector is at the same
level as the laser beam.
5. Use the two marks on the side of the MR80S to draw your level.
6. You can also view the same information on the LCD on the back
of the detector.
7. Press the on/off key to turn the detector off. Automatic swtich off will
occur after 5 minutes if not used.
8. The detector has a magnetic attachment for use on ceiling grids or
partition rails. To use the detector with a rod, slide the rod bracket into
the slots.
9. Keep the capture window clean, using a soft cloth and glass cleaner.
• Using the MR80S in remote control mode
The MR80S stops, starts or changes direction of the laser rotation and moves
the square shot to the left and right. It also controls scanning and calibration.
To use the MR80S as a remote control, press any key (except on the on/off key).
If in detection mode, press on/off to change to the remote control functions.
• To change the battery of MR80S
To install a new 9V battery, open the battery compartment on the back of the
detector. First raise the left side of the cover,then the right side and lift out.
Respect the polarity indications noted inside the battery compartment.
18
• MR80S Specifications :
Remote control
The remote control stops, starts or change the directions of laser rotations and
moves the square shot left or right. It also controls scanning and calibration.
To open the battery compartment and change the battery, push the battery cap
in the direction of the arrow.
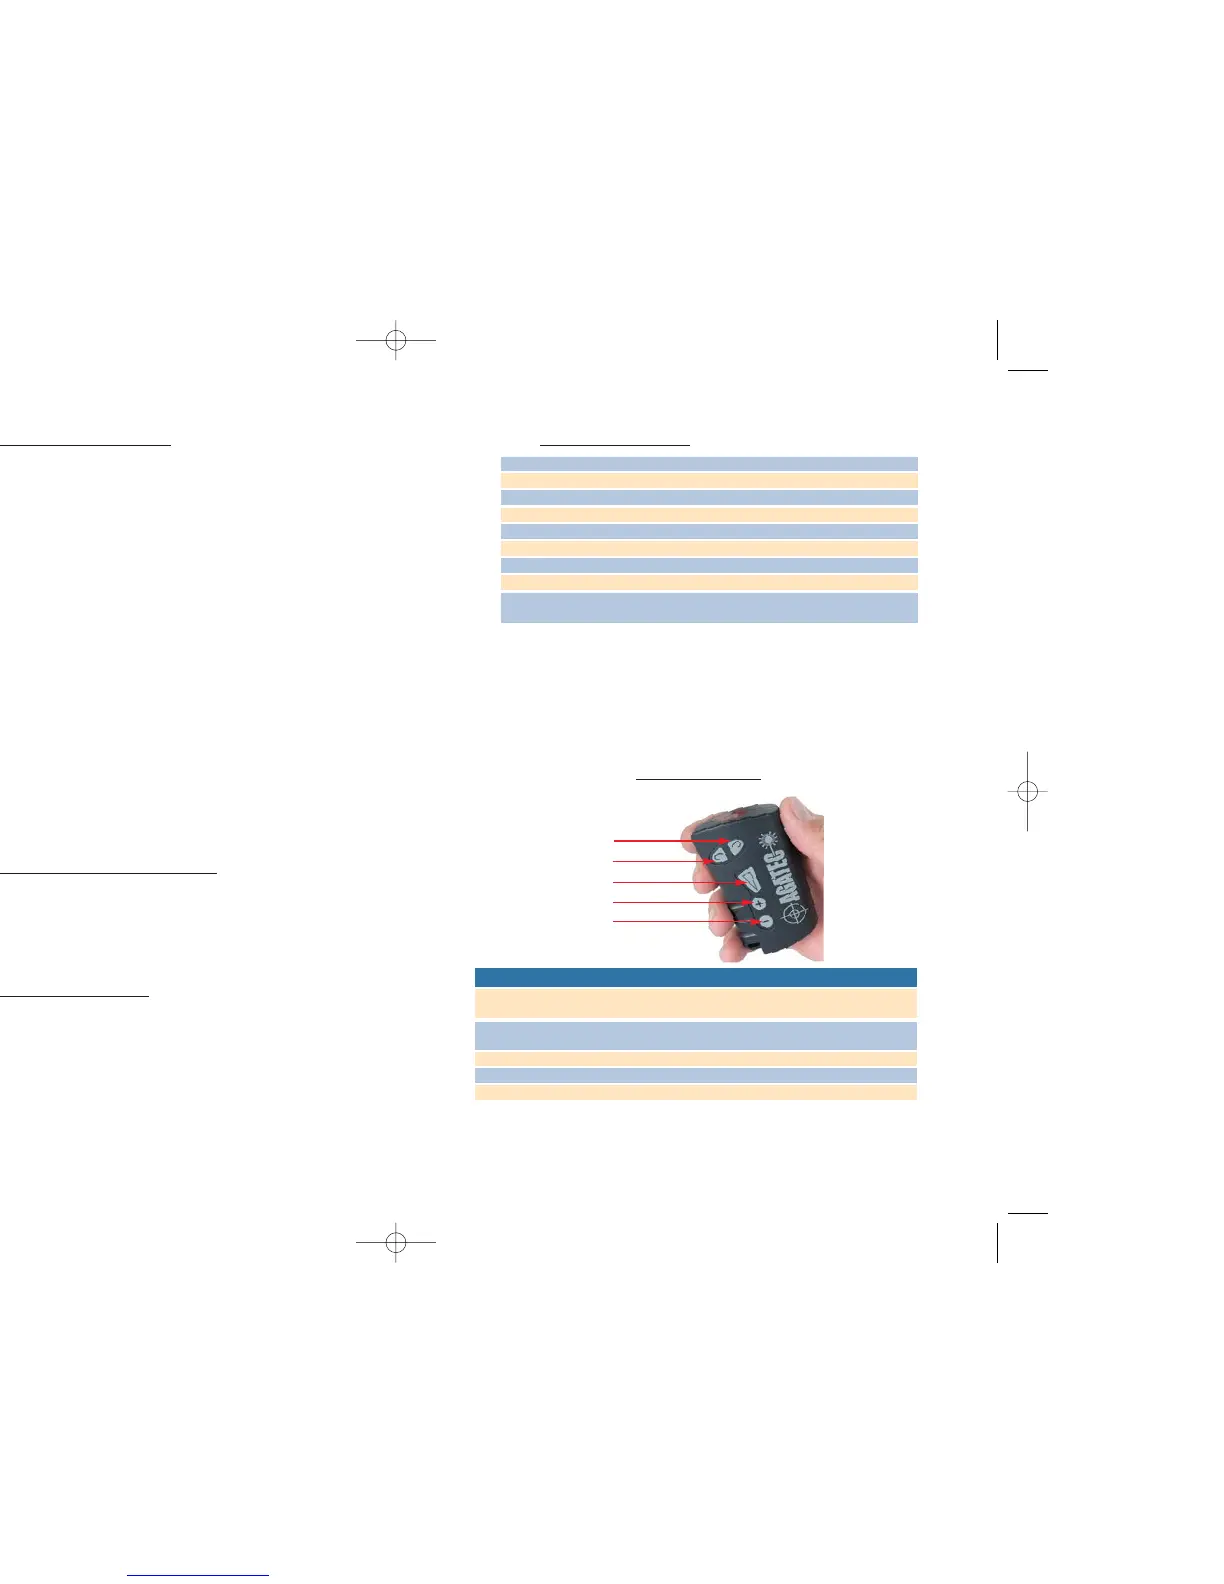
R
emote control overview
It is also possible to use the remote control for calibration purpose.
Follow instructions as indicated in part 3 of this manual.
Operating distance in detector mode 180 meters
Operating distance in remote mode 30 meters inside
Sound 3 sound levels – Mute, normal and high
Displays LCD (front and rear)
Power Alkaline battery 9 V.
Battery life 50 hours
Dimensions 15 x 8 x 3 cm
Weight 300 gr.
Accuracy at 30meters Fine : 0,2mm - 2mm
Coarse : 1 - 6 mm
Key
Automatic Manual Calibration
1 Decrease rotation speed/scanning Save data
Move non-rotating point left
2 Increase rotation speed/scanning Change selected axis
Move non-rotating point right
3 Scanning on/off Scanning on/off Start/Stop rotation
4 Move to the left of the scanning Set a positive slope Move up the dot
5 Move to the left of the scanning Set a negative slope Move down the dot
2
1
3
4
5