HOW TO USE THE LT300
Setup
Horizontal
The laser can be used on a 5/8-11 tripod, on a wall mount, or directly on a
solid, stable surface.
Vertical
The laser can be placed directly on a solid, stable surface.
Place the laser on the side with the two adjustable feet (6). Rough level the laser
by using the feet to center the bubble in the vertical vial (4).
The LT300 has a wide self-levelling range; however, if the laser is set up out of
the levelling range, laser beam will continue to blink and rotation will not start.
Turning on the laser
Turn on the laser with the On / Off key (5). It does a self-test and the beam
blinks while the laser is self-levelling. After it’s levelled, the head rotates.
Automatic / manual mode
The laser is in automatic self-levelling mode when turned on.
To put in manual mode, press (2) on the laser keypad. The led indicator (8)
located near the Auto/Man key will blink to remind you that the laser is in manu-
al mode.
You cannot use H.I. Alert in Manual Mode.
CAUTION: In manual mode, the beam rotates even if the laser is not levelled.
The Tilt function is not available when laser is in manual mode.
H.I. Alert
H.I. (height of instrument) Alert stops the laser automatically if the laser is
disturbed or moved, preventing inaccurate readings.
5
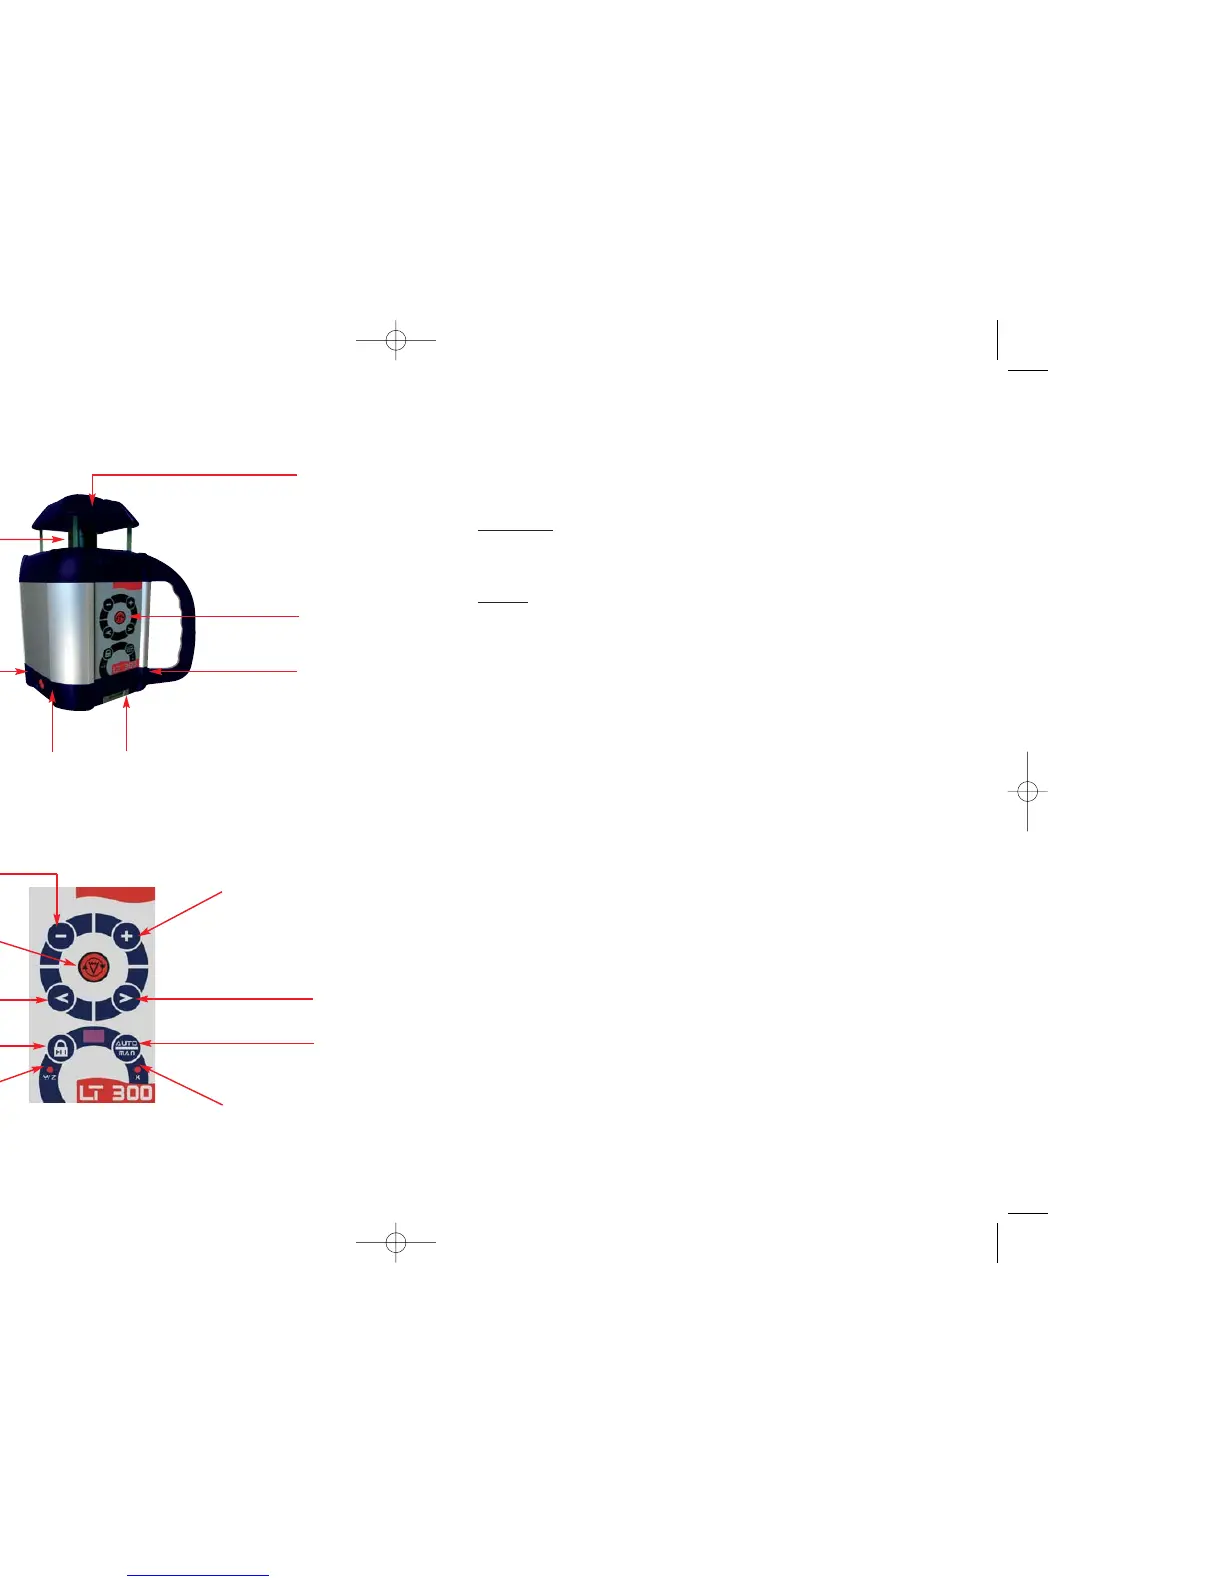
Laser Overview
Keypad Overview
4
1. Rotating laser beam
(head enclosed in glass lighthouse)
2. Non-rotating laser
beam for plumb,
squaring, or pipeline
7. Laser keypad
3. Charger jack
5. On/Off
6. Adjustable feet
for vertical setup
4. Bubble vial
for vertical setup
1. Tilt / H.I Alert
2. Auto / Manual mode
3. Scanning on / off
4. Increase rotation speed /
Scanning angle
5. Decrease rotation
speed / Scanning angle
6. Move scan plane to left /
Plumb point to left
7. Move scan plane to right /
Plumb point to right
9. Led indicator
for H.I Alert signal
8. Led indicator
for manual use