• Remove the cover from the existing thermostat. Do not disconnect the wires yet.
TIP: Take a picture of the wires before you detach them from the existing thermostat for future reference.
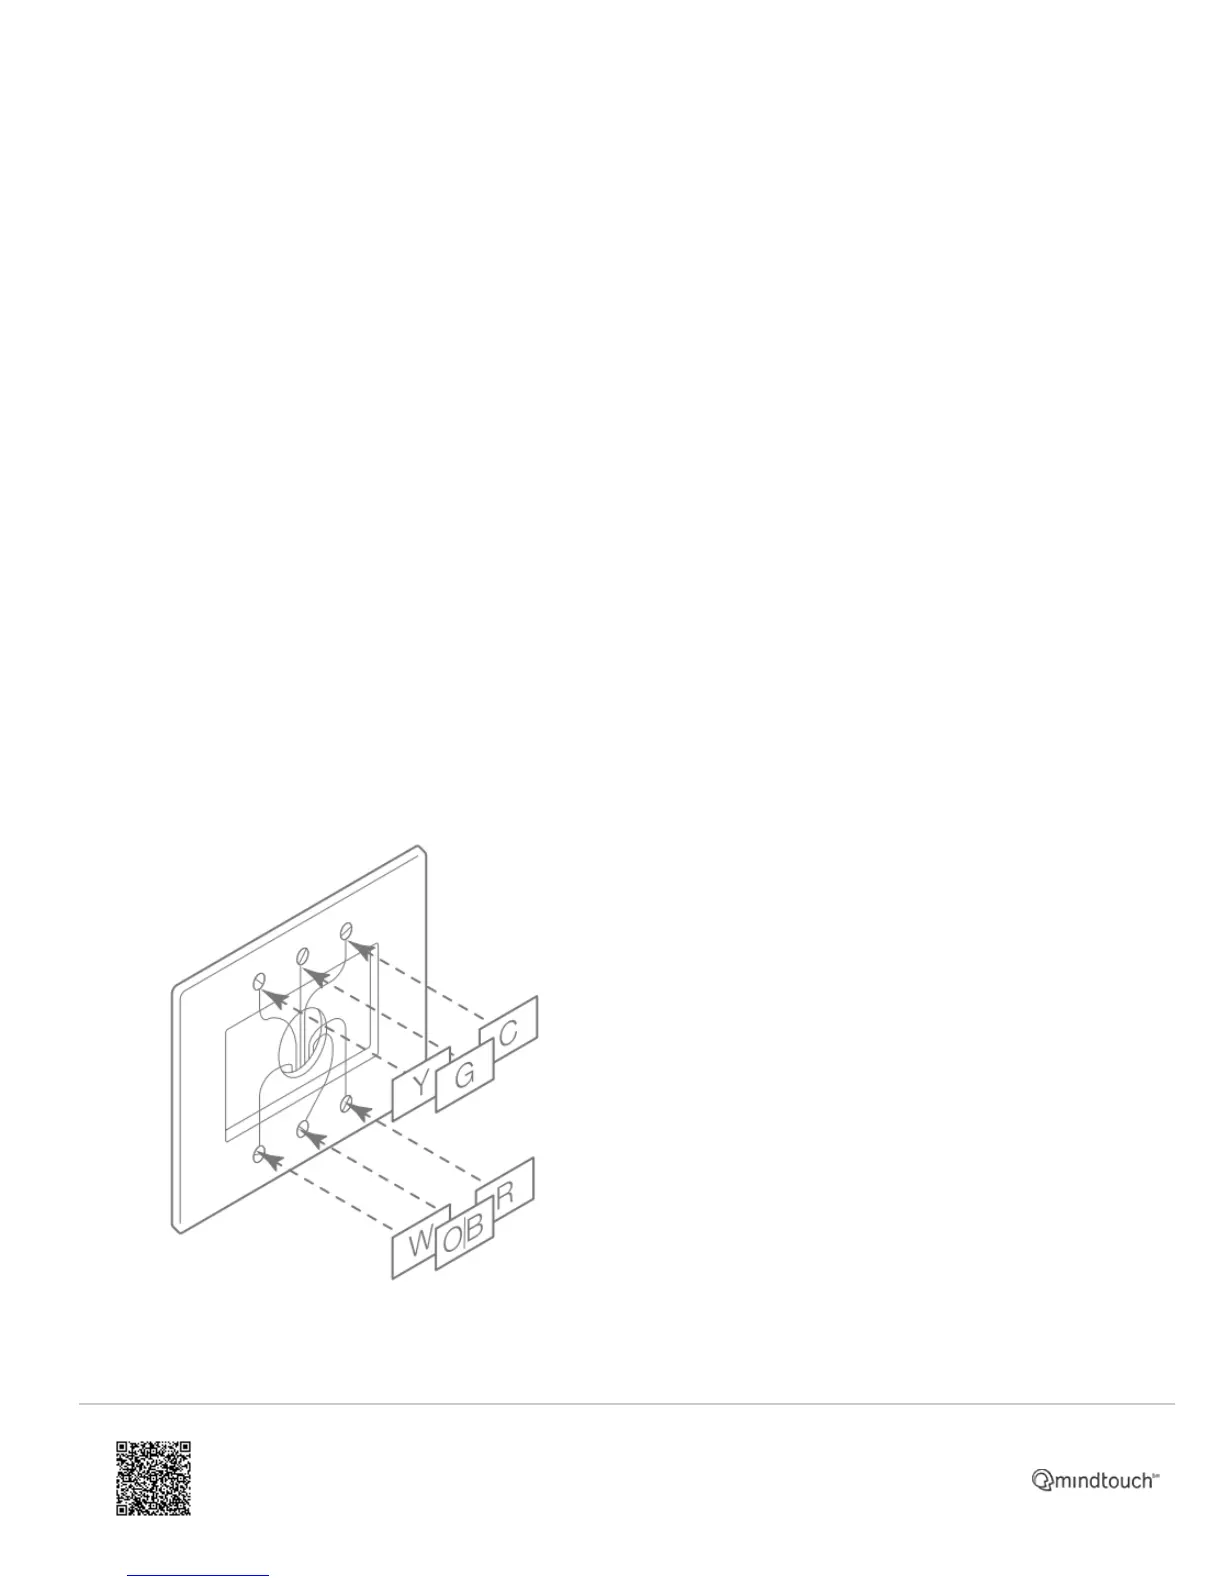
4. Label All Existing Wires
• Label all existing wires, one at a time, with the labels provided.
Make sure the wires are labeled correctly. If you have an unidentified wire, it may be necessary to identify the wire
where it connects to the heating or air conditioning equipment.
TIP: Take another picture of the wires to document connections for easy reference. Do not disconnect wires before
labeling them.
• Disconnect all of the wires and remove the existing thermostat.
TIP: Remember to secure the wires so they don’t fall into the wall.
Prepare the Wires
Follow these guidelines for safe and secure wire connections:
• Ensure the wires are a proper gauge between 18-24 AWG.
• Make sure wires have exposed straight ends about 1/8” long.
CAUTION: Wiring can vary for each manufacturer. Label all wiring before removing it from the existing thermostat.
https://answers.alarm.com/Installation_and_Troubleshooting/Thermostats/Z-Wave_Thermostats/Alarm.com_Smart_Thermostat_(ADC-T2000)/Alarm.com_Smart_Thermostat_(ADC-T2000)_Installation_Guide
Updated: Sun, 15 Oct 2017 23:38:59 GMT
Powered by
5
 Loading...