CAUTION: Verify that the system is 24 VAC. If the old system is labeled as 120 or 240 volts or has wire nuts, the system
is high voltage. Do not install the thermostat to a high voltage system. Contact a local HVAC professional for help.
INSTALL YOUR NEW THERMOSTAT
Install the Back Plate
Use the bubble level provided on the back plate as a guide. Mark where the screws will go with a pencil through the
screw holes on the back plate.
TIP: If necessary, use the trim plate to cover up any marks or holes left from the old thermostat. Attach the trim plate
before securing the back plate to the wall.
TIP: Drill holes with 3/16” drill bit to tap in the drywall anchors for added support.
Wire Your New Thermostat
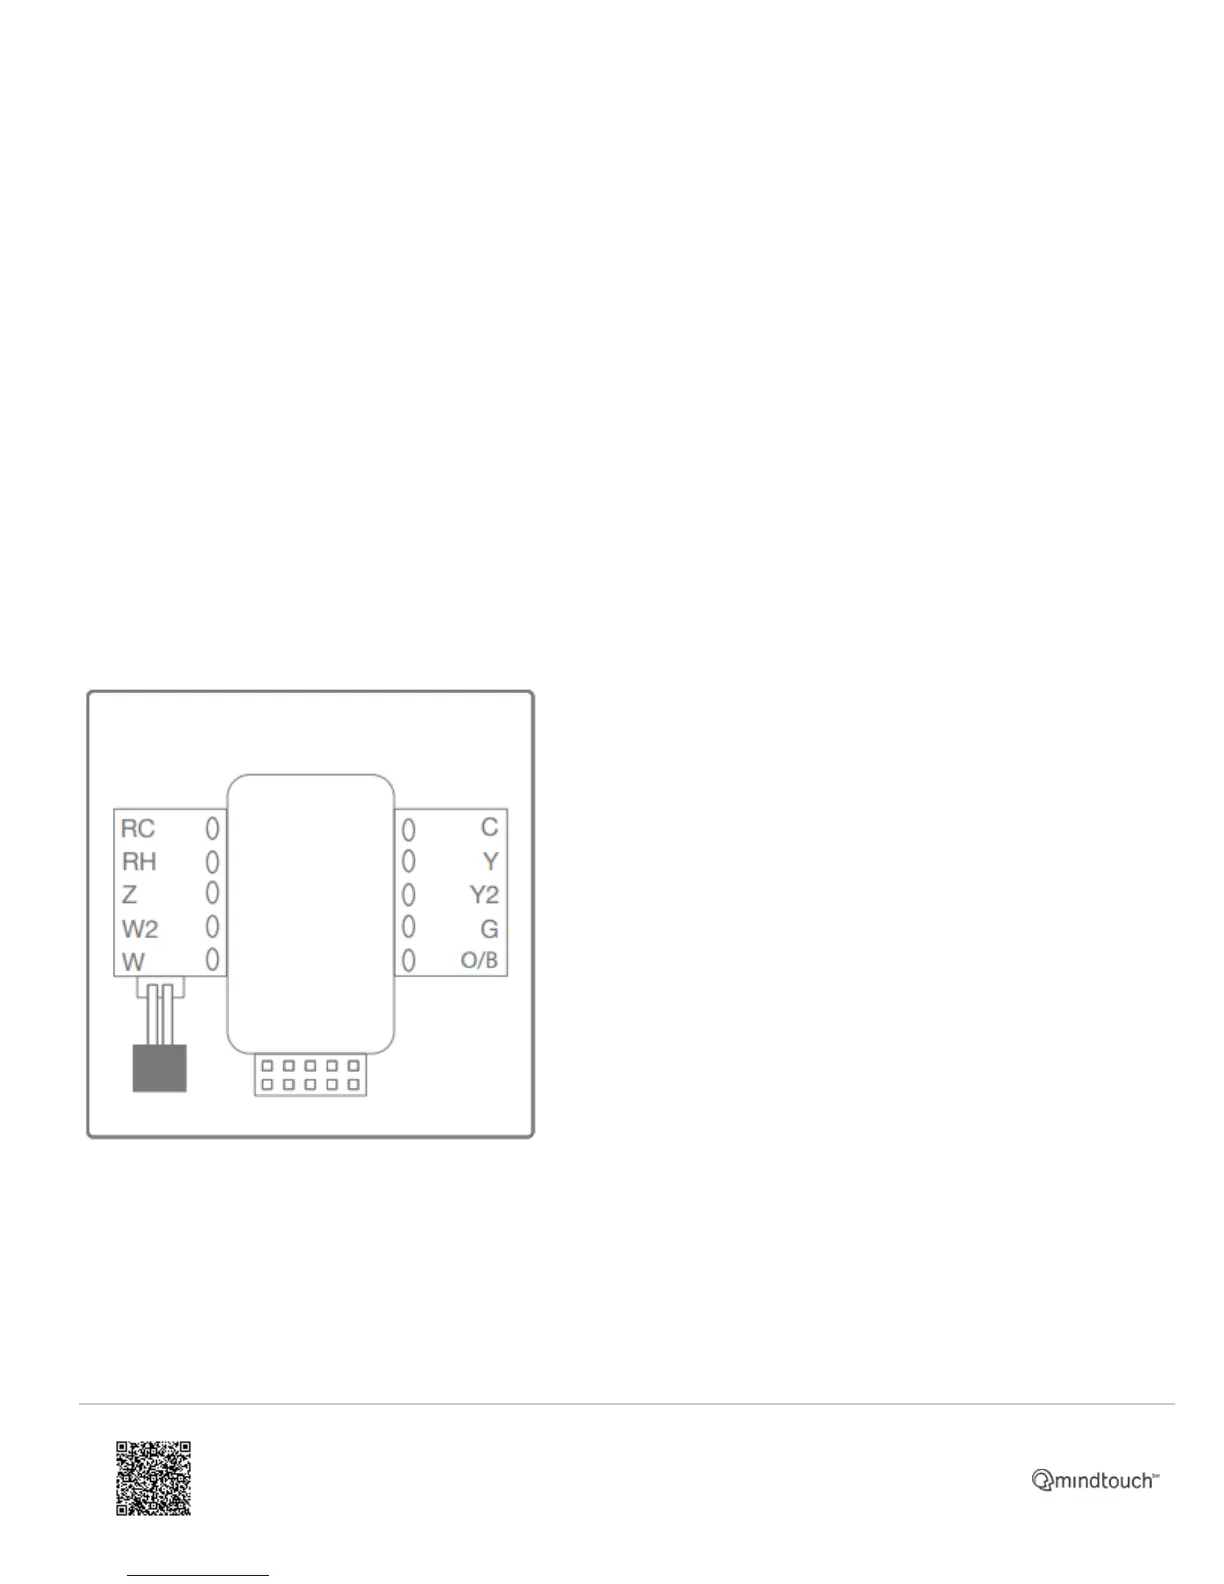
Reconnect the wires to the new thermostat and indicate the connected wires with a pencil in the image below. This
information will be needed when configuring the thermostat.
TIP: If you have extra wires do not install them in the new thermostat. Please contact your local HVAC professional for
additional assistance.
• If you have R, connect it to RH.
• If you have RH & RC, remove the black jumper in the lower left corner of the back plate terminal board with
needlenose pliers.
https://answers.alarm.com/Installation_and_Troubleshooting/Thermostats/Z-Wave_Thermostats/Alarm.com_Smart_Thermostat_(ADC-T2000)/Alarm.com_Smart_Thermostat_(ADC-T2000)_Installation_Guide
Updated: Sun, 15 Oct 2017 23:38:59 GMT
Powered by
6
 Loading...