User Guide V1.1.0 Issue 1
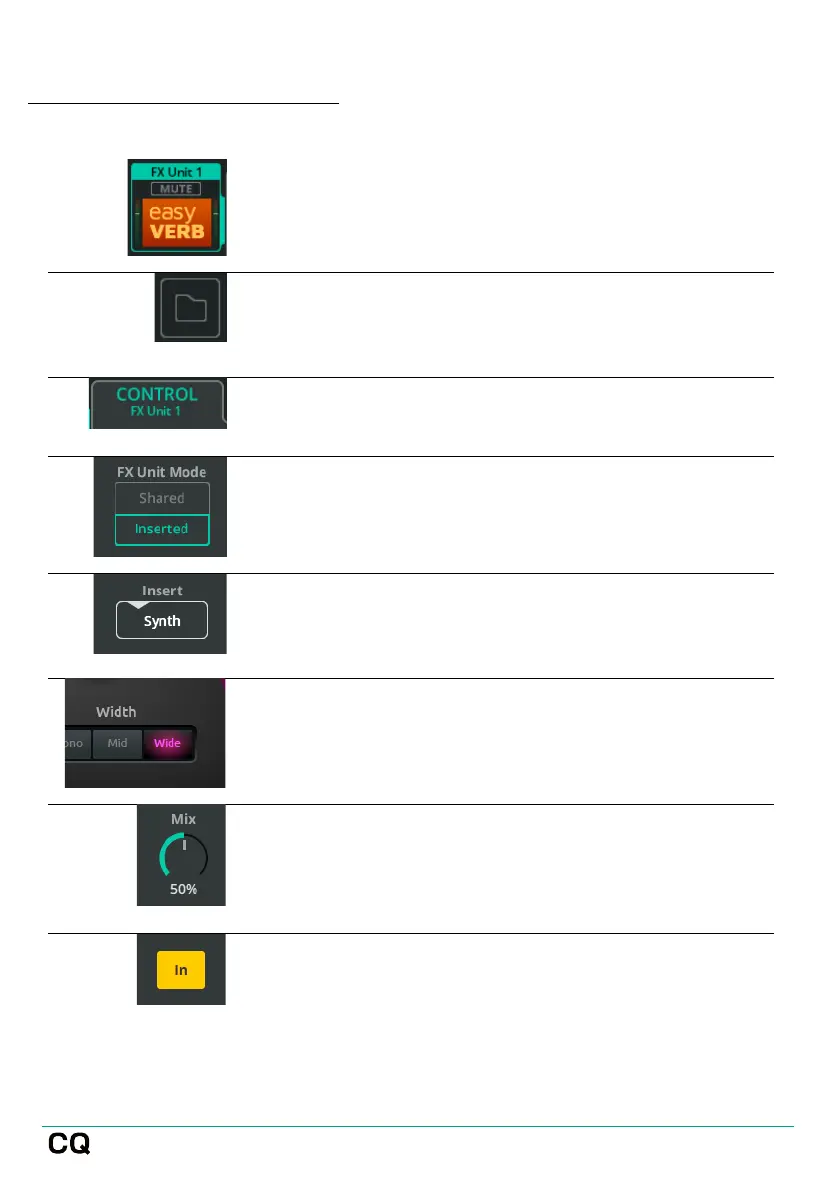
Using an FX Unit in Inserted Mode
Go to the FX screen and select one of the FX
Units on the left-hand side.
To choose a different FX type, use the Library
button at the right top corner of the screen, select
an FX type or stored preset then recall it.
At the top of the screen, ensure the CONTROL tab
is selected and the FX Unit controls are shown.
Toward the bottom left, set FX Unit Mode to
Inserted (if not already set) and select a channel
to insert the FX Unit into from the pop-up.
To change the channel the FX Unit is inserted into
at any time, touch/click the Insert (channel)
button.
Adjust FX parameters. (Refer to the FX section of
this guide for a detailed description and
configuration of each FX).
Use the Mix control to adjust the balance of
signal between 0% (only direct/’dry’ signal, no FX
heard) and 100% (only FX/’wet’ signal, no
direct/’dry’ signal heard).
Switch the inserted FX Unit in and out of the
channel instantly using the In/Out button.
Inserted FX Units are shown with an icon in the channel strip on the PROCESSING
screen. Selecting this will jump to the FX Unit in the FX screen.
 Loading...