AT-RS710TX, AT-RS718TX, and AT-FS708 Switches Installation Guide
13
Rackmount Installation
You will need a Phillips screwdriver for this installation.
Caution
Do not use power tools to perform this installation.
1. If previously attached, remove the rubber feet and all cables and power
cord from the switch.
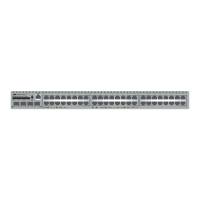
2. Attach the rackmounting brackets to each side of the switch, using the
8 small screws provided (4 on each side). See Figure 7.
Figure 7: Switch With Rackmount Brackets
3. Attach one end of the power cord to the back of the switch and the other
end to the power source.
4. Slide the switch in a standard 19-inch rack and secure the switch’s
brackets to the rack using the 4 large screws provided (2 on each
bracket).
5. Turn on the unit by pushing the power switch in the back to the 1
position. Make sure the POWER LED on the front panel lights green.
6. Attach the data cables and observe normal operation as indicated by
the port LEDs.
Note
If you are using ports with associated MDI buttons, make sure you also
refer to Table 5.
You are done with rackmount installation.
LINK / ACTIVITY
FULL DUPLEX
COLLISION
1
POWER
100M
2AB 345678
XX XXX XXX
To Hub
To PC
To Hub
To PC
AB 1234 5678
10BASE-T
AND
10/100BASE-T 10 PORT SWITCH