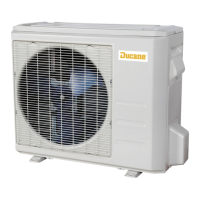
508067-01Issue 2016Page 28 of 75
Wireless Remote
Frequent changes to operating mode may cause
system malfunction. Allow at least one minute between
mode changes for the system to stabilize.
IMPORTANT
Requirements
Using the remote controller
• Point the remote controller directly at the indoor unit.
• Stand within 26 feet (8 meters) of the indoor unit.
• Do not block the signal between the remote controller
and indoor unit.
NOTE: The remote controller will not function without
a clear line of sight to the indoor unit.
• Do not submerge the remote controller in liquid.
• Do not expose to direct sunlight.
• Do not drop or step on remote controller.
• Remote control holder
Use eld-provided fasteners to attach the remote controller
holder to any suitable vertical surface such as a wall.
Remote Control Specications
MODE
FAN
TEMP
SL EEP
SWI NG DIRECT
LED FOLLOW
ME
TURBO SELF
CLEAN
ON/OFF
SI LENCE
FP
TI MER
ON
TIMER
OFF
Figure 15. Remote Control Buttons
• Up arrow button. Press to increase the temperature
setpoint or to scroll through settings options.
• On/O button. Press to turn the system on or o.
• Mode button. Press to scroll through the operation
modes:
Auto → Cool → Dry → Heat → Fan
Function Specications
Rated voltage 3.0 VDC (2 AAA batteries)
Min voltage for sending signal
to CPU
2.4 VDC
Eective transmitting distance 26 feet (8 meters)
Operation conditions 23°F to 140°F (-5 to 60°C)
Table 6. Specications
• Fan speed. Press to scroll through the fan speeds:
Auto → Low → Med → High.
• Sleep button. Press to activate “night-mode”. This will
automatically increase (cooling) or decrease (heating)
the setpoint 2°F (1°C) increment per hour for the rst
two hours. The modied setpoint will be set for ve
hours. After seven total hours the indoor unit will turn
o.
NOTE: SLEEP mode is only available when the unit is
in COOL, HEAT or AUTO mode.
• Turbo button. Press to active turbo mode. In both
heating and cooling modes only, the indoor fan will
ramp up to reach the setpoint more quickly. After
reaching the setpoint or after 30 minutes, the indoor
unit will resume the previous operating conditions.
• Self Clean button. Press to activate self cleaning
mode. In cooling or dry mode only, the indoor unit will
temporarily change operation to allow condensate on
the indoor unit coil to evaporate, and then will return to
the previous operating conditions.
• Down arrow button. Press to decrease the temperature
setpoint or scroll through settings options.
• Silence button. Press and release to activate quiet
mode operation. The indoor unit will change operation
to provide the quietest sound possible.
NOTE: Quiet mode operation may result in insucient
cooling or heating capacity. Press and release the
Silence button again to stop quiet mode operation.
• FP button. Press and hold for two seconds to activate
frost prevention mode. In heating mode only, the
indoor unit will operate at a 46°F set point and the
indoor unit display will show “FP”. To cancel, push the
“ON/OFF”, “SLEEP”, “FP”, “MODE”, “FAN SPEED” or
“UP/DOWN” buttons.
• Timer ON button. Press to set the number of hours of
delay before the indoor unit begins operation.
• Timer OFF button. Press to set the number of hours of
delay before the indoor unit stops operation.
• Swing button. Press once to initiate louver up and
down oscillation. Press again to stop louver oscillation.
Louvers remain in place where stopped. Not available
in all indoor unit models.
• Direct (Direction) button. Press to move louvers up
and down in 6 degree increments. Louvers remain in
place where stopped.