Shaw Almex Industries | 1.800.461.4351 | www.almex.com
9
49900-038Revised - April 2014
4.3.3. MINIMUM CURRENT
- An alarm will sound if the current falls below the value speci-
fied. This can be used to determine if a platen phase has burnt
out. NOTE: if the process is in the middle of a splice and the
platen “Auto/Manual” switch is set in the “Off” position the
alarm will activate. (SEE FIGURE 19)
4.3.4. PLATEN DISCONNECTION
- An alarm will sound if a platen is disconnected during a splice.
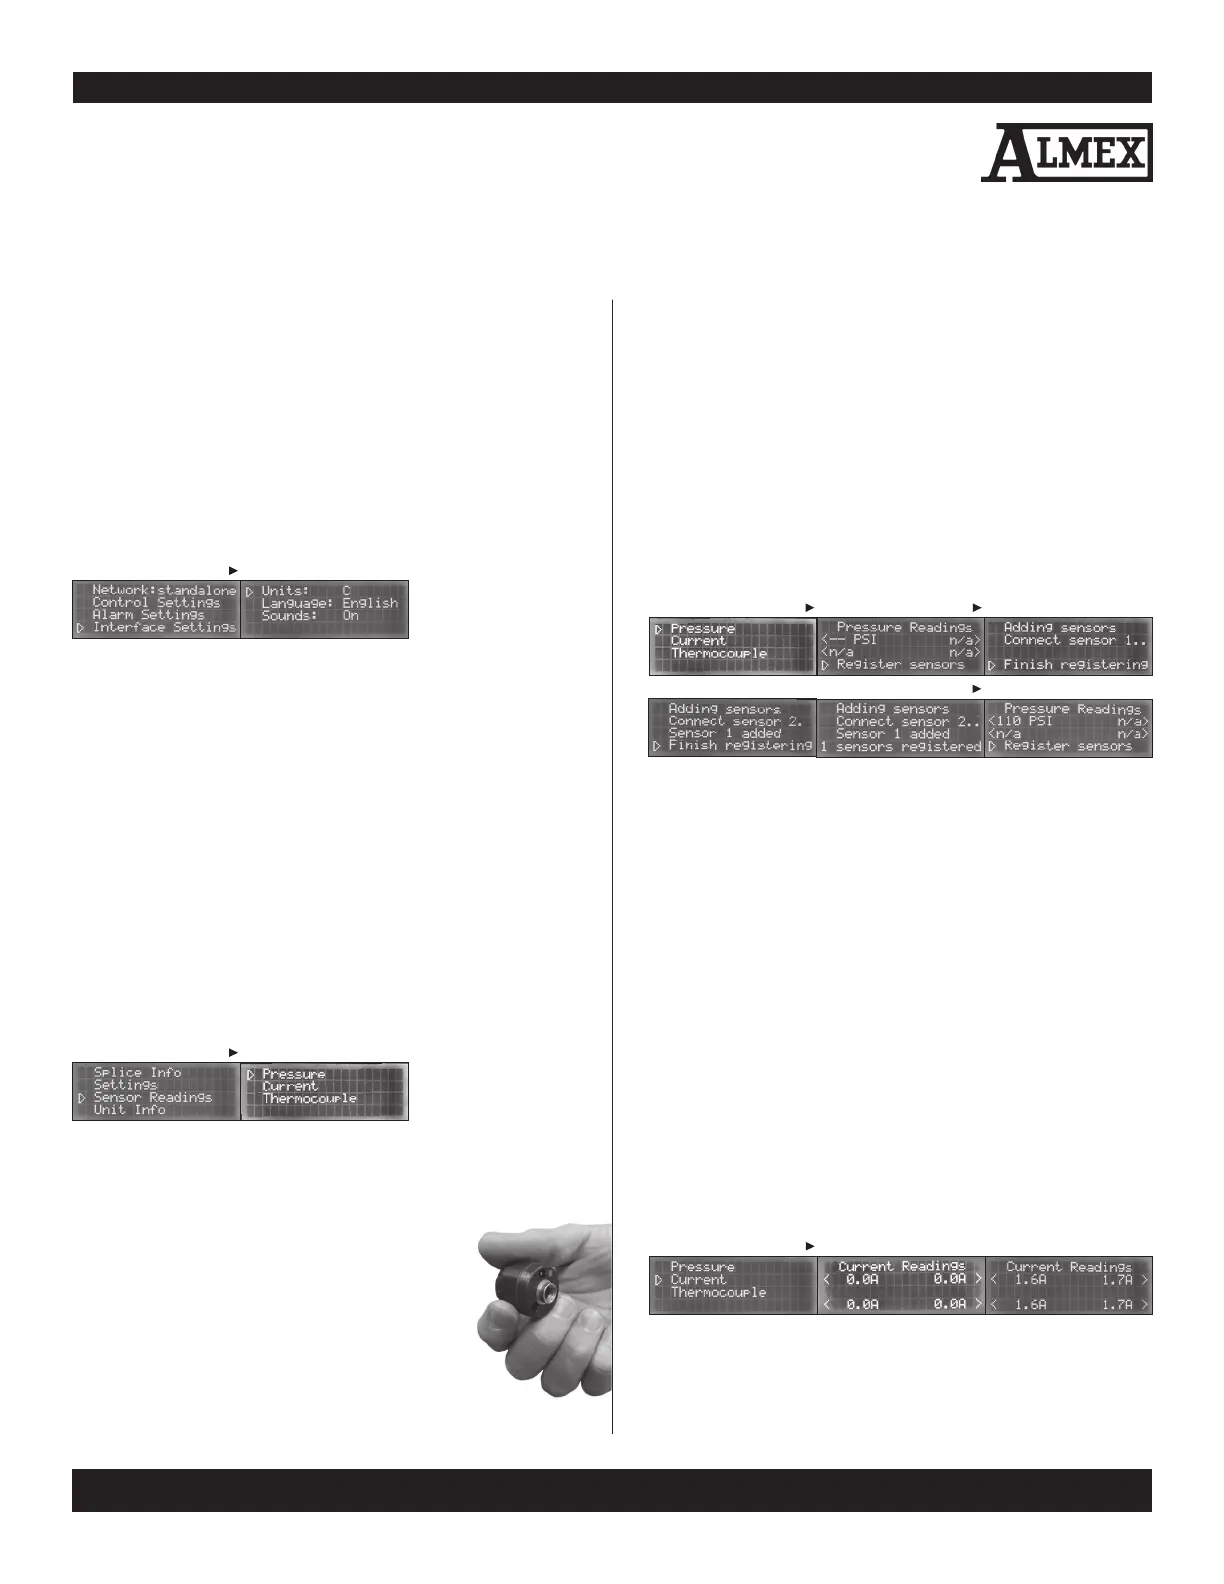
4.4.1. TEMPERATURE UNITS
Sets the temperature units to either degrees Celsius or degrees
Fahrenheit.
(SEE FIGURE 20)
4.4.2. LANGUAGE
Sets languages to either English or Spanis
h. (SEE FIGURE 20)
4.4.3. SOUNDS
Turns the menu sounds ON or OFF. When a selection is made, an
alert will sound.
(SEE FIGURE 20)
5. Sensor Readings
From the menu, users can monitor all sensor readings including
pressure, electrical current, and thermocouple readings.
5.1. PRESSURE READINGS
SG1s come with wireless pressure sensors.
These sensors read between 8 and 299 psi at a
distance of up to 300 ft., when line of sight is not
obstructed. Sensors attach to Schrader valves in
line with the bag pressure. These valves are con
-
nected in one of three configurations:
5.2. PRESSURE SENSOR REGISTRATION PROCEDURE
NOTE: Pressure Sensors can only be registered when there is
no splice in progress.
5.3. CURRENT READINGS
1. Directly attached to a tee fitting connected to each pressure bag.
2.
Attached to a manifold combining multiple pressure bags.
3. Connected directly to the pressurizing pump. In order to read
pressures, users must first register the sensors with the SG1.
After registration, the SG1 will continue to receive pressure
readings from that specific pressure sensor until either the
sensor registration process is repeated or until the pressure
sensor battery is completely depleted.
1. On the menu screen. Navigate to Sensors > Pressure
Sensors. Select “Enter” on the “Register sensors” line.
2. The LCD display will now show “Connect Sensor 1.” Con
-
nect the first pressure sensor you want to use to a pressure
source, and within 1 minute, the sensor will be registered.
3. The next prompt is: “Connect sensor 2.” Connect the second
sensor to a pressure source and wait until it is registered.
4. Up to four pressure sensors can be added. Press MENU at
any time to stop adding pressure sensors.
5. Press the “Reset” button after sensors have been registered.
6. To view the sensor readings, return to the Pressure Readings
screen. (SEE FIGURE 22)
NOTE: Pressure Sensors are battery powered and will run
out after use. The average life span is three years. Contact an
Almex distributor to purchase new pressure sensors.
The SG1 monitors and displays the total electrical current running
to each of the connected platens. Readings vary press to press.
(SEE FIGURE 23)
4. Settings CONTINUED
ENTER ENTER
FIGURE 22 - REGISTERING PRESSURE SENSORS
MENU
FIGURE 21 - SENSOR READINGS
ENTER
FIGURE 20 - INTERFACE SETTINGS
ENTER
ENTER
FIGURE 23 - CURRENT READINGS
1. CURRENT READING 2. NO CURRENT 3. ACTIVE CURRENT
4.4. INTERFACE SETTINGS
From the SG1 menu, users can change the way the menu dis-
plays information or reacts to selections. (SEE FIGURE 20)