TEC Power Output Connector
The Second connection to be made is to the TEC.
ç Make sure that the sensor is properly wired, the
controller is properly programmed, and the power is
OFF before connecting the TEC. See Section 4.0 for
details on the sensor setup.
Make sure the Series 800/850 temperature controller is OFF before connecting the
TEC to the TEC power output connector.
After locating the TEC power output connector on the rear panel of the Series 800/850
temperature controller, locate the mating connector supplied with the instrument. This
mating connector has screw terminals that allow the TEC leads to be clamped down
within the connector.
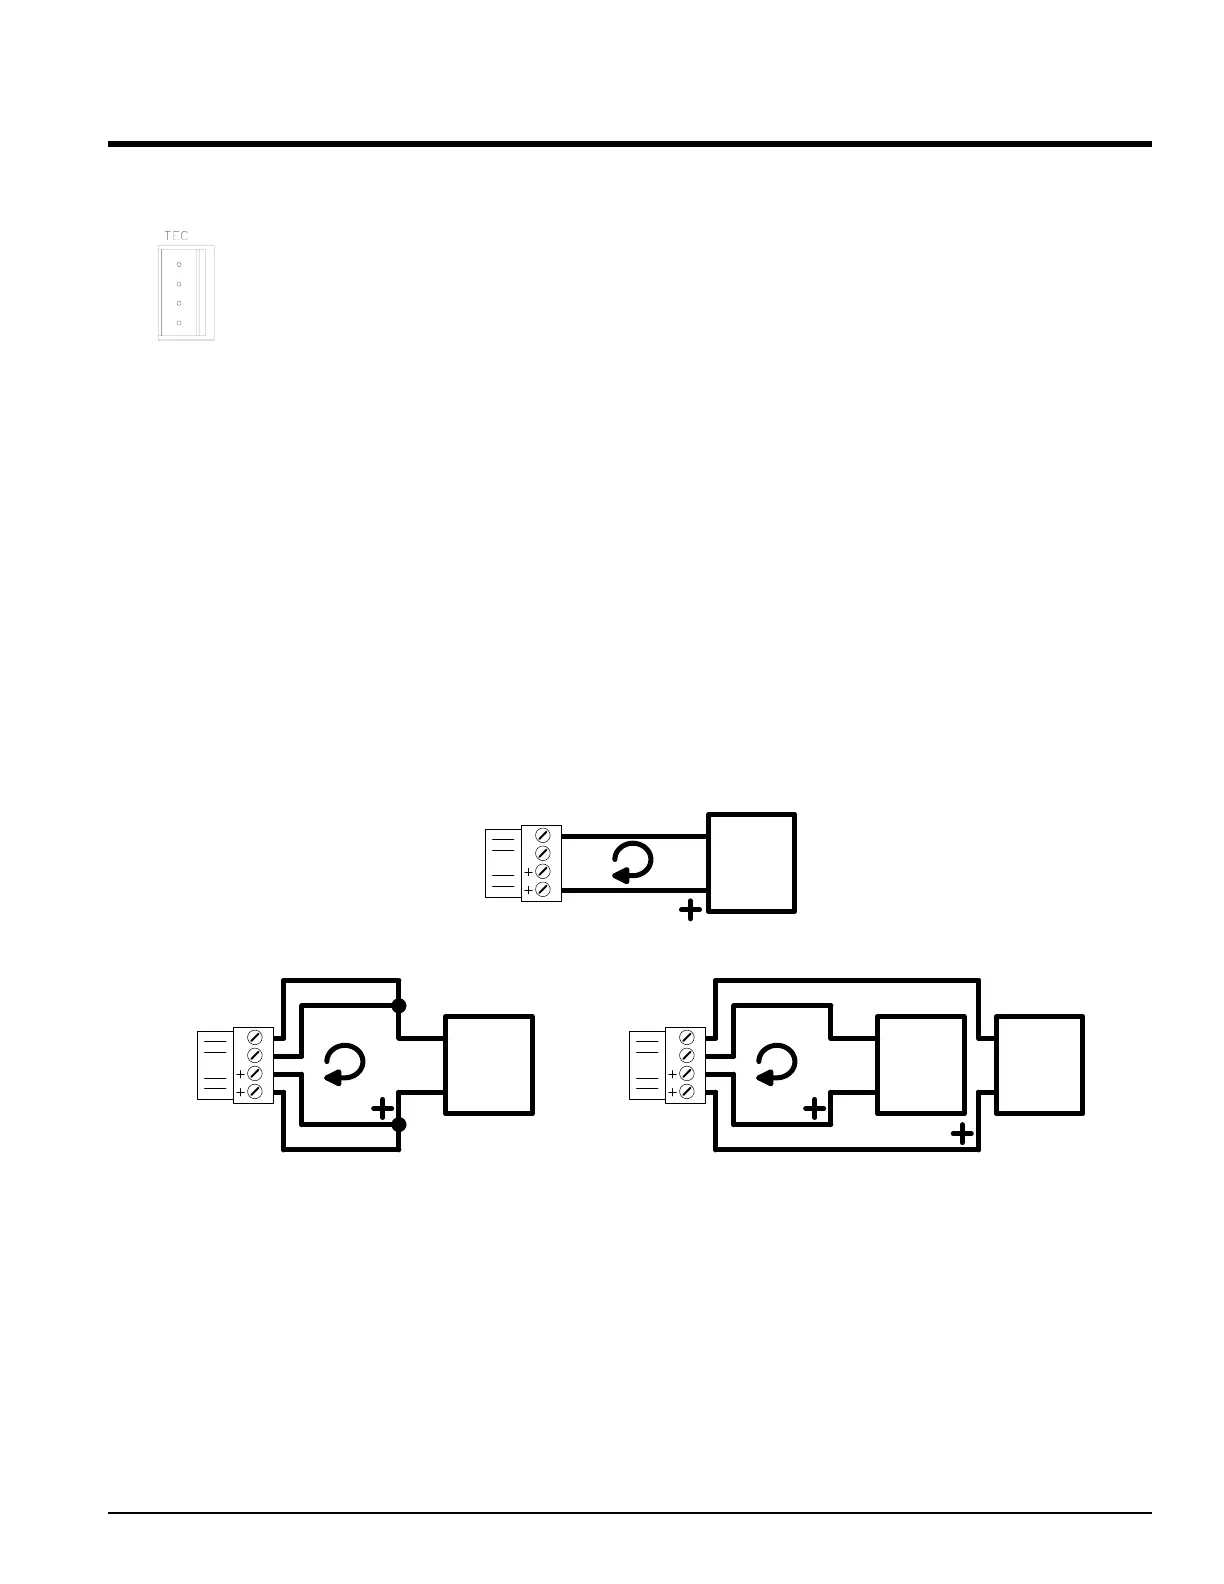
Connect the TEC to the mating connector.
There are two “+”’s and two “-”’s. Each pin can carry a maximum of 10 amperes. With
the Series 850 TEC Controller, if the current rating is over 10 amperes, then both pins
must be used to carry the current (the Series 800 is designed to deliver a maximum of
10 amps). Please remember that for currents over 8 amperes, AWG #14 size wire is
recommended. See diagrams below for various configurations:
10 amperes MAX
TEC
Keyed Connector
10 amperes MAX
10 amperes MAX
TEC
Keyed
10 amperes MAX
10 amperes MAX
Connector
20 amps
20 amps
10 amperes MAX
10 amperes MAX
TEC 1
Keyed
10 amperes MAX
10 amperes MAX
Connector
20 amps
20 amps
TEC 2
Once the TEC leads are securely fastened into the mating connector, plug this
connector into the TEC Power Output connector. If the Sensor is configured according
to Section 4.0 and the TEC is properly connected, all that’s left is to turn on the Series
800/850 temperature controller.
Caution: Before applying power to the TEC, the user is responsible for ensuring that
the TEC(s) have proper heat sinking. If questions arise regarding heat sinking, it is
strongly advised that you contact the supplier of the TEC module for further guidance.
ALPHA OMEGA INSTRUMENTS CORP. Instruction Manual
Series 800/850 Thermoelectric Cooler Controller Page 13
 Loading...