Settings
136
D9 BAH0041-4 08.18
8.6.2 Moving the track marker on the D9 2500/3000/3500 into working position
1. Position the implement on the field.
2. Apply the tractor parking brake, switch the
tractor engine off and remove the ignition
spanner.
3. Unlock both track markers.
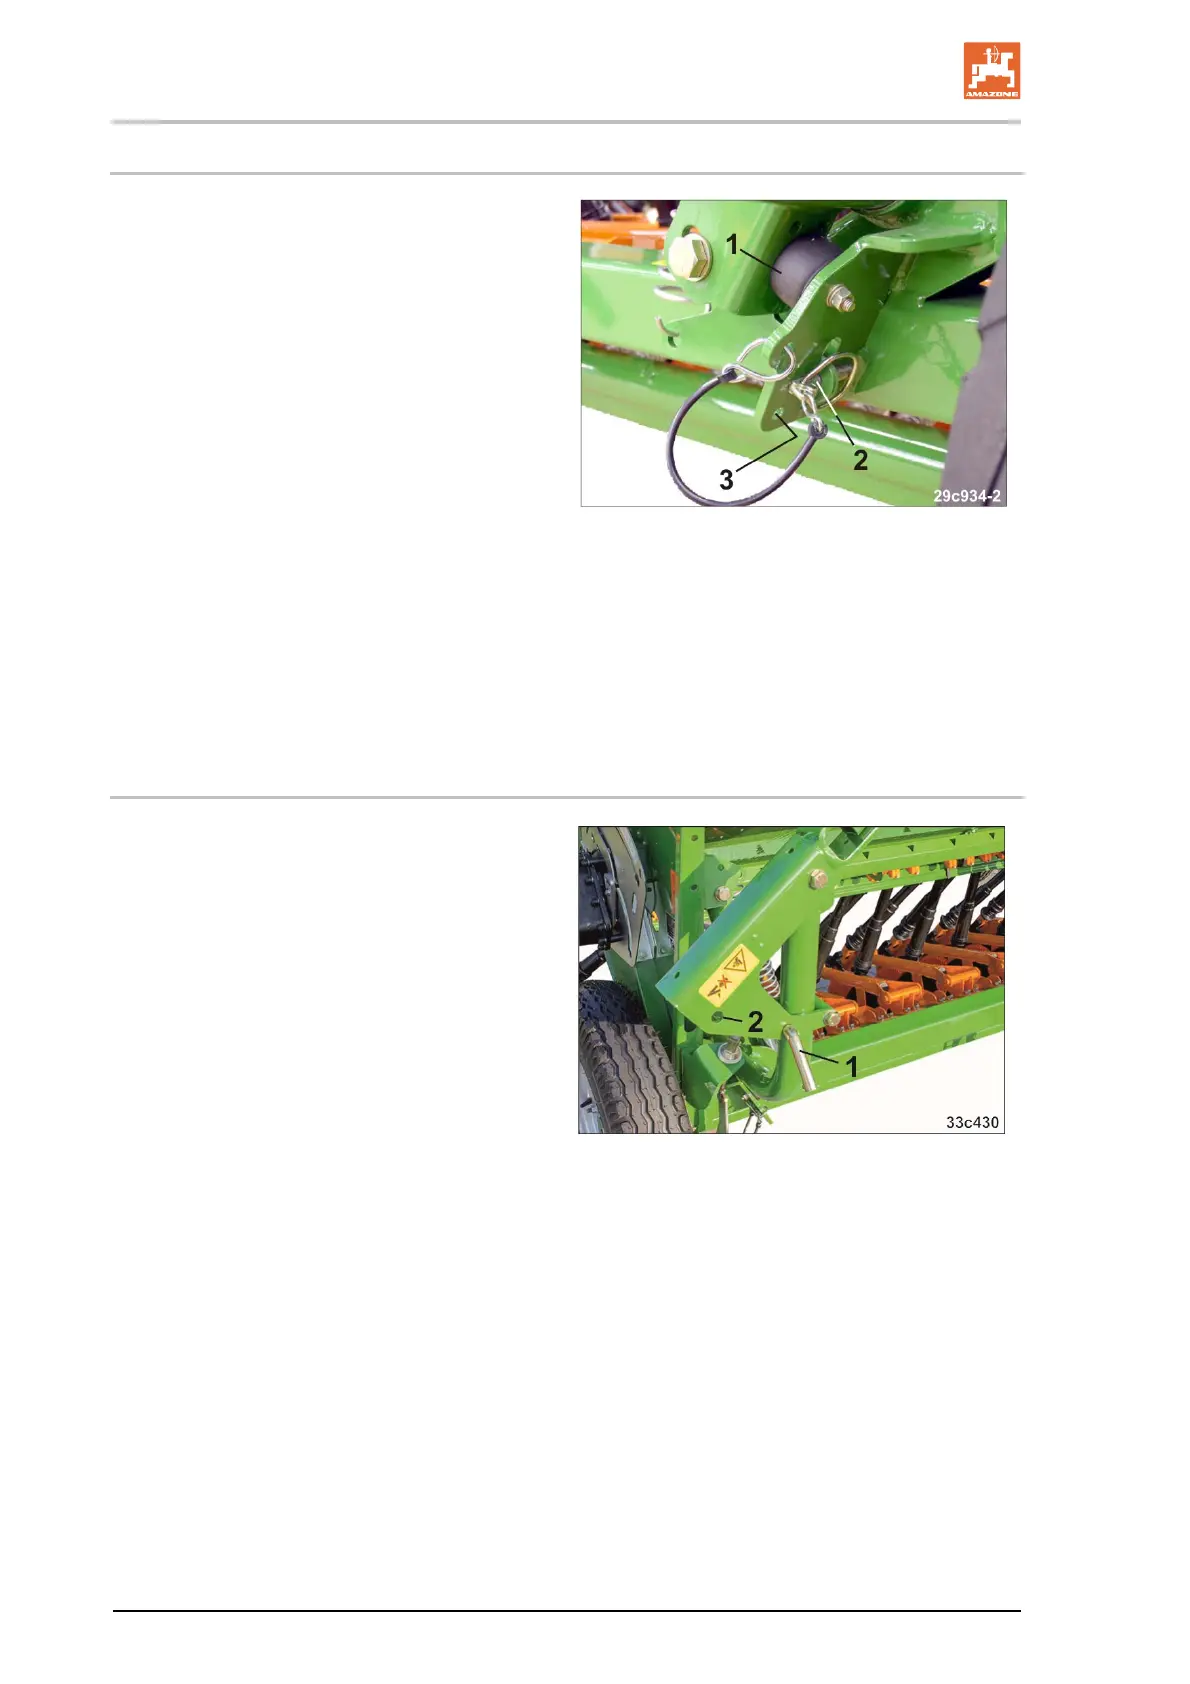
3.1 Press the track marker boom against
the rubber block (Fig. 167/1).
3.2 Pull out the linch pin (Fig. 167/2) and
insert it in the parking position in the
hole (Fig. 167/3).
3. Direct people out of the swivel area of the
track marker.
4. Move track markers to working position.
4.1 Actuate the tractor control valve (yel-
low) and put the active track marker
down on the ground.
5. Adjust the track marker length (see section
"Adjusting the track marker length", page
137).
Fig. 167
8.6.3 Moving the track markers on the D9 4000 into working position
The track markers of the D9 4000 Super are so
long that they cannot be transported in a vertical
position. To prevent exceeding of the permitted
transport height, the track markers are folded
and tilted towards the centre of the implement
during transport.
1. Position the implement on the field.
2. Place both track markers on the
D9 4000 Super in a vertical position and
secure them.
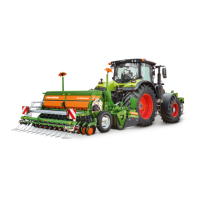
2.1 Pull out the pin (Fig. 168/1).
2.2 Place the track marker in a vertical po-
sition.
2.3 Insert the bolt (Fig. 168/1) into the hole
(Fig. 168/2) and secure it (linch pin).
3. Move the track markers on the D9 4000 into
working position (see section "Moving the
track marker on the D9 2500/3000/3500 in-
to working position", page 136)
Fig. 168



 To Next Page