Installation
5
Section 2: Installation
2.1 Unpacking
Carefully remove the contents of the shipping carton and check
each item against the packing list before destroying any packing
material. If there is any shortage or damage, immediately
report it to the factory at 1+ 215-674-1234.
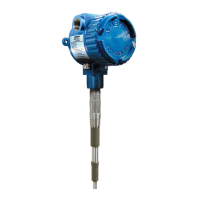
2.2 Mounting and Installation Guidelines
CAUTION:
ThePoint instrument must not be powered before it is installed
in the application with material below the sensing element.
ThePoint instrument can be mounted vertically or horizontally
or at an angle. Mounting location should be as free as possible
from vibration, corrosive atmospheres, and any possibility of
mechanical damage. Ambient temperatures at electronics
should be between -30 to 70º C (-22 to 158º F).
NOTE:
To reduce possibility of damage caused by water in conduit,
install drip loop and breather drain in conduit to purge any
accumulating moisture as shown in Figure 2-1.
After system is installed and level is below sensing element,
apply power. ThePoint series instrument does not require
any calibration or setpoint adjustments and is ready to detect
change in level.
If properly installed, the green LED will
light when power is applied. Neither the
green nor red LED should be ashing.
If either of the LEDs are ashing, refer
to, Section 4, Troubleshooting.
Cable ttings supplied are
weather-resistant. They are NOT certied
as explosion proof (XP) or ameproof (d)
unless they are specically marked.
Figure 2-1
Recommended Conduit Connection
 Loading...