amgmicro.com 5
EVOS™ User Guide
ASSEMBLY
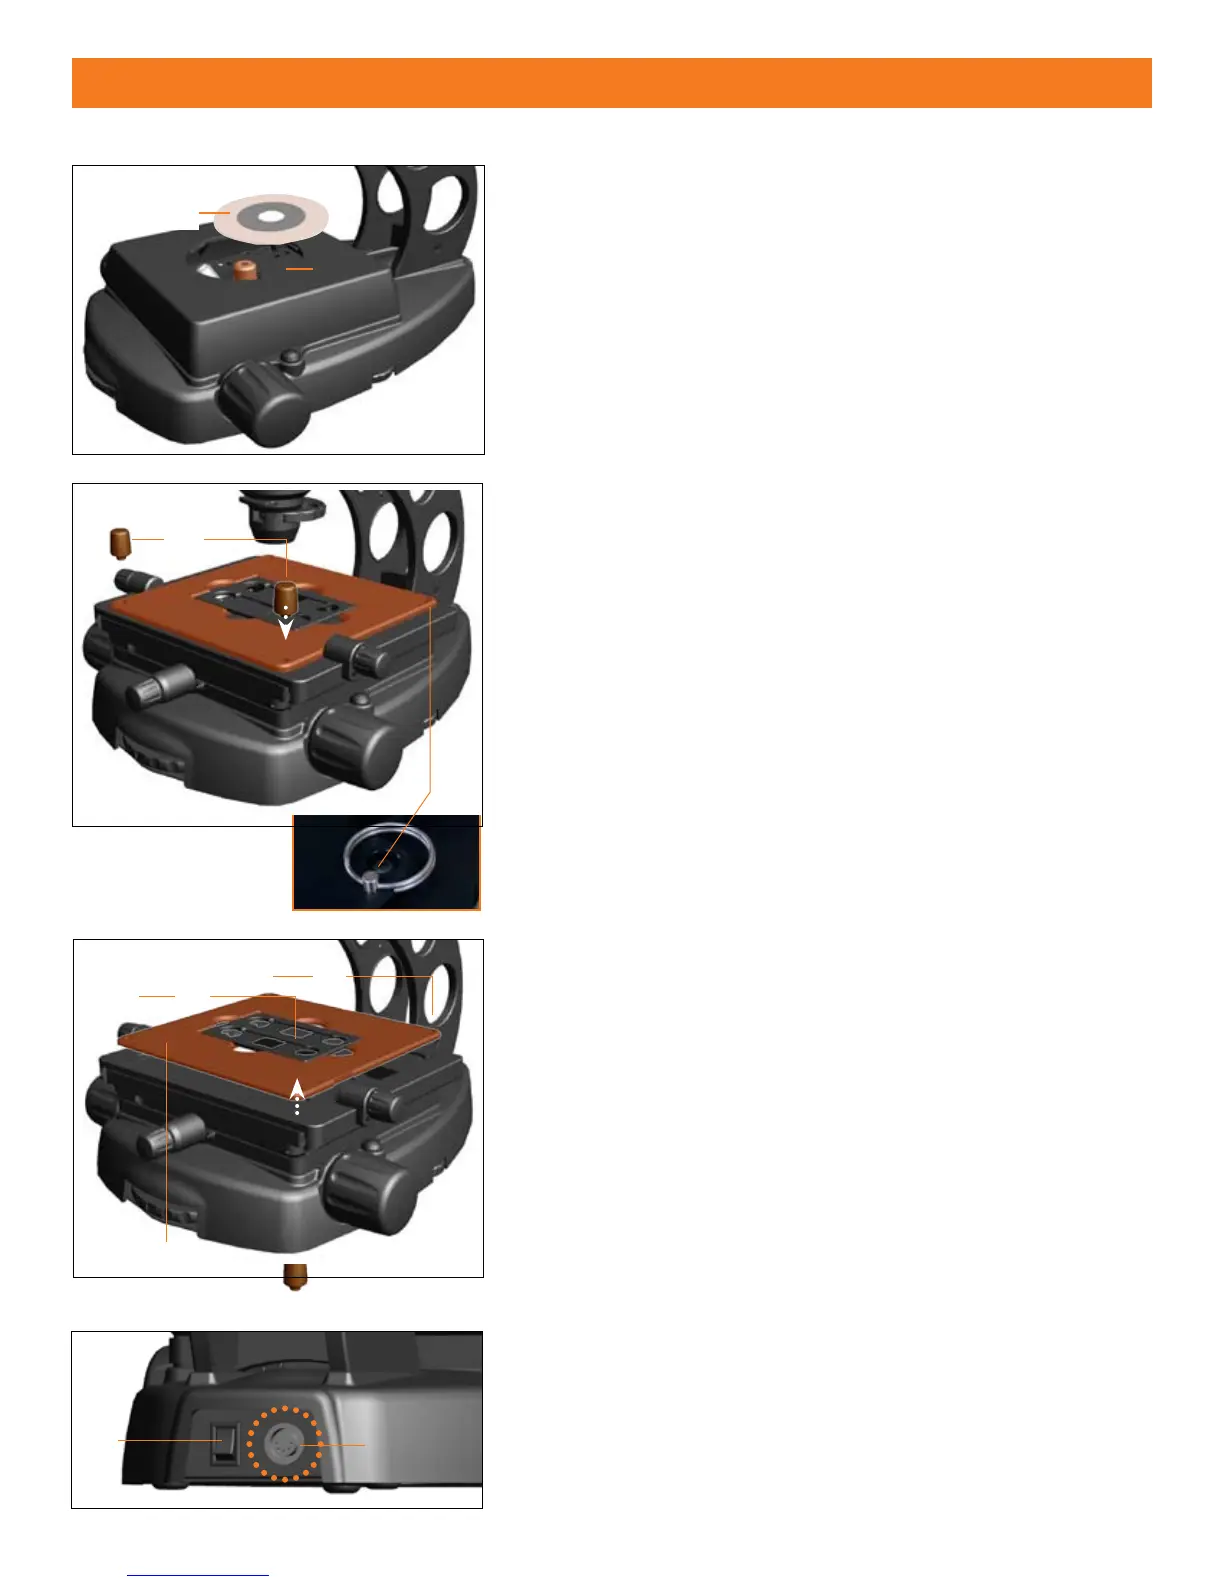
STAGE PLATE ASSEMBLY
PLAIN STAGE (Figure 1)
The PLAIN STAGE assembly is pre-installed and pre-positioned at AMG.
Simply install the circular stage plate
into the round opening in the
stage
..
MECHANICAL STAGE (Figures 2 & 3)
For AME i2111/2 and AME 3205/6 Series (MECHANICAL STAGE) microscopes,
follow the procedures below before use.
Screw in the 2
1. coarse positioning knobs
into the front right and
left-hand corners of the stage assembly.
Remove the 2. stage lock pin
on the back right-hand corner.
Note: The stage lock pin
is used to secure/hold the mechanical stage
in place when transporting or moving the unit.
CHANGING STAGE PLATES MECHANICAL STAGE (Figure 3)
Unscrew the two 3 mm1. hex screws
from the back of the stage with
a hex tool (included).
Unscrew the 2 2. coarse positioning knobs
from the front of the
stage.
Carefully lift the 3. stage plate
o from the stage assembly and
replace.
Reattach all screws to secure.4.
Figure 2
Figure 3
Figure 1
POWER CORD ASSEMBLY
(Figure 4)
Turn the 1. power switch
to the “” (OFF) position before connecting
the power cord (transformer unit).
Insert the plug into the
2. power outlet
on the back of the
microscope.
Insert the 3-prong plug from the power supply into a power socket.
3.
Figure 4