9www.amico.com
1. Remove all 4 Housing Screws (#11) then remove the Front Housing (#1) from the Assembly.
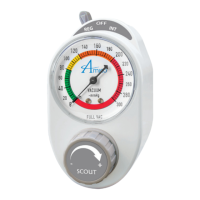
2. Carefully remove the Vacuum Gauge (#2) from the Assembly. Remove the filter from the back
of the Vacuum Gauge.
3. Remove the Regulating Module (#3) by turning it clockwise until it is separated from the
Assembly. Thoroughly clean the Regulating Module with Cidex solution. Allow time for the
Regulating Module to fully dry.
4. Remove the Control Knob Screw (#5) holding the Intermittent Module (#4) in place, then
carefully separate the Intermittent Module from the Assembly.
5. Remove the 2 Disposable Back Screws (#7), and the 1 Disposable Body Back Screw (#10)
holding the Assembly together. Carefully separate the Disposable Body (#6) from the Back
Housing (#9).
6. Remove the Port Gasket Disposable Seals (#8).
7. Dispose of the Port Gasket Disposable Seals, Disposable Body, Disposable Body Back Screw,
Disposable Back Screws and Vacuum Gauge Filter, following your facility's procedure for
handling contaminated products.
8. Place the new Port Gasket Disposable Seals onto the new Disposable Body then carefully install
onto the Back Housing. Ensure that the Port Gaskets remain in place and create a good seal.
Fasten the Disposable Body in place using 1 new Disposable Body Back Screw and 2 Disposable
Back Screws.
9. Carefully install the Intermittent Module and fasten it to the Assembly using the Control Knob
Screw.
10. Install the Regulating Module by turning it counterclockwise into the corresponding threads
on the Disposable Body.
11. Install a new Vacuum Gauge Filter. Carefully install the Vacuum Gauge into the Assembly.
12. Install the Front Housing and tighten all 4 Housing Screws.
Cleaning Instructions - Scout
 Loading...