13www.amico.com
Battery Replacement - Sentinel
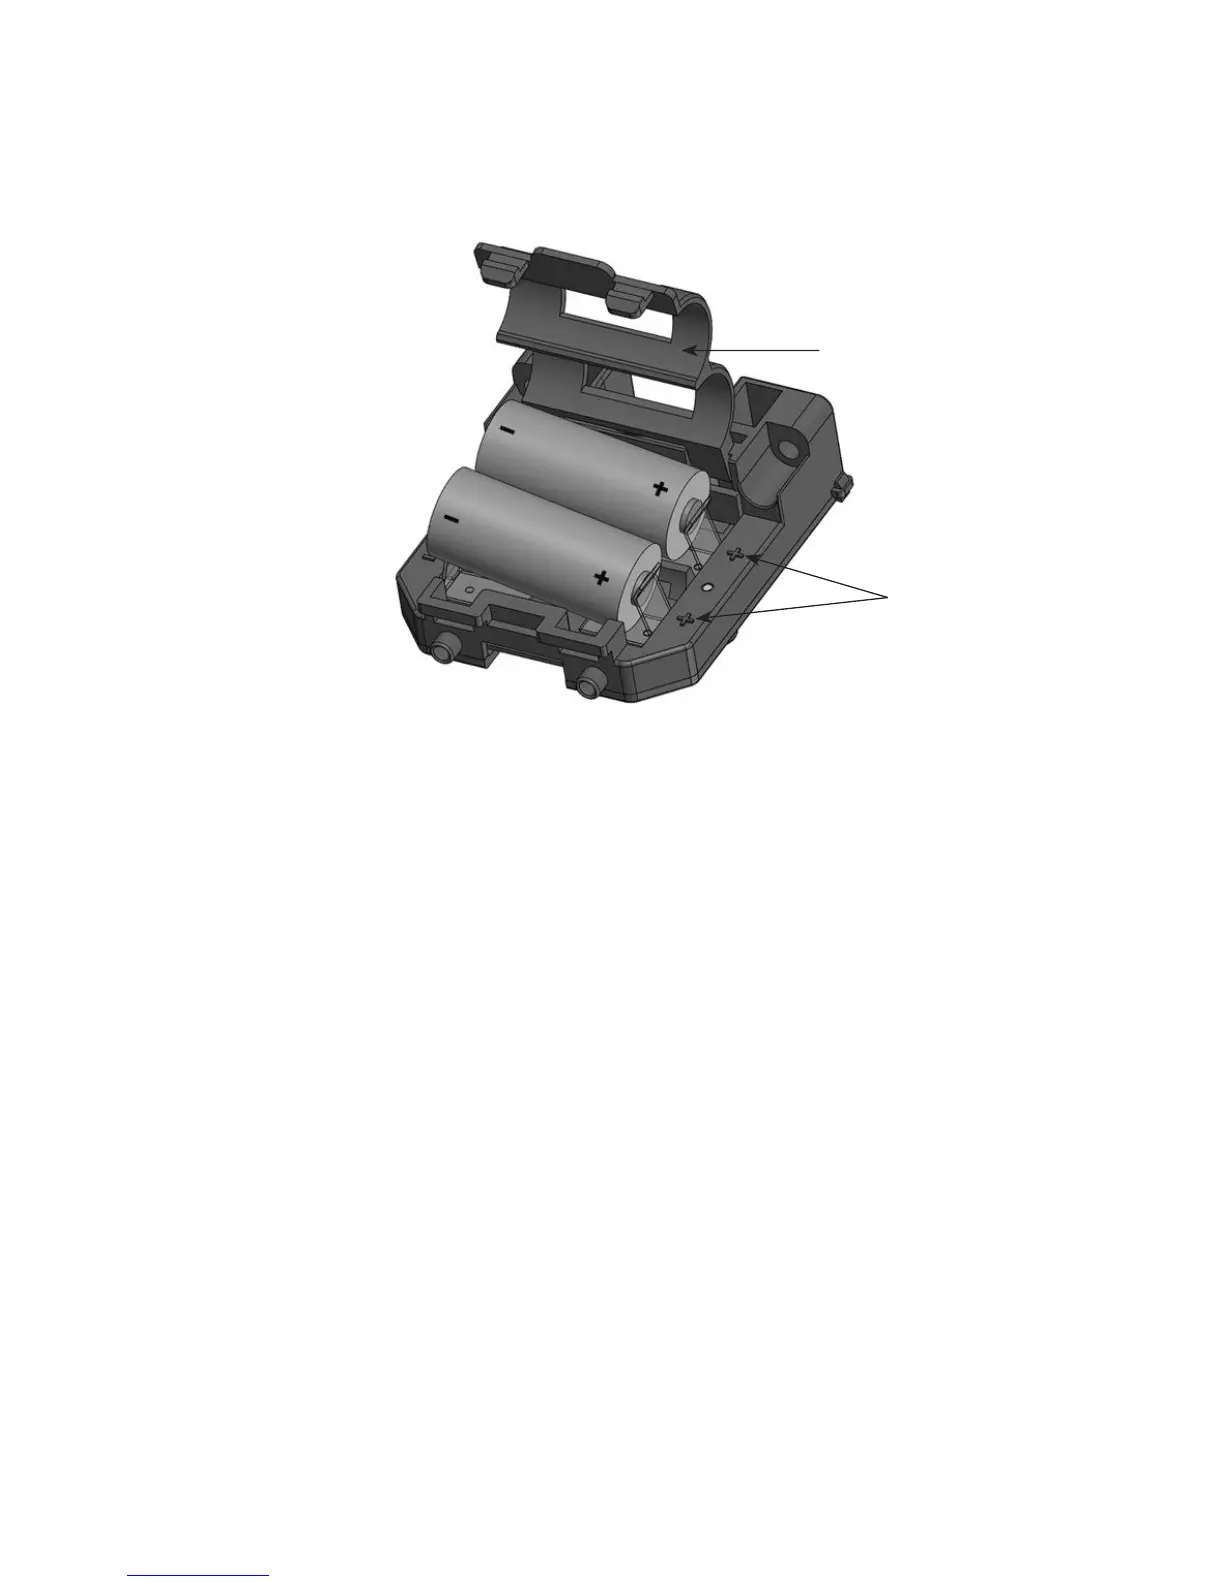
Figure 6: Sensor Assembly - Sentinel
Battery Holder
Battery Orientation Symbols
1. Remove all 6 Housing Screws then remove the Front Housing from the Assembly.
2. Pull out the Sensor Assembly located in the Front Housing.
3. Lift the Battery Holder by pressing the two tabs with a slotted screwdriver.
4. Install the new batteries following the battery orientation symbols.
5. Calibrate the Sensor (follow the Test & Calibration/Reset Guide on page 15-16).
6. Reinstall the Sensor Assembly into the Front Housing:
a. Using the guide, insert one side of Sensor Assembly with the other side sitting slightly
above the guide (see Figure 7).
b. Press down on the Sensor Assembly to insert the other side into the guide. Be careful
not to damage the CHECK or BATT LED guides (see Figure 8).
c. Gently push the Sensor Assembly forward to insert the CHECK and BATT LED guides
into the corresponding slots on the Front Housing (see Figure 8).
7. Install the Front Housing on the Assembly and tighten all 6 Housing Screws.
 Loading...