7
You need the following tools for assembly (too see a picture different tools, see
page 31):
Frames
Start assembling your Amtryke by first attaching the main and rear frames
together:
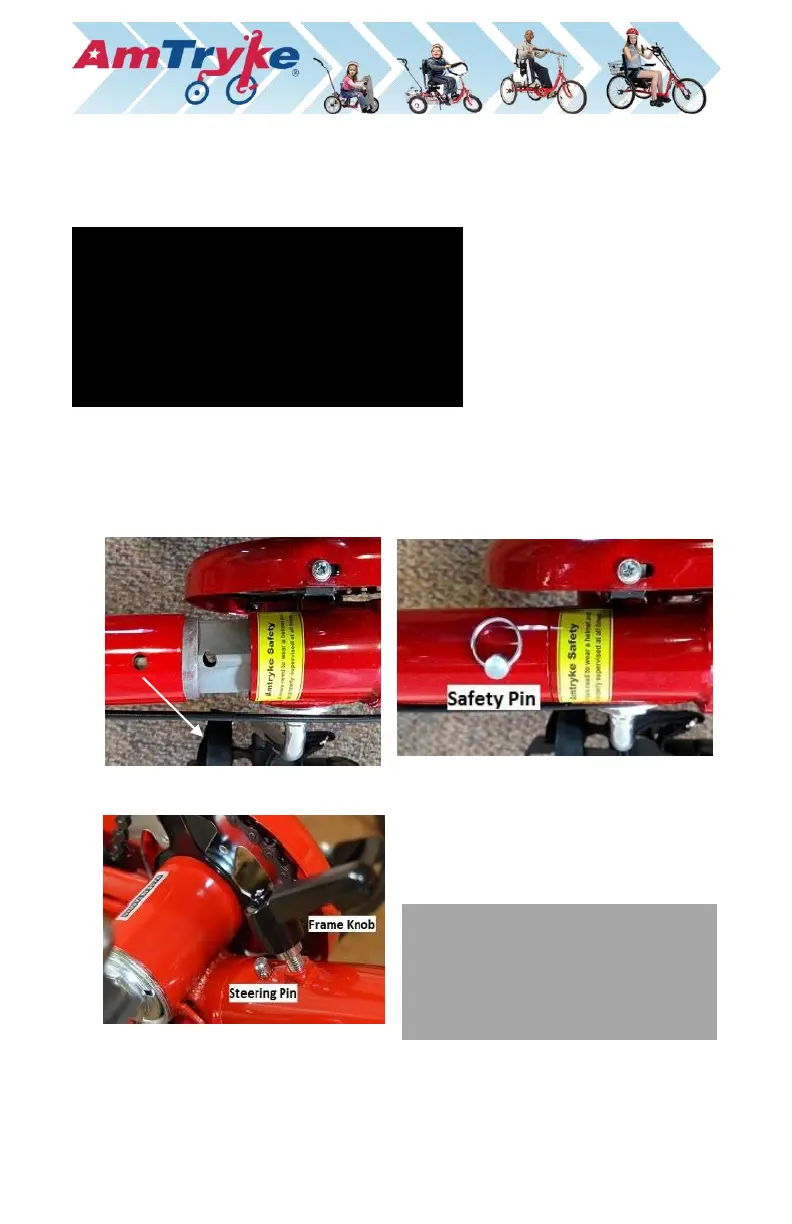
Step 1: Slide the main frame onto the
rear frame.
Step 2: Insert the safety pin through both
sections.
Step 3: Install the frame knob by turning
it clockwise ½ a turn at a time. Picture
shot above the underside of tryke.
NOTE: The frame knob is spring-
loaded. Once it is threaded into the
frame, pull the knob out to rotate it
backward without loosening it. You
can then tighten it further.
TOOLS REQUIRED:
• 5 and 6 mm Allen wrench (incl.)
• 10 mm wrench/socket
• 14 and 15 mm wrench (incl.)
• 22 mm socket or adjustable wrench
• Quick release wrench (incl.)
• #2 Phillips head screwdriver