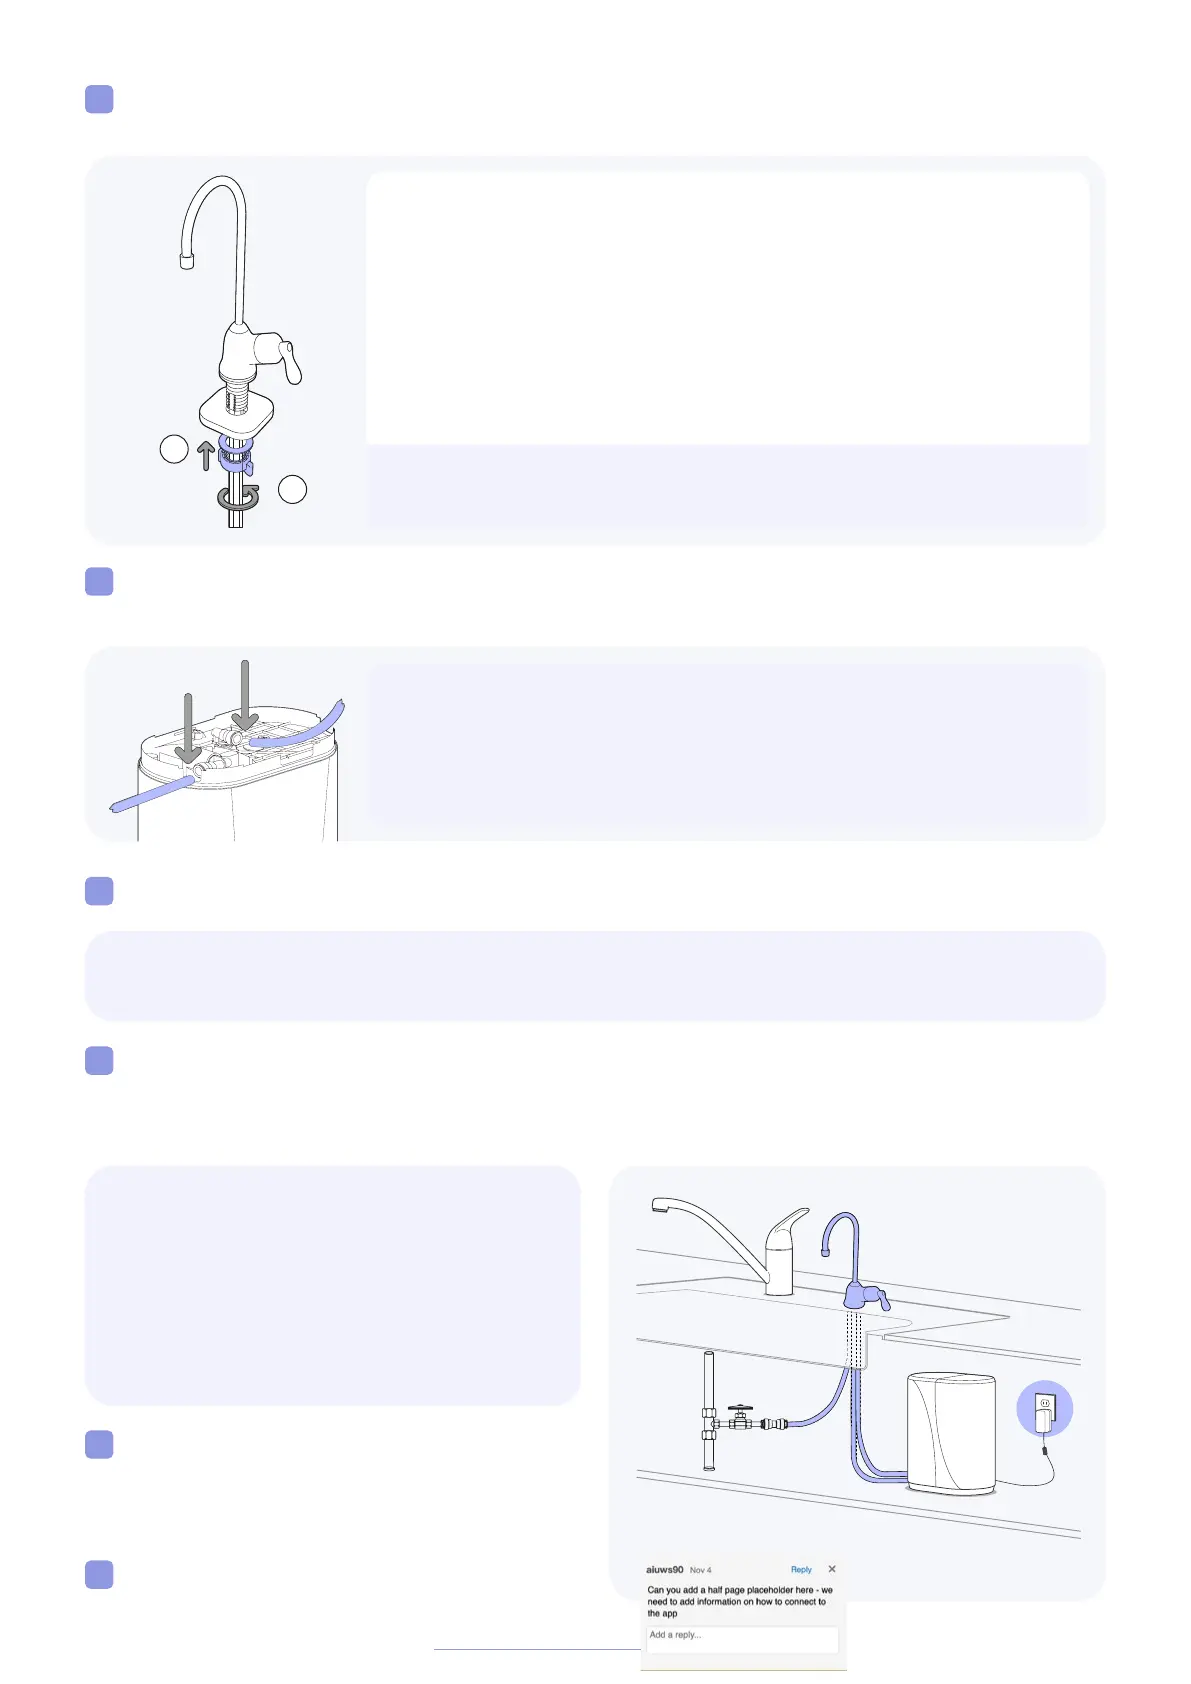
Insert the GREEN and BLUE tubes from the eSpring™ Auxiliary Faucet into their proper locations
on the bottom of the unit.
Set unit upright then ll and ush the water purier prior to use
a. Open the eSpring™ Faucet. Open the water supply shut-o valve to start water owing
through the Water Purier.
Turn o the eSpring™ Faucet and check
for any signs of leakage at all tubing
connections (3). If there is leaking or
bubbling, refer to Troubleshooting.
Plug the power adapter into the wall outlet.
Connect the RED tube from the auxiliary faucet to the cold-water supply.
4
6
7
8
5
Note: It will take a short time fo
water to saturate the Filter and
start owing out of the faucet.
Flush for a minimum of 5 U.S.
gallons (20 liters approximately
5-15 minutes) to remove air pockets
and carbon dust. If water does not
clear, see Troubleshooting.
Note: You will feel resistance before the tubes are fully installed. Ensure the tubes are pushed
in all the way. To verify, check that the tube is all the way to the mark or past it.
Holding the rubber washer in place against the faucet body, lower the eSpring™ Faucet stem and
tubes through the hole in the sink ledge or counter
3
a. With an assistant holding the faucet in place, reach up from
below the counter and slide the metal washer then the wing nut
onto the threaded faucet
b. Position the faucet in the desired orientation and tighten the
metal washer and wing nut to secure the faucet.
Note: If the faucet remains loose, an additional spacer may be
required. Refer to Service Components.
Note: Plug the power adapter into the jack at the bottom of
the unit. Wait until the nal step to plug the adapter into
the wall outlet.
18
1
2
We have no way to shorten the information here
to get a place for a placeholder