21
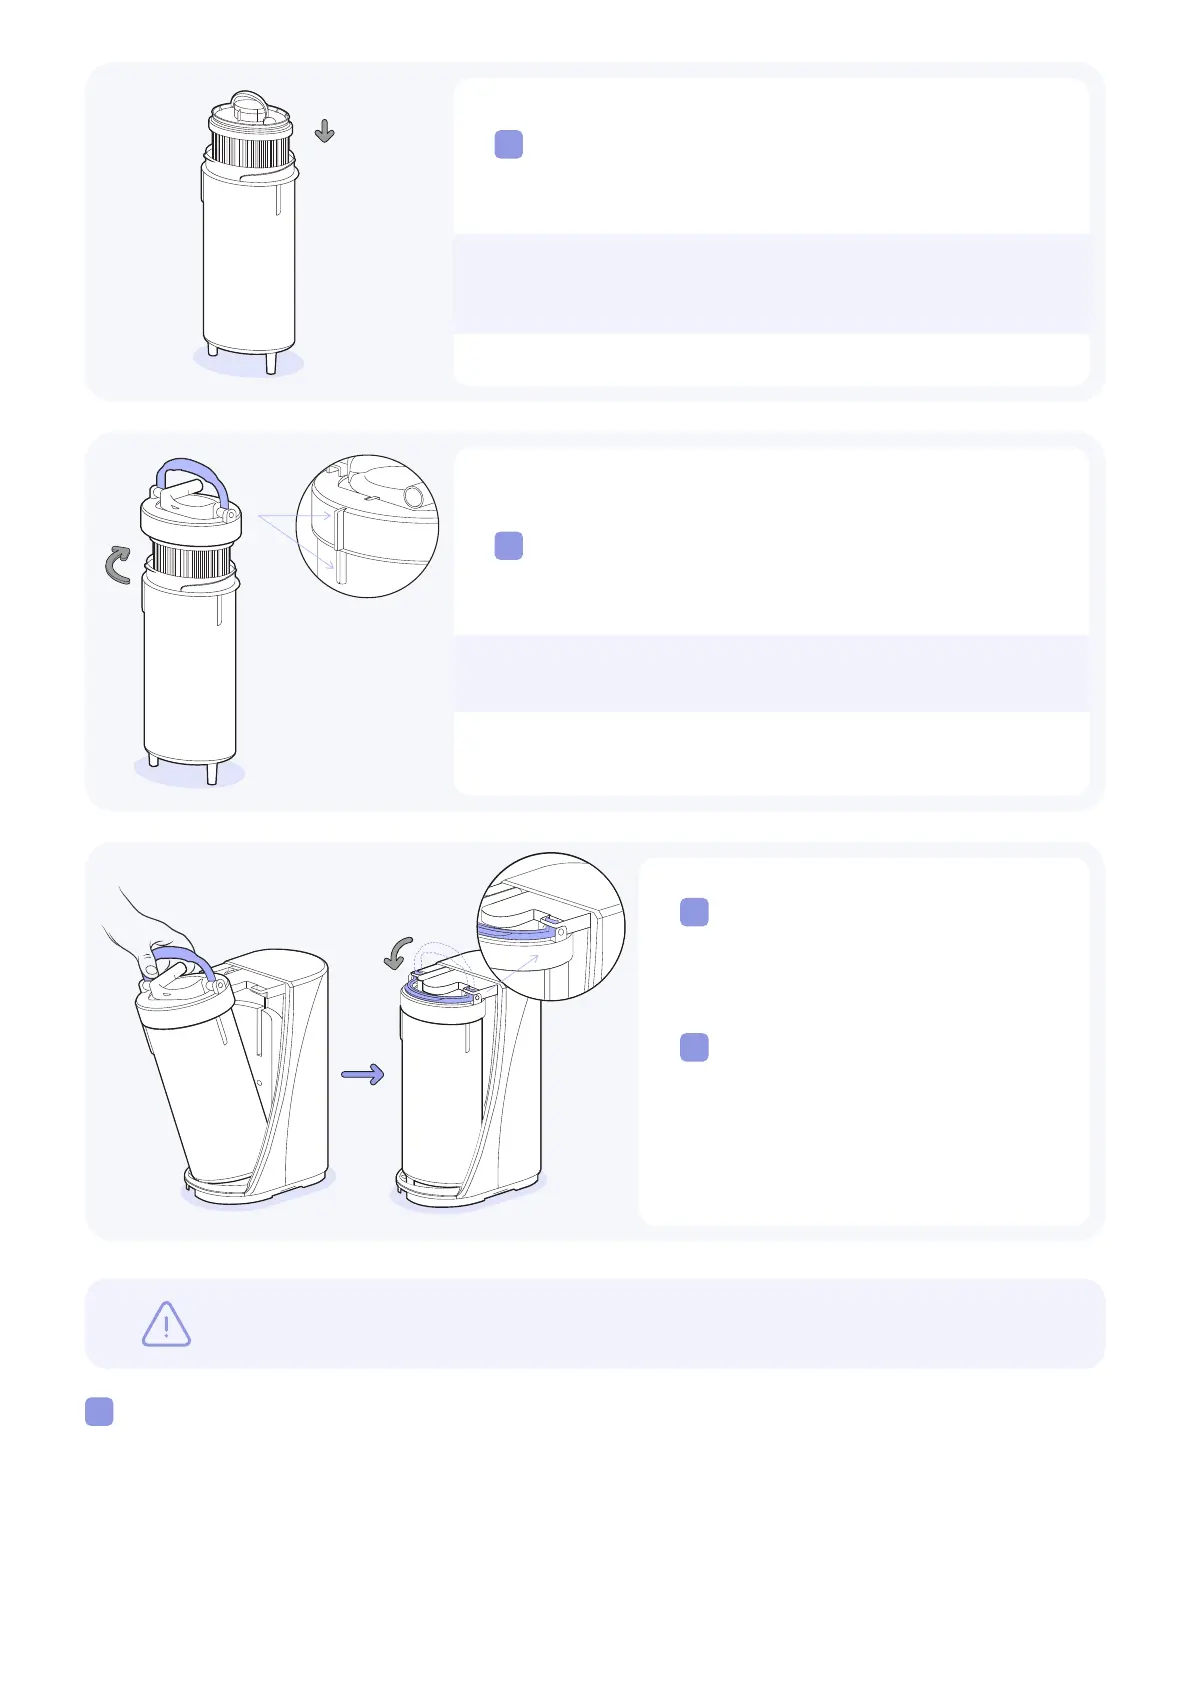
Remove plastic wrap from the new lter and place
it into the vessel using the small handle at the top
of the lter.
Place the lid onto the lter vessel and rotate
clockwise to secure in place (1/3 rotation). The rib
on the lid should align with a rib on the vessel.
8
9
Note: The lter does not need to be oriented and
will rest loosely on the bottom of the vessel
until the lid is secured in the following step.
Note: The lid can go on correctly from 3 positions.
Place the vessel into the unit
so that the lter vessel outlet is
pointing toward the frame and
the handle is in the up position.
10
Tip the vessel up into position
and latch the handle down until
it snaps in place. Ensure that
both tabs of the lid handle are
secured to the base unit frame.
11
IMPORTANT: If the closure is not fully tightened then the vessel outlet and handle
will not line up with the frame. Refer to step 9.
Turn on water supply and ush the lter
a. For the existing tap: Turn on the cold water at the tap (1) and leave the handle of the diverter
in treated water position (2).
b. Auxiliary Faucet: With the Auxiliary Faucet handle still in the open position, open the supply
shut-o valve.
c. While the unit is ushing, check for leaks at the inlet and outlet of the vessel.
12
 Loading...