Preconfiguring the NXA-WAP1000
11
NXA-WAP1000 Smart Wireless Access Point
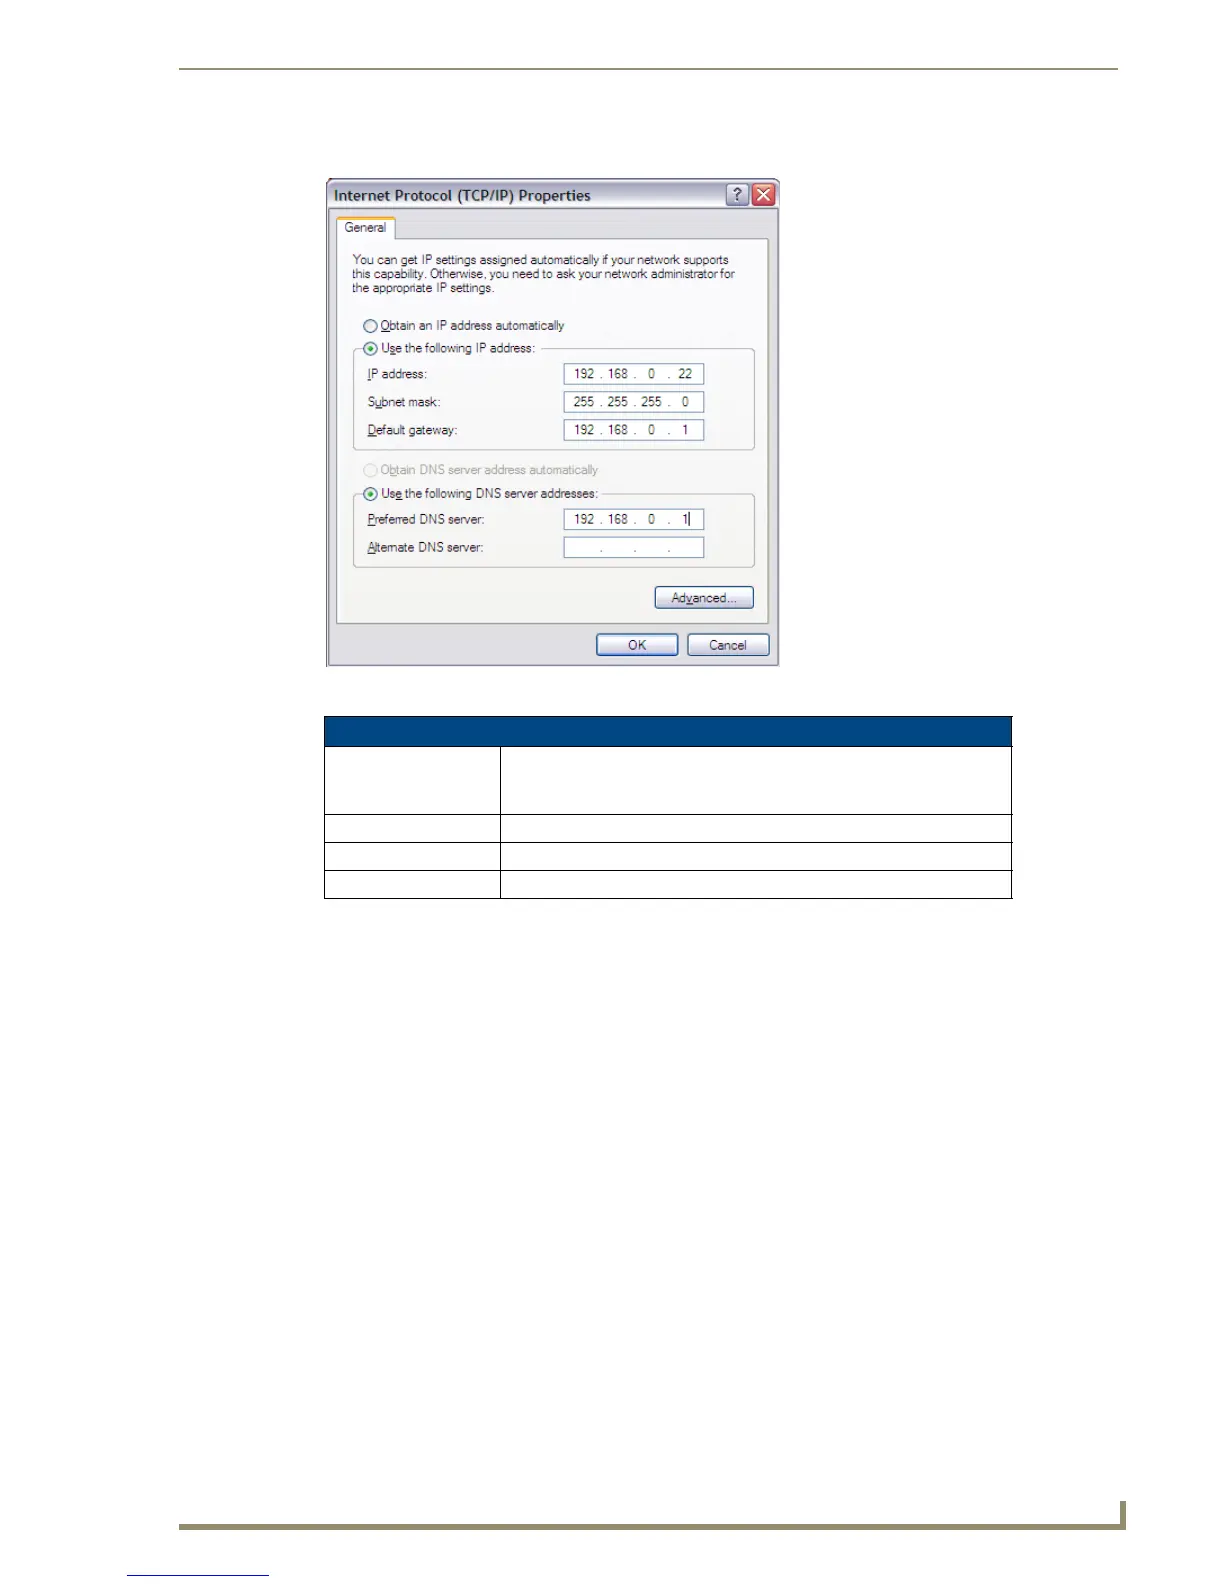
5. Click Use the following IP address, and then configure the IP address settings (FIG. 4).
You can leave the Alternate DNS server box blank.
6. Click OK to save your changes and close the TCP/IP Properties dialog box.
7. Click OK again to close the Local Area Connection Properties dialog box. Windows saves the IP address
settings that you have configured.
2. Connect the NXA-WAP1000 to the Administrative Computer
Connect one end of an Ethernet cable to an Ethernet port on the NXA-WAP1000, and then connect the other
end to the administrative computer’s Ethernet port. After a minute, the power LED on the AP will turn solid
green. You have completed connecting the AP to the administrative computer.
3. Log Into the AP’s Web Interface
1.
On the administrative computer, open a Web browser window.
2. In the address or location bar, type the following address: https://192.168.0.1
3. Press Enter on the keyboard to connect to the NXA-WAP1000’s Browser-Based Configuration Pages. A
security alert message appears.
FIG. 4 Sample configuration in the Internet Protocol (TCP/IP) Properties dialog box
IP Address Settings
IP Address: 192.168.0.22 (or any address in the 192.168.0.x network, with the
exception of 192.168.0.1, which is the default IP address assigned to
the NXA-WAP1000)
Subnet Mask: 255.255.255.0
Default Gateway: 192.168.0.1
Preferred DNS Server: 192.168.0.1
 Loading...
