18
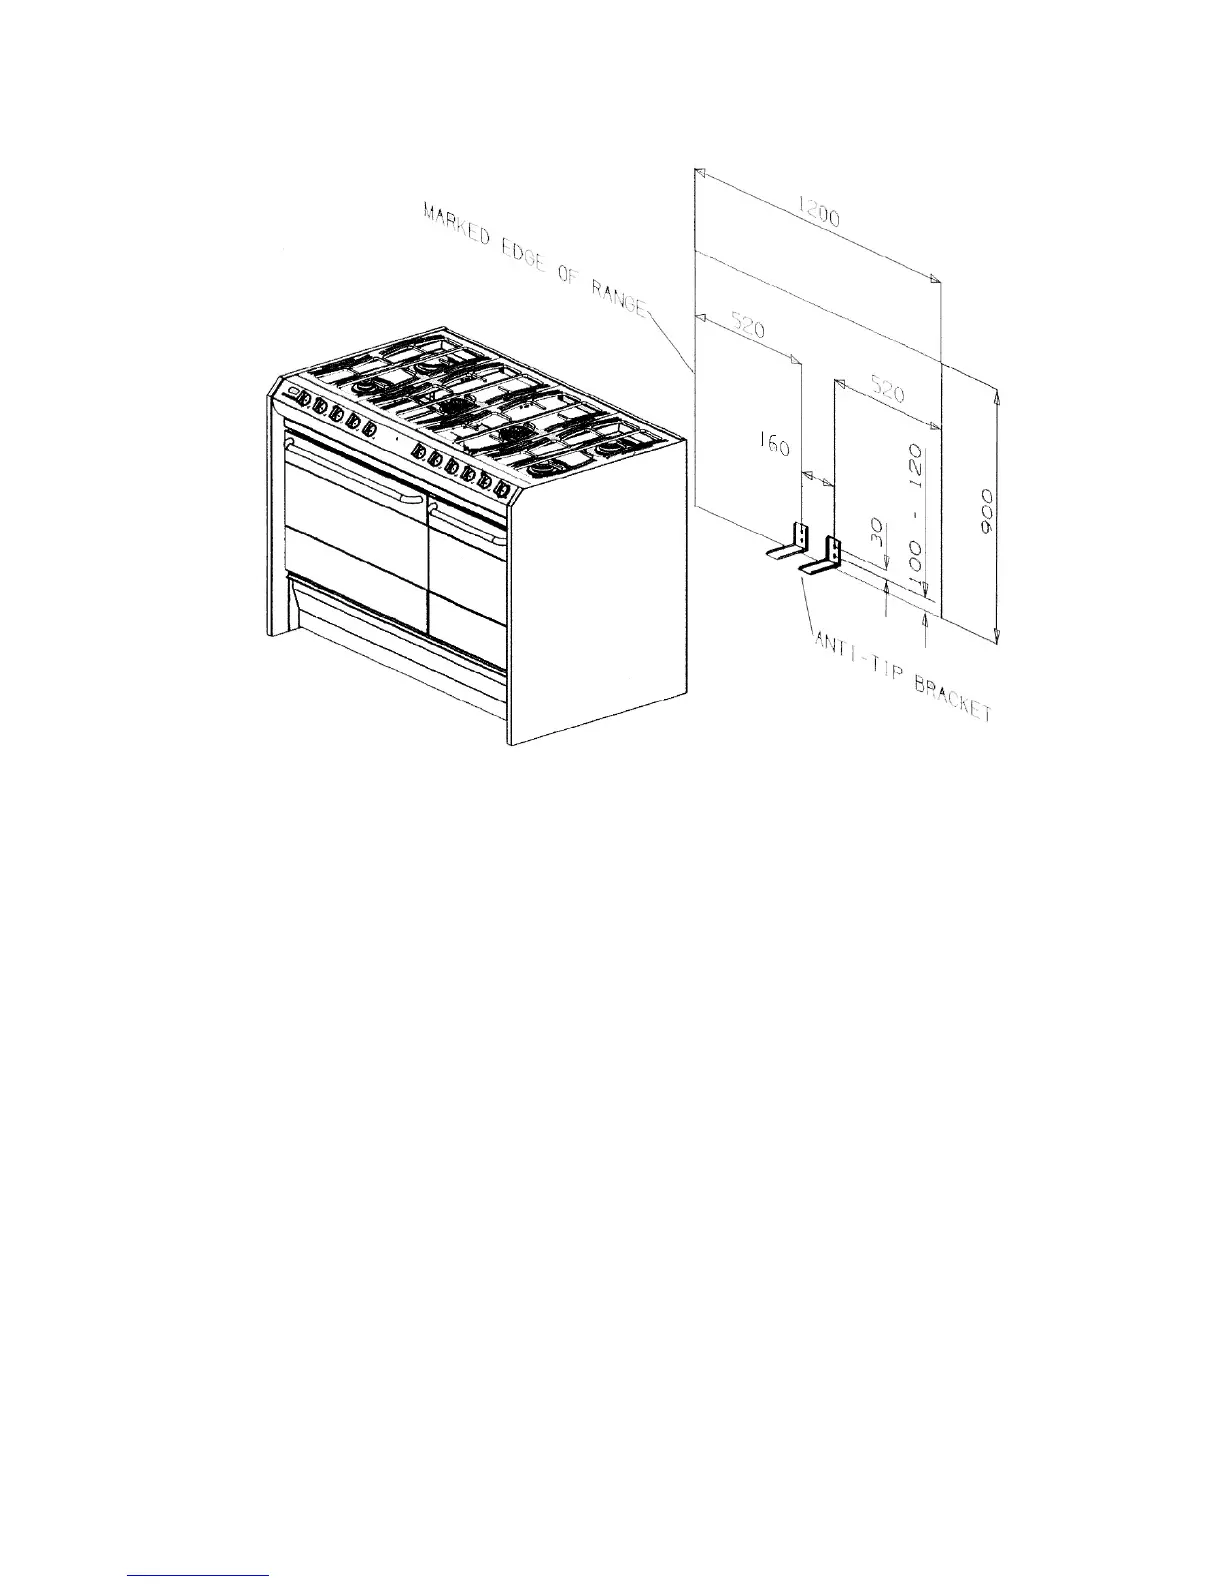
STEP 3 – Range Installation
A. Align the range to its designated location and slide it back into position.
Make sure that the Anti-Tip bracket plate is fully inserted into the range
rear cover slot and above the lower “U” frame.
B. For Safety Considerations as well as optimum performance adjust the
range so it is level. This may be checked by placing a spirit level or a large
pan of water on the cooktop or on the oven rack. If an adjustment is
required on free standing, pull the range forward, tip the range and rotate
the levelling feet as required. Slide-in ranges require total removal from
cabinet before an adjustment can be made.
C. To check the range for proper installation of the anti-tip bracket: Remove
lower storage drawer, by pulling downward the lever A on the right hand
side and pulling upward the lever B on the left hand side, while pulling
both levers pull out the drawer or in case that a lower storage drawer is
not supplied remove the lower foot cover by lifting it up and pulling. Use a
flashlight and look beneath the “U” shape back frame and verify that the
anti-tip device horizontal plate is properly engaged in the rear cover slot
and just above the “U” shape frame. As shown in figure 12.
Fig. 11