8
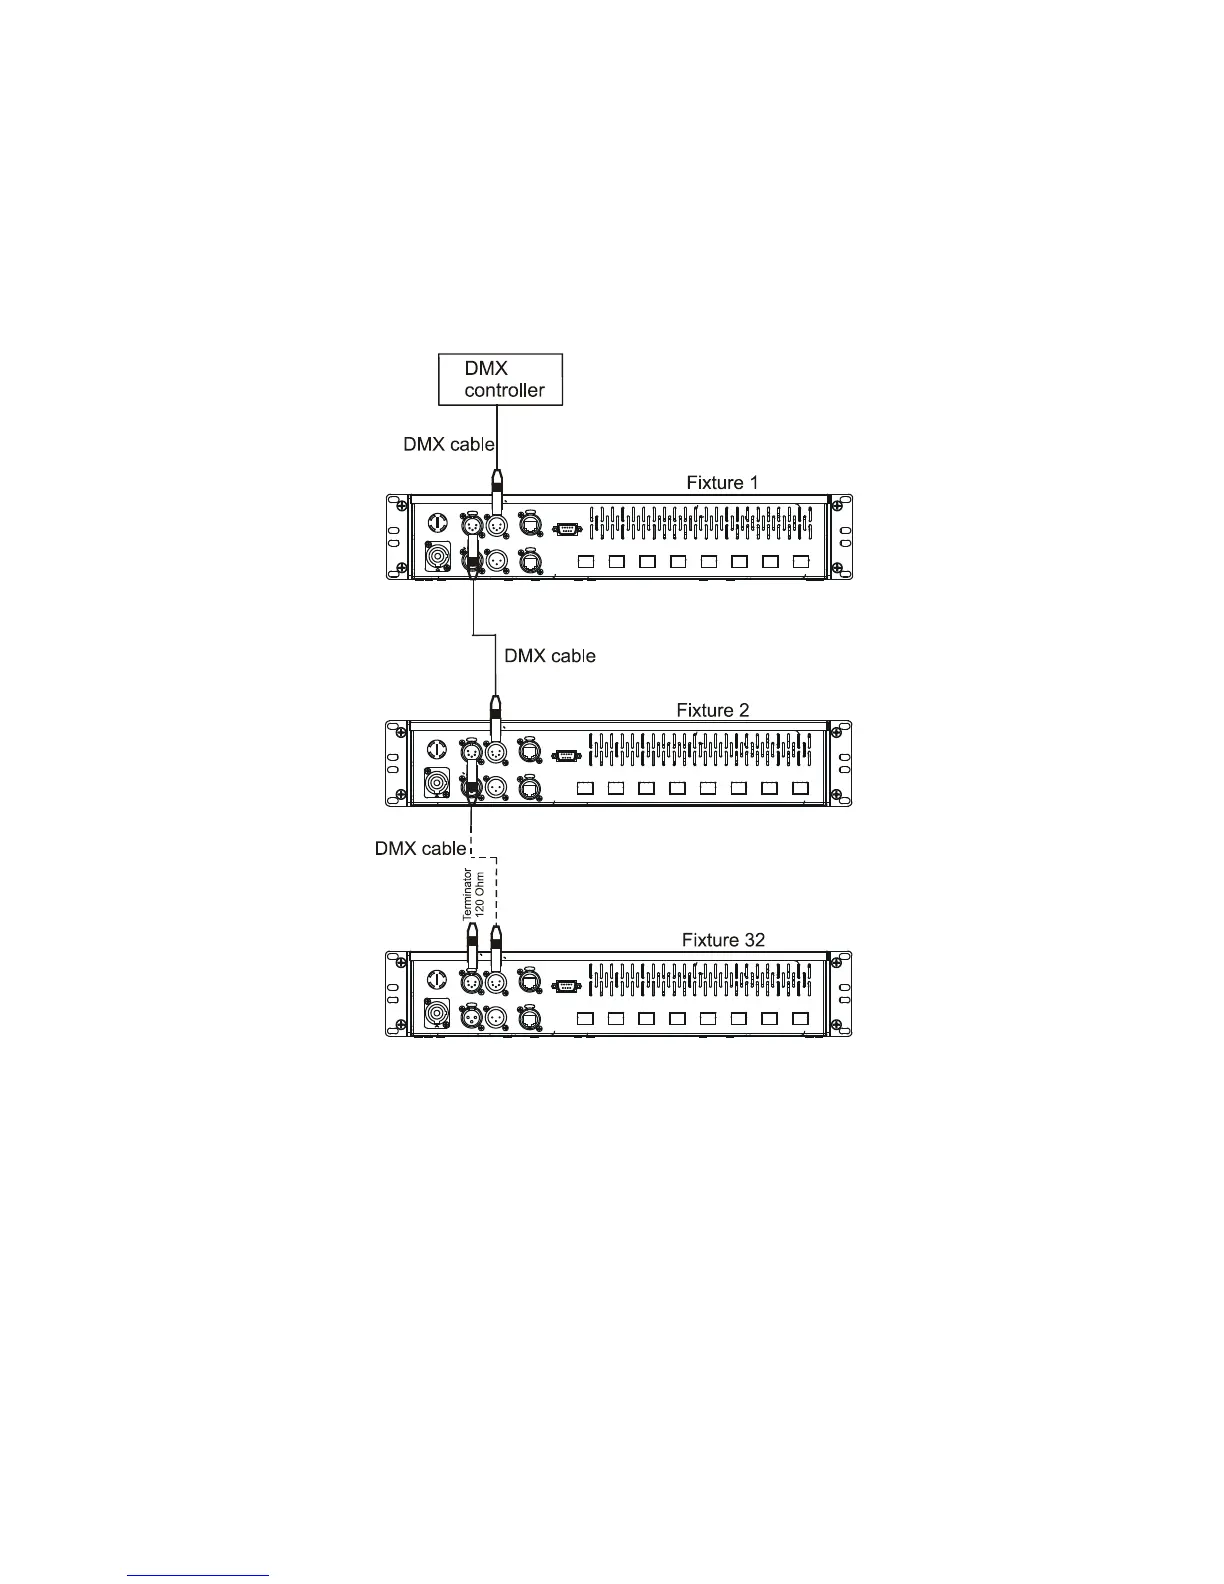
To build a DMX chain.
1. Unplug xtures from the mains before installation.
2. Connect the LED modules to the xtures.You cannot combine RGB and RGBW modules
(e.g. ArcSource 6 RGB and ArcSource 7 RGBW) on the same LEDs output.
3. Connect the DMX controller to the rst xture
4. Connect xtures each other. Max. 32 xtures may be connected on a DMX link. Terminate the DMX link
by installing a termination plug in the output of the last xture. The termination plug is a male 3-pin/5-pin
XLR plug with a 120 Ohm resistor soldered between Signal (–) and Signal (+).
5. Connect xtures to the mains
6. Set desired DMX address on each xture (see the chapter "Control board").
Note: You cannot combine RGB andRGBW modules on one LED output as the current circle of the white LEDs
will not be closed ( white LEDs will not lit). All modules have to be either RGB or RGBW on one LED output..
7. Ethernet operation
The xtures on a data link are connected to the Ethernet network with an Art-Net communication protocol. The
control software from PC (or lighting console) has to support the Art-Net protocol.
The Art-Net communication protocol is a 10 Base T Ethernet protocol based on the TCP/IP. Its purpose is to
allow transfer of large amounts of DMX 512 data over a wide area using standard network technology.
An IP address is Internet protocol address. The IP uniquely identies any node (xture) on a network.
The Universe is a single DMX 512 frame of 512 channels.
The ArcPower 384 Rack Mount is equipped with 8-pin RJ- 45 socket for Ethernet input. Use a network cable
category 5 (with four “twisted” wire pairs) and standard RJ-45 plugs in order to connect the xture to the network.
Patch cables that connect xtures to the hubs or LAN sockets are wired 1:1, that is, pins with the
same numbers are connected together: