7-10 LCD Assembly Replacement Chapter 7 — Assembly Replacement
7-12 PN: 10580-00324 Rev. N S412E MM
7-10 LCD Assembly Replacement
This procedure provides instructions for removing and replacing the Liquid Crystal Display (LCD) once the
Main/VNA PCB assembly has been separated from the S412E.
1. Open the case as described in Section 7-2 “Opening the S412E Case”.
2. Remove the Main/VNA PCB assembly as described in Section 7-3 “PCB Assembly Replacement”.
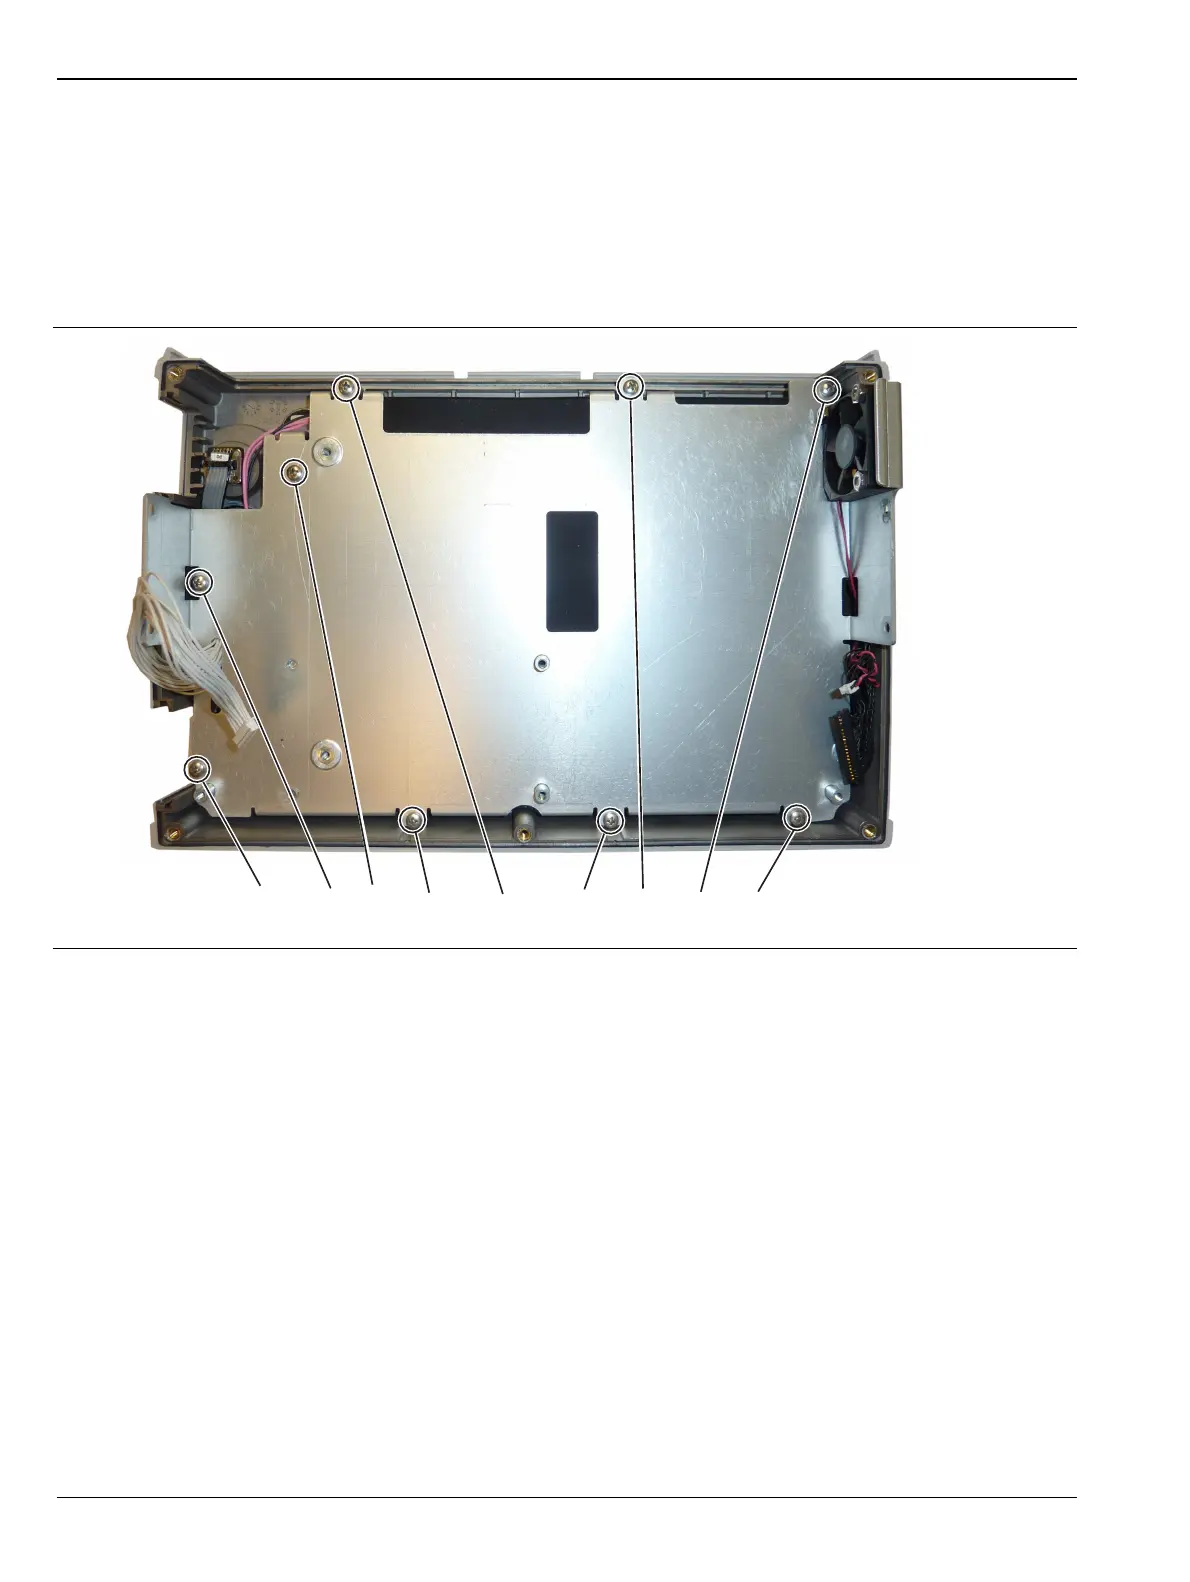
3. Remove the 9 screws connecting the LCD Assembly to the front half of the case (Figure 7-13).
Figure 7-13. Removing the LCD Assembly
Remove the 9 screws holding the LCD Assembly to the case.