E-ITN 10
Installation and service manual M2015/04b [EN]
7.6. INSTALLATION ON PANEL RADIATORS
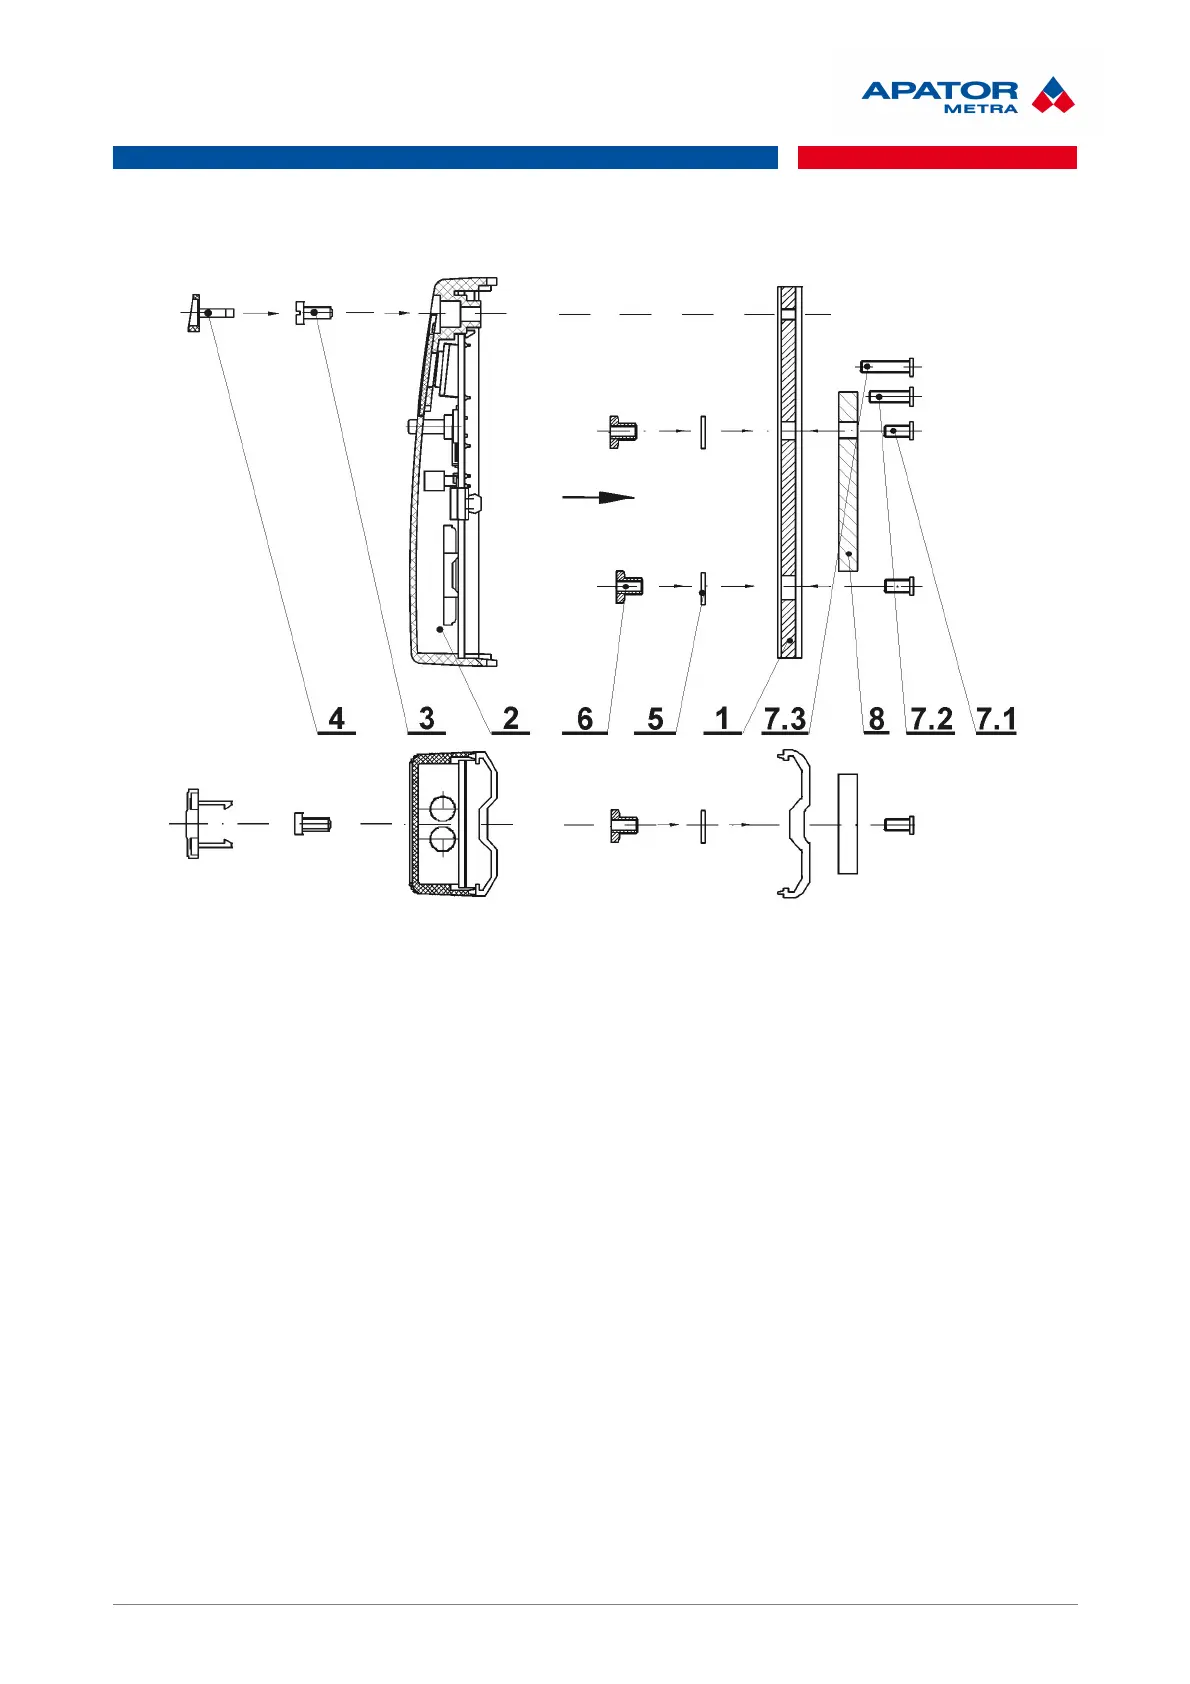
1 Back plate 6 Nut M3 spec.
2 Allocator body 7.1 Bolt M3x6
3 Bolt M3x8 7.2 Bolt M3x10
4 Seal 7.3 Bolt M3x12
5 Washer 4 ČSN 02 1746.25 8 Spacer
7.6.1. Installation on panel radiators
E-ITN 10 back plate should be installed on the panel radiators with two welded bolts thread M3 and
special nuts as follows:
• mark the place for both welding bolts on the radiator,
• remove the paint within the diameter of 10 mm on the marked places,
• weld the bolts to the radiator with two-head welding pistol,
• if one-head welding pistol is used, second bolt have to be in distance 39±1 mm towards the upper
edge of the radiator, remove the paint within the diameter of 10 mm on the marked place,
• attach back plate to the bolts and than to the radiator, screw the nuts to the bolts with socket wrench
M7,
• tighten the nuts to a torque 1 Nm,
• place the allocator into the back plate profile groove from bottom, align it with the base plate and fix
allocator with bolt M3x8 in this position,.
• now secure the device with seal (marked seal should be inserted into the holes in the upper part of
the allocator) against unauthorized manipulation.
24 / 39
 Loading...