Align the tall thread stand so the loop is
directly over the top of the spool pin.
Use a #8 metric wrench or a pair of pliers
to tighten the bottom nut on the post
tightly against the bottom plate, holding
the posts in position.
Setting Bobbin Fill Level
The APQS Bobbin Winder can be set for either L or M size bobbins and will need to be set up prior to the first
bobbin fill. To help the bobbins wind more evenly, add one thick and one thin washer to the pin where the
bobbin is mounted before adding the empty bobbin. The winder uses an optical sensor to ‘see’ how full the
bobbin is. This sensor is adjusted by loosening the two mounting screws on the sensor housing with a Phillips
screwdriver.
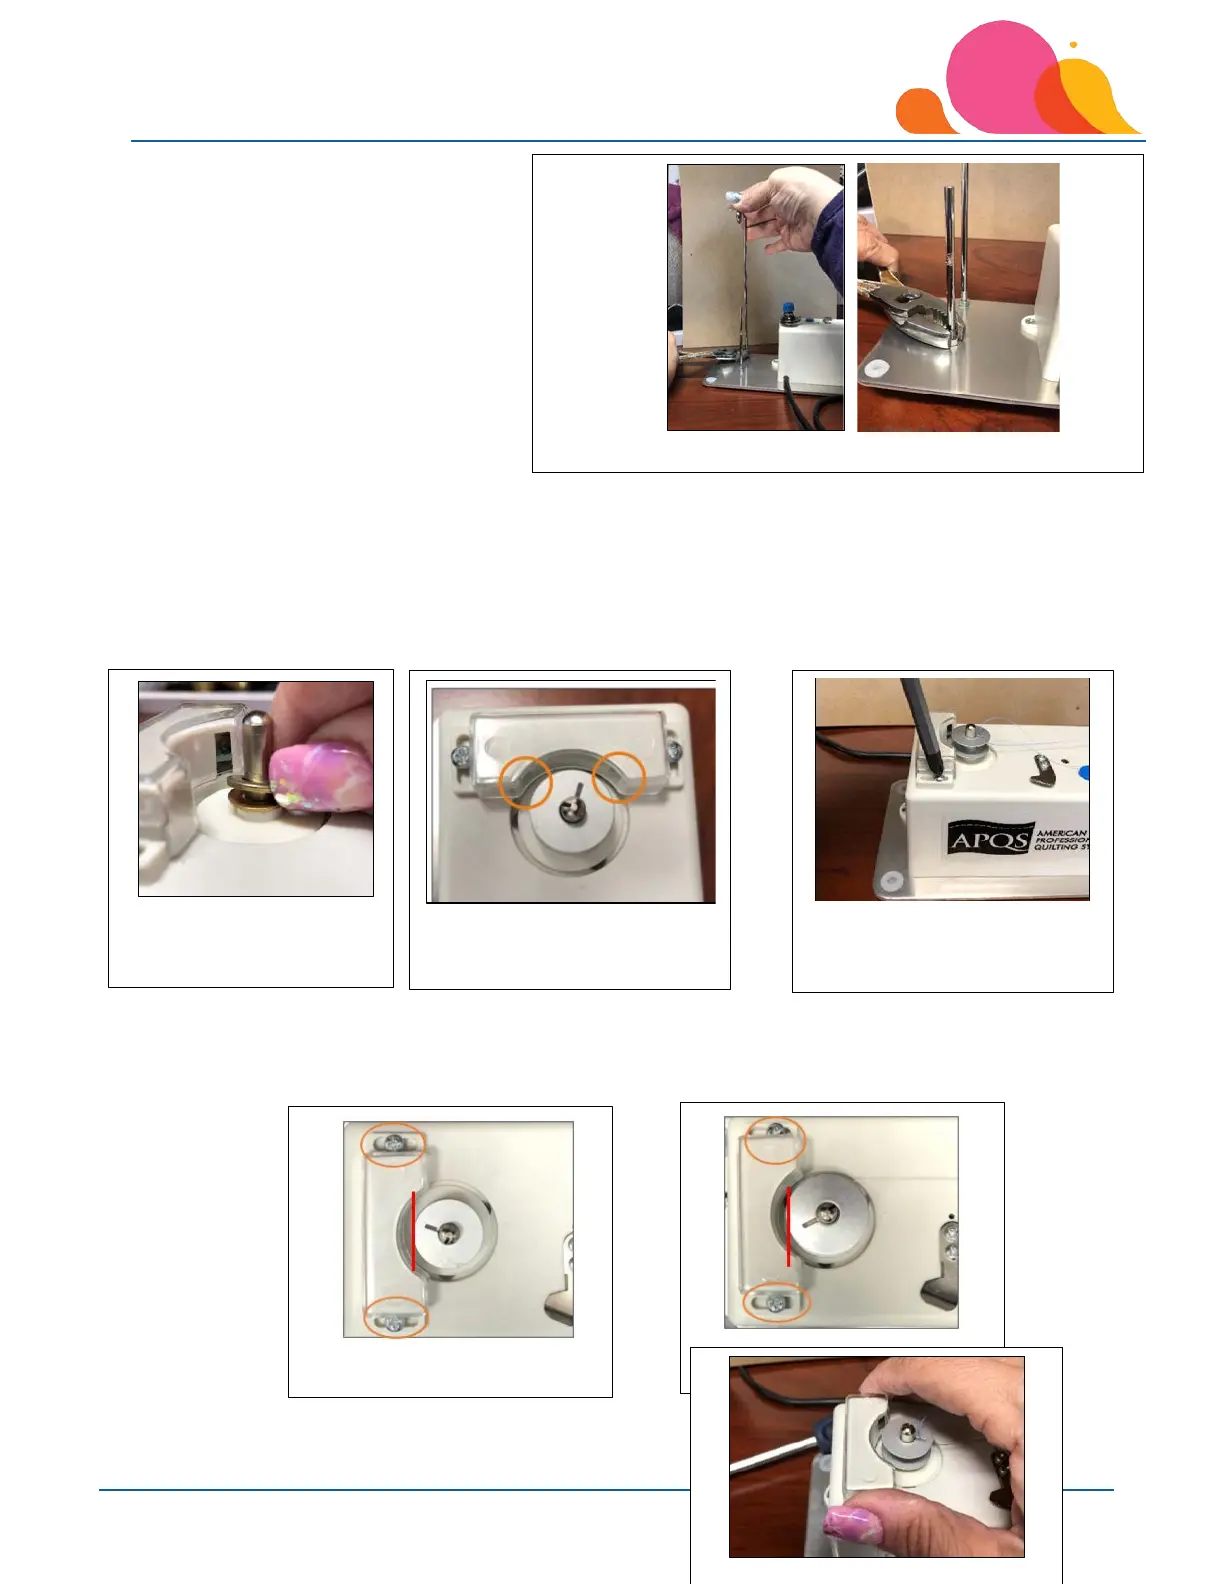
A ‘preliminary setting’ would be similar to what is shown below, depending on bobbin size. The line is a visual
representation of where the sensor is ‘seeing’ the thread level on each bobbin size. For the L size, the mounting
screws are positioned just to the left of center in the opening for the screw….the M size is just to the right, as
shown below.
Once the screws have been loosened (about 2 full turns
4. Align the tall thread stand loop directly over the spool.
5. Add 1 thick and 1 thin
washer to the bobbin
6. Bobbin Fill Level Sensors
‘read’ across outer edge of
7. Sensor adjustment screws –
one on each side of the
sensor housing.
4. Preliminary setting for “M”
8. Preliminary setting for “L”
10. Adjusting sensor position to set