counterclockwise is enough), move the sensor housing so
it is positioned similarly to the pictures on the previous
page. A final adjustment may be necessary once a bobbin
has been wound, but this is a good starting point.
Threading the Winder and Winding a Bobbin
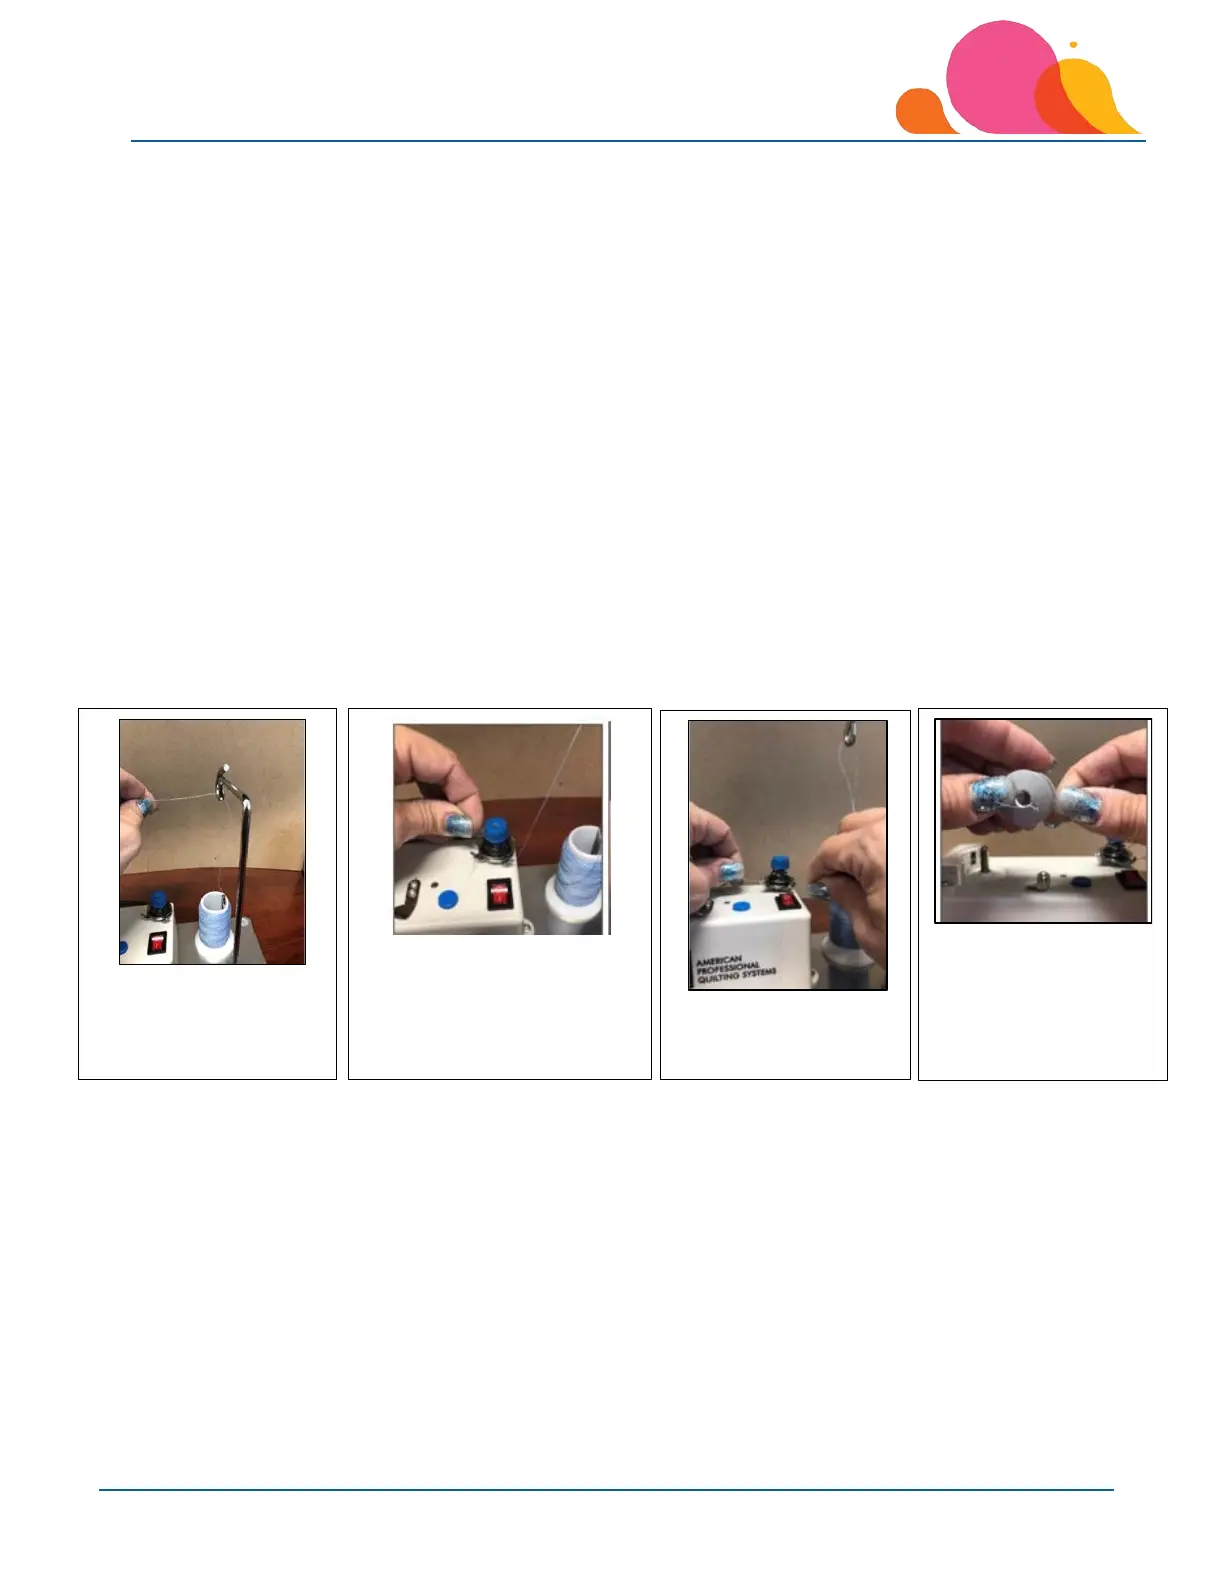
Using a thread net on the cone is advised due to the speed that the thread will come off the cone. Once the net
is on the cone, pull the thread up through the tall stand, going from right to left as shown below, and then down
to the tension control. Start at the thread guide closest to the cone, and then wrap the thread around the
tension discs counterclockwise and through the thread guide closest to the bobbin. Once the thread is through
the tension discs, pull on both sides to make sure the thread is seated between the tension discs. Then, if your
bobbin has slots in the center, run the thread through the slot towards the center and out the top of the bobbin.
If your bobbin does not have slots, leave the bobbin on the post and wrap the thread around the bobbin
counterclockwise 4-5 revolutions to get the winding process started.
5. Adjusting sensor
position to set for
bobbin size.
3. Pull on thread to
seat between
2. Place thread through the
first guide, around the
tension discs counter-
clockwise and through the
second guide.
1. Pull thread up and
over the thread stand
from the right to the