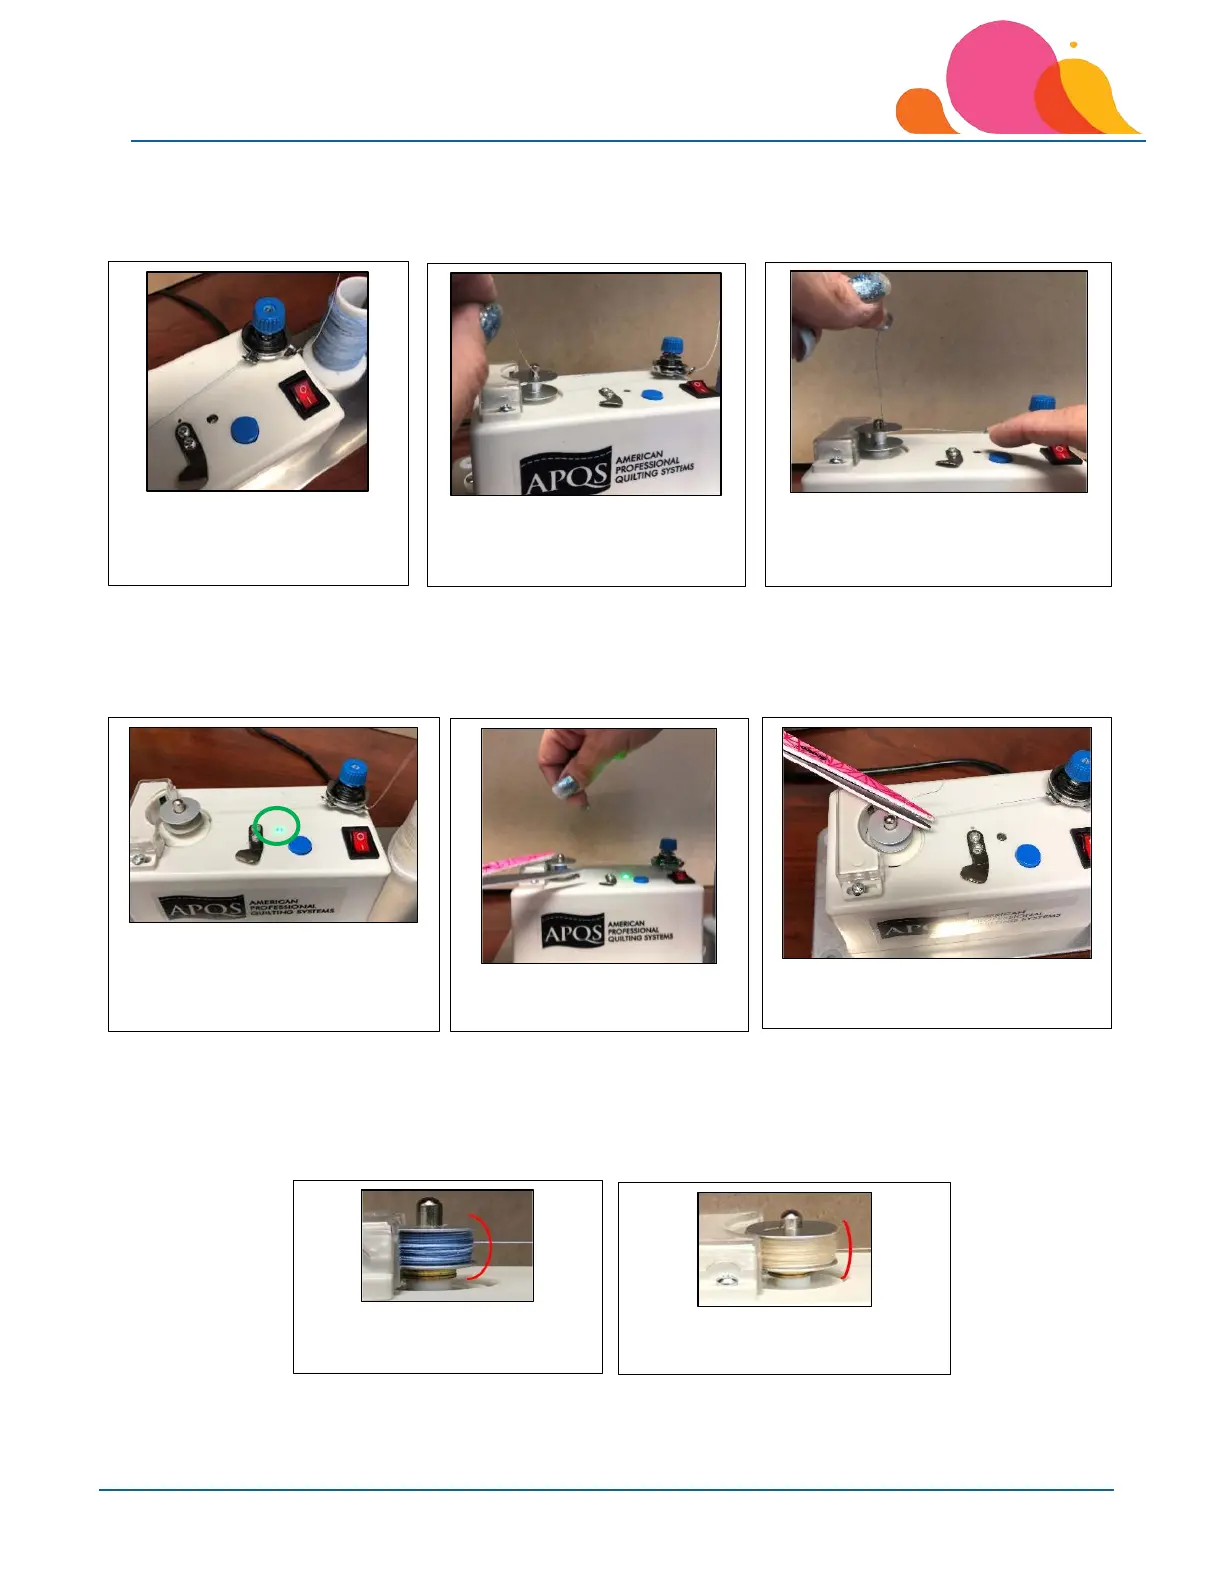
Turn the power on to the bobbin winder by pushing the switch towards the ‘I’ side – the red light in the switch
should come on at that point. Hold onto the thread tail gently with a little bit of tension and push the blue button
down. The winder motor should start turning the bobbin and start the winding process.
The green light will be on when the motor is running. Once the winding process has started, you can either give
the thread tail a quick ‘tug’ to break the thread, or touch with the blade of a scissors to cut close to the bobbin.
You can also push blue button again to shut motor off to cut the thread tail close to the bobbin.
The motor will shut off once the bobbin is filled. The first photo shows the bobbin filled without any ‘assistance’
while winding – since the thread will move up and down on the bobbin of its own accord, assisting the filling
towards the top and bottom of the bobbin will ensure more thread is wound on the bobbin. The second photo
was done with minimal assistance with a finger or pencil to guide the thread towards the top and bottom of the
bobbin as it filled.
7. Push the blue button to start
the motor and winding
process.
6. Gently hold onto the thread
tail with slight tension.
5. Push switch towards “I” to
turn power on – switch
will glow red.
10. Motor stopped to allow thread
to be trimmed.
8. Green light = motor on
9. Touch tail with scrissors
to trim while winding.
12. Bobbin filled without any
assistance during winding.
11. Bobbin filled without any
assistance during winding.