18 Ultrasound Controller Manual
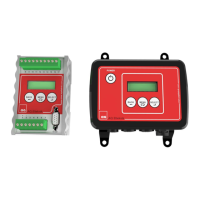
1 LIQ 3 cal Lev Sw
2 set 4 1234
Mounting the Level Switch
How to mount the Level Switch on the container is described in Level Switch manual.
Level Switch start-screen
When power is applied, the Level Switch start-screen is displayed showing Lev Sw on first line
to the right signifying this is Level Switch start-screen. . On the second line to the right is written
1234 which shows the state of each of the four relays. A dark background signifies a closed
relay.
To the left are four small digits signifying Level Switch 1 2 3 and 4 with three-letter-text following
each digit showing information about each Level Switch:
AIR air is detected
LIQ liquid is detected
cal Waiting for calibration of Air and/or Liquid
set parameters need to be set
-- Level Switch disconnected
err error – see troubleshooting
™™™ Level Switch is not existing
Example: Level Switch 1 detecting liquid, Level Switch 2 connected but not set, Level Switch 3
need to be calibrated, Level Switch 4 not existing, Relay1 closed.
SETTINGS
Through the SETTINGS-menu the parameters of the Level Switch can be set.
Select SET Type AND Technique to set it to either Type: KS or LS, Technique: ECHO or Type: RS,
Technique: WR or Type KS or LS, Technique WR or No Level Switch.
Select SET DISTANCE to reflecting wall to set it between 46mm (minimum) and 600mm (maximum).
This parameter is needed if the “ECHO” technique is chosen and should be set to actual distance
±10%.
Select SET FILTER to set the filter-time between 0,5s 1s 2s or 4s. It determines how fast the Level
Switch detects air or liquid.
Select SET Jacket to set the distance in mm between jacket and container. Set it only if container
has a jacket.
Select SET FREQUENCY to set the measurement frequency. If set to Auto, the best frequency
(1=1,3MHz, 2=1,5MHz, 3=1,7MHz, 4=2,0MHz or 5=2,2MHz) is automatically selected. Changing
the FREQUENCY does not change the calibration.
Select SET RELAY to set how the relays should act. Each relay have one normally open contact
(at power off and when sensor is not connected the relay is open).). There are four relays and
each relay can be controlled independently by any Level Switch. Choose between Closed with air
or closed with liquid. It is also possible to set one relay to be controlled by two Level Switches.
Example (pump filling a container): LS1 is placed high and LS2 is placed low on a container.
The relay is set to: Open LS1 Liq, Closed LS2 Air. When liquid level drops below LS2, the relay closes
(starting the pump to fill the container). When liquid level rises to LS1, the relay opens (stopping
the pump).
Example (pump emptying container): LS1 is placed high and LS2 is placed low on a container.
The relay is set to: Open LS2 Air, Closed LS1 Liq. When liquid level rises to LS1, the relay closes
 Loading...