28/02/2020 Page 10 of 41 ARB Copyright 2018 3789452
If you have any queries regarding the installation of this product please contact the distributor from whom it was purchased, or alternatively the ARB office in your state.
Head Office – ARB Corporation Ltd VIC: 42-44 Garden Street, Kilsyth, Victoria, 3137 Tel: (03) 9761 6622 Fax: (03) 9761 6807
WA:(08) 9244 3553 NSW: (02) 9821 3633 ACT: (02) 6280 7475 SA: (08) 8244 5001 QLD: (07) 3872 3872 NT: (08) 8947 2262 TAS: (03) 6331 4190
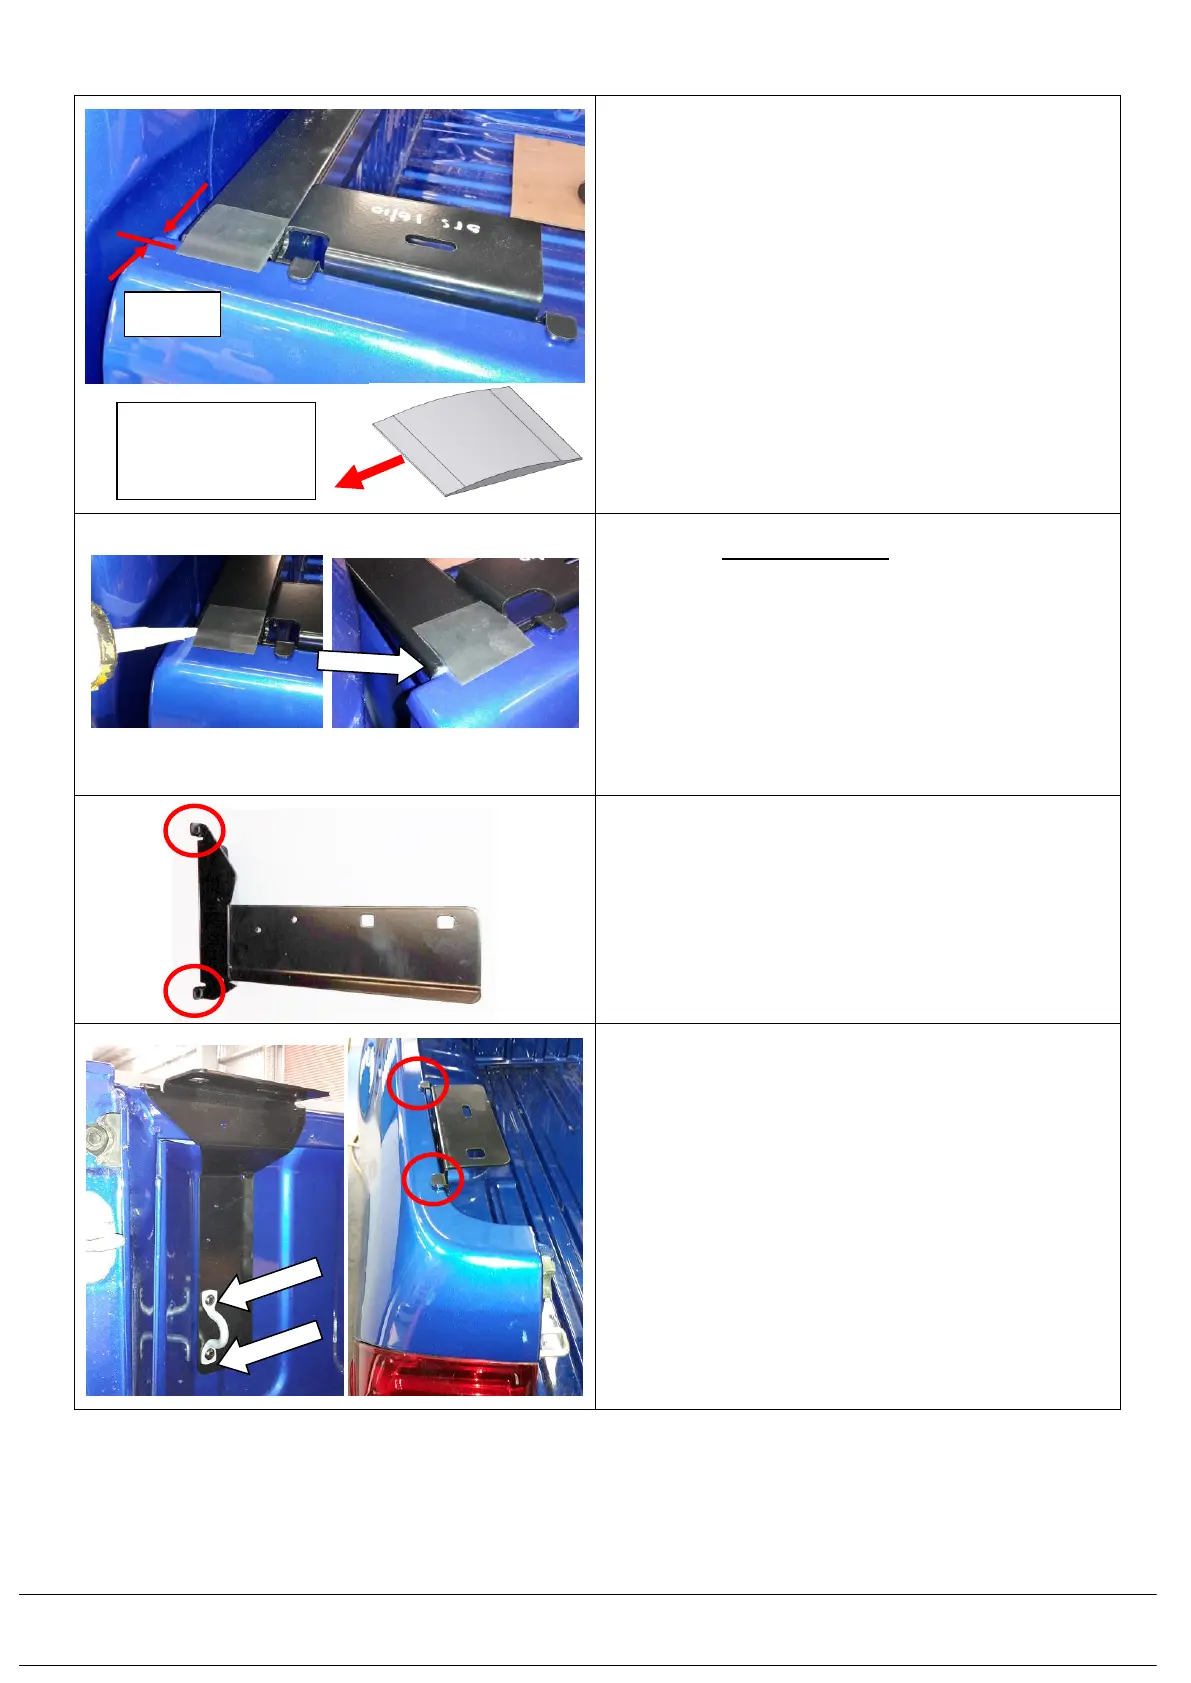
2.14) After removing the backing paper to expose the
adhesive, place on the tub bridge rubber self-
adhesive ramps (668PM005) at either end of the
front tub rail bracket, aligning them centrally to the
width of the front head board rail bracket. The
bridge should lip over onto the side tub rails
by 10mm only.
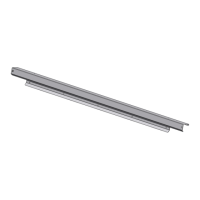
2.15) Apply neutral cure silicon to the ends of the
rubber bridge extrusions and seal down the front
side of the corner of the tub between the tub and
the front head board rail bracket. Clean off the
excess carefully with a rag applied sparingly with
silicon remover or wax and grease remover. The
bridge seal provides a transition from the front tub
head board rail bracket to the top of the side tub
walls to provide a sealing surface to the seal that
is mounted on the underside of the canopy.
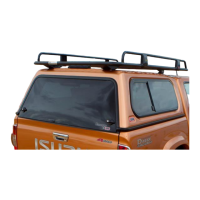
2.16) To a pair of rear corner tub mounting brackets
(668PD062R&L), apply self-adhesive bumpons
(665076) to the two tags on each bracket.
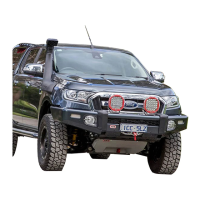
2.17) Bolt the rear corner brackets (L is shown) to the
lower tie down hook mounting points in the tub.
Insert 2 off M8x25mm Torx bolts (6151625)
through the retained tie down hook, through the
bracket and into the tub. Ensure the top bracket
tags engage to top of the sides of the vehicle tub.
Do bolts up to 22Nm.
This side to
outside of tub
sides