28/02/2020 Page 16 of 41 ARB Copyright 2018 3789452
If you have any queries regarding the installation of this product please contact the distributor from whom it was purchased, or alternatively the ARB office in your state.
Head Office – ARB Corporation Ltd VIC: 42-44 Garden Street, Kilsyth, Victoria, 3137 Tel: (03) 9761 6622 Fax: (03) 9761 6807
WA:(08) 9244 3553 NSW: (02) 9821 3633 ACT: (02) 6280 7475 SA: (08) 8244 5001 QLD: (07) 3872 3872 NT: (08) 8947 2262 TAS: (03) 6331 4190
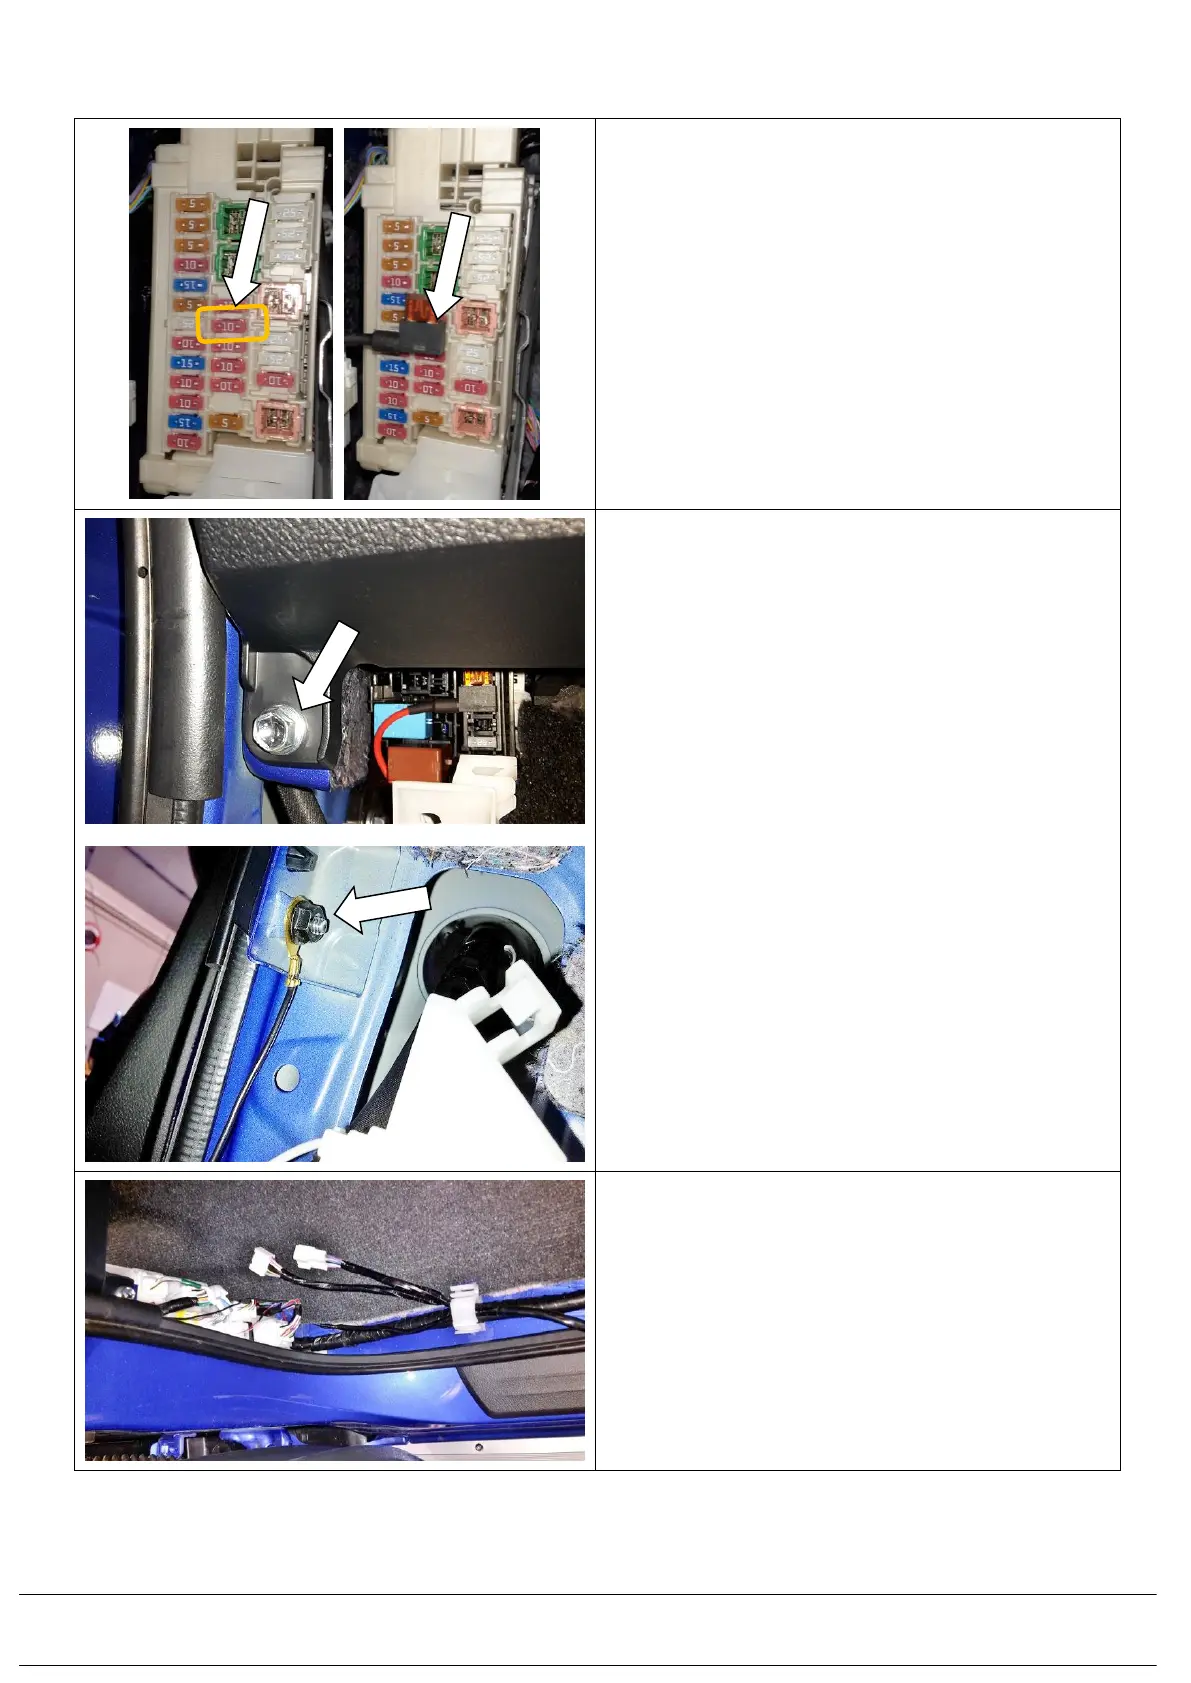
IF THERE ARE NO 10A FUSES, REFER TO THIS
STEP. OTHERWISE CONTINUE BELOW.
3.7) Remove the 10A fuse second down in the middle
column.
3.8) Insert the loom blade fuse adaptor assembly into
the location where the 10 Amp fuse was removed.
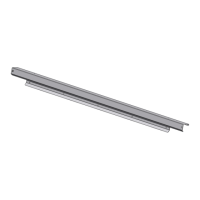
3.9) Locate the mounting bolt for the dash board near
the fuse box. From the main vehicle patch loom,
locate the eye terminal on the black wire. Place it
over the back of the dash board bolt on the inside
and secure it in place with an M6 flange nut
(6151173).
3.10) Route the main patch loom behind the existing
vehicle connectors in the kick panel area down to
the clips in the scuff plate area. Clip the main patch
loom into the clips leaving the 2 large connectors
on the main patch loom free.