11
SP290
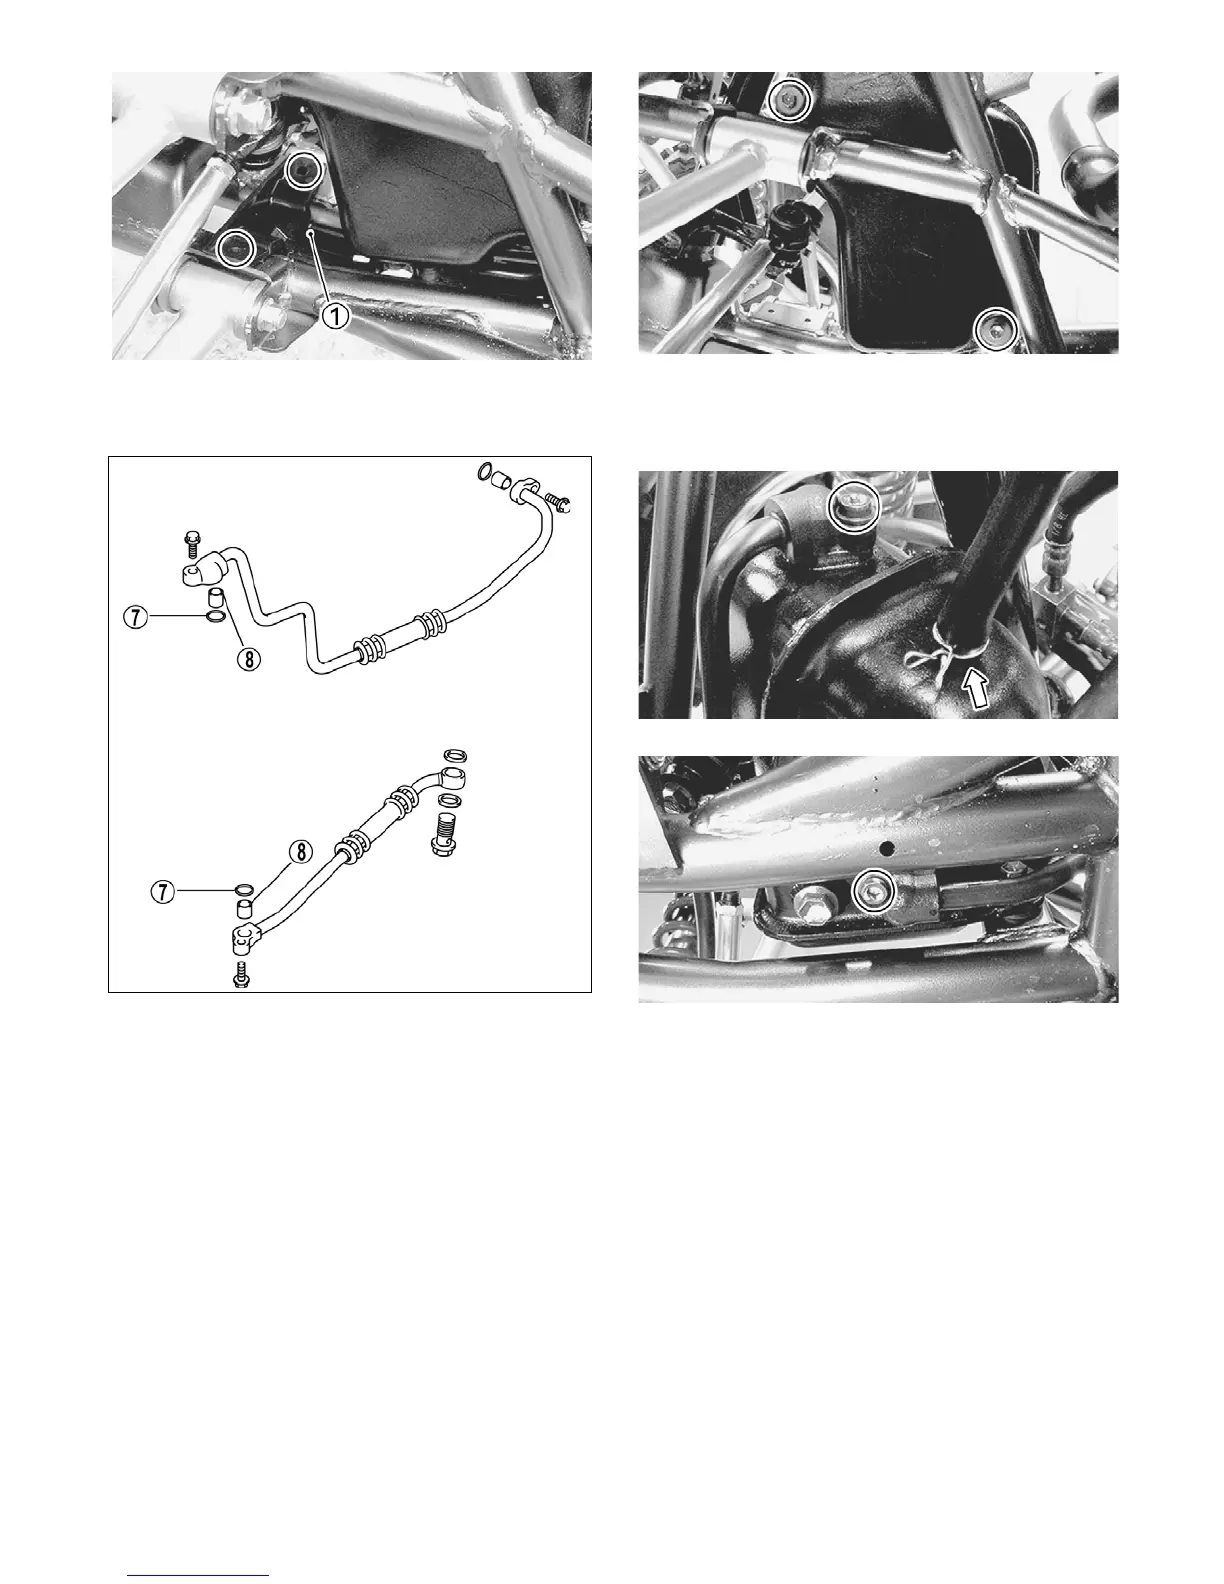
4. Remove the oil lines from the tank. Account for the
two O-rings (7) and two alignment pins (8).
ATV2181A
5. Remove the cap screws securing the tank to the
frame; then remove the overflow hose and remove
the tank. Account for the tank mounting isolators and
two spacers.
NOTE: If the tank islotaors are oil soaked or dam-
aged, new ones should be installed.
INSTALLING
1. Ensure that the tank mounting isolators are service-
able; then install the tank onto the frame and tighten
the cap screws securely.
SP291
2. Install new O-rings to the upper and lower tank fit-
tings; then secure the fittings to the tank and tighten
the cap screws securely. Install the overflow hose.
SP292
SP293
3. Fill the oil tank with the correct amount of recom-
mended engine oil. See Section 2.
4. Install the radiator (see Radiator in this section) and
fill the cooling system.
5. Install the body (see Section 8); then install the seat.
6. Start the engine and check for coolant or oil leaks;
then recheck the proper coolant and oil levels. See
Section 2.