V 11/21 64
BUTTONS
Temperature setting
With the unit switched on, press the button to increase the set temperature by 1 ° C and the button to decrease it.
The temperature adjustment range is between 16 and 30 ° C.
To set the desired temperature more quickly, hold down the two buttons simultaneously for 2 seconds.
FAN BUTTON
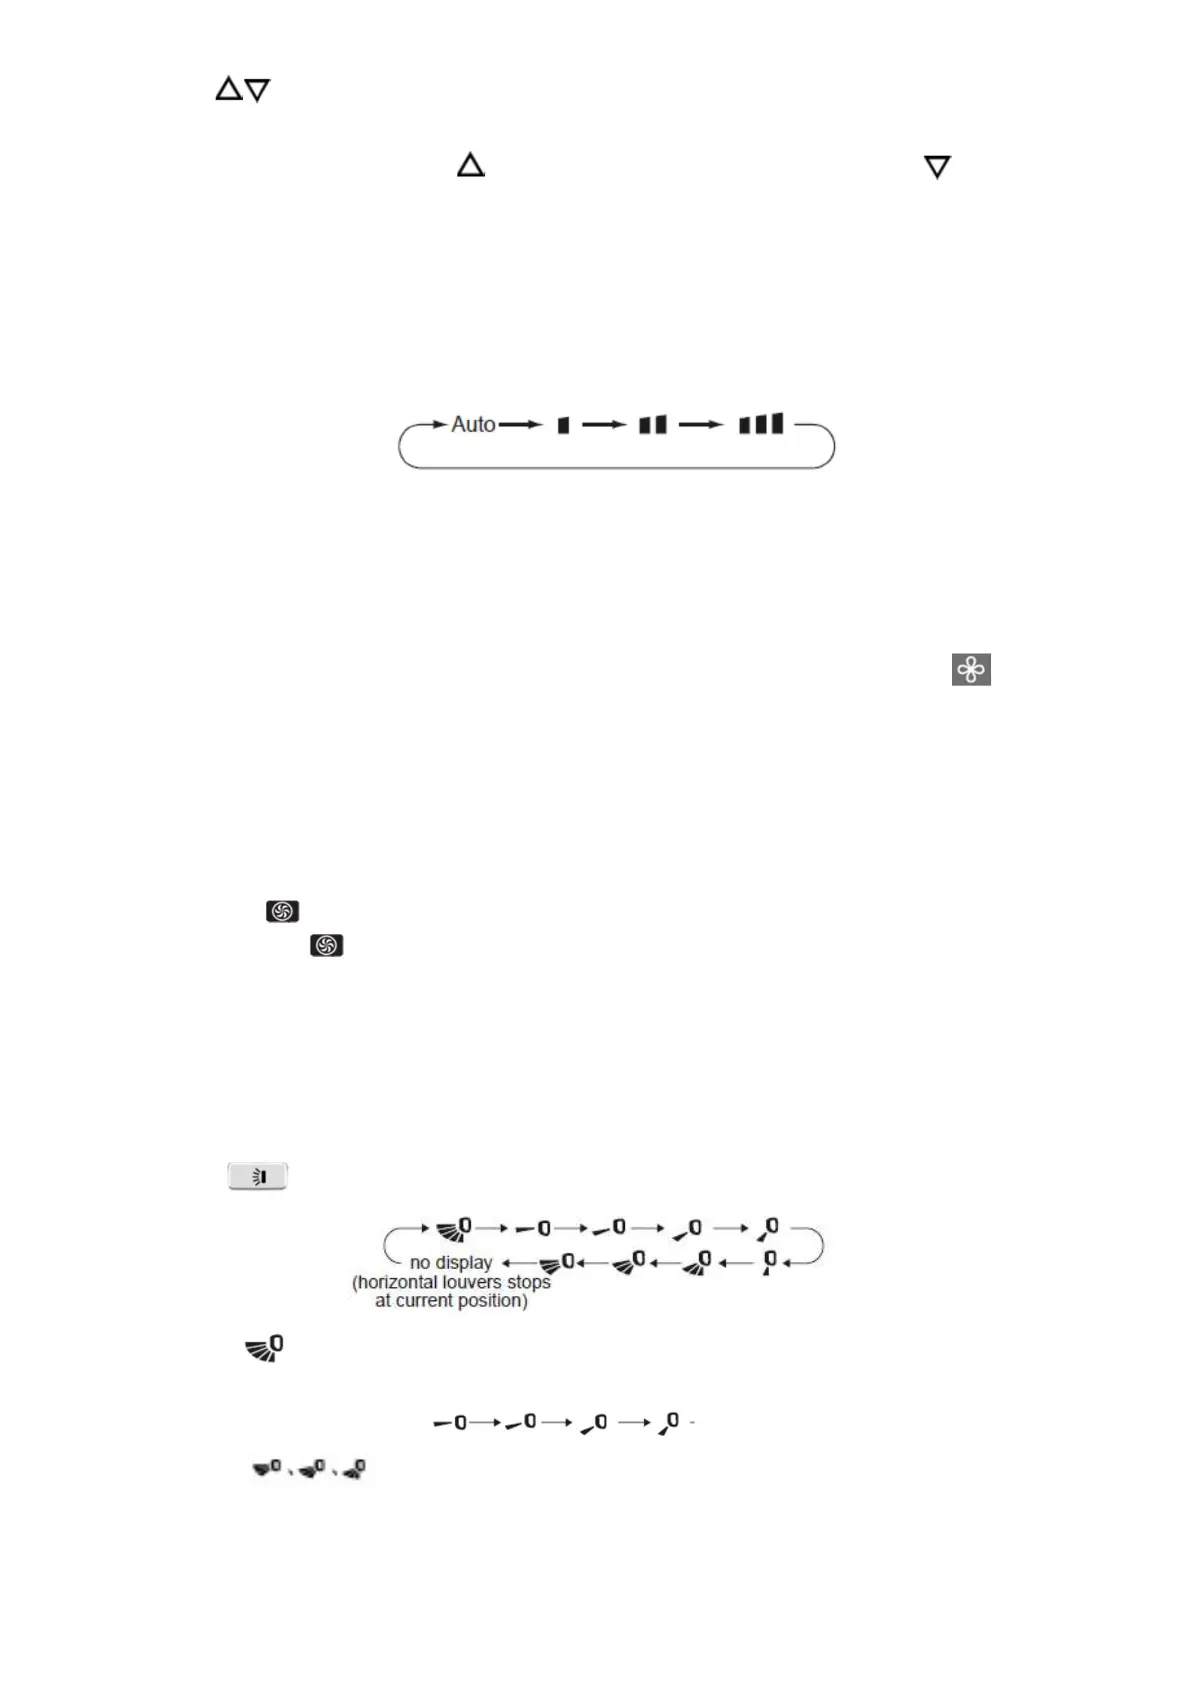
Adjustment of the ventilation speed
With the unit turned on, press the FAN button to adjust the fan speed in the following sequence: Auto, Low, Medium,
High.
Note:
In AUTO mode, the ventilation will work with the factory settings.
If the operating mode is changed, the fan speed is memorized;
In Dry mode, the fan speed is low and cannot be adjusted.
X-FAN function
By holding down the FAN button for 2 seconds in Cool (cooling) or DRY (dehumidification) mode, the icon will appear
and the internal fan will continue to operate for a few minutes in low ventilation speed, even when the unit is turned off.
This is to allow the evaporator of the indoor unit to dry, thus avoiding the formation of mold. When the unit is switched on,
the X-fan function is not set by default.
This function is not available in AUTO, fan and heat modes.
If you want to stop the X-fan function, press and hold the FAN button again for 2 seconds.
Turbo function setting
In Cool or Heat mode, press the TURBO button to set the Turbo function.
When is displayed , it means that the Turbo function is activated.
When it is not displayed , it means that the Turbo function is turned off.
When the Turbo function is on, the unit runs at full speed to quickly achieve cooling or heating. When the Turbo function
is deactivated, the unit operates at the set fan speed.
Right / left swing setting
Function not available.
Up / down swing setting
Press the key to circularly adjust the swing angle up / down in this sequence:
When selected , the flap automatically swings at the maximum angle up and down.
When one of these symbols is selected , the flap remains fixed in that position.
These positions correspond to a fixed angle oscillation.
They may not be available: in this case the flap will swing automatically.
Hold the button down for 2 seconds to fix the flap in the desired position: when the flap reaches the desired position,
release.