EasyManua.ls Logo

Aries 205041 - User Manual

Aries 205041
5 pages
Print Icon
To Next Page IconTo Next Page
Loading...
PAGE 1 • 205041-INS-RB • 800.798.0813 • NEED ASSISTANCE? ARIESAUTOMOTIVE.COM
Level of Difficulty
Easy
Parts List
1 Driver / left side bar
1 Passenger / right side bar
1 Driver / left
front mounting bracket
1 Passenger / right
front mounting bracket
2 Mounting bracket, rear
2 Bolt plate, M8
5 Hex bolt, M8
7 Flat washer, M8
7 Lock washer, M8
2 Hex nut, M8
2 Plastic retainer, M8
4 Hex bolt, M10
4 Flat washer, M10
4 Lock washer, M10
4 Bolt / nut plate, M12 stud
4 Hex bolt, M12
4 Flat washer, M12 x 32mm
4 Flat washer, M12
8 Lock washer, M12
4 Hex nut, M12
4 Plastic retainer, M12
Scan
for helpful
install tips
INSTALLATION MANUAL 205041
Tools Required
Torque wrench Socket, 13mm
Utility knife Socket, 16mm
Level Socket, 18mm
Product Image
Brackets
Front
Rear
Notes and Maintenance
Before you begin installation, read all instructions thoroughly.
Proper tools will improve the quality of installation and reduce the time required.
To protect the product, wax after installing. Regular waxing is recommended
to add a protective layer over the finish. Do not use any type of polish or wax
that may contain abrasives that could damage the finish.
For polished, gloss and other smooth finishes,
polish may be used to clear small scratches and scuffs on the finish.
Mild automotive detergent may be used to clean the product.
Do not use dish detergent, abrasive cleaners, abrasive pads,
wire brushes or other similar products that may damage the finish.
Refer to the table on page 2 when securing hardware during the
installation process to help prevent damage to the product or vehicle.
Question and Answer IconNeed help?

Do you have a question about the Aries 205041 and is the answer not in the manual?

Summary

Notes and Maintenance

Torque Specifications

Installation Steps

Step 1: Locate Mounting Locations

Identify the two mounting points underneath the vehicle on the driver's side.

Step 2: Prepare Driver-Side Front Location

Remove tape plugs and insert M8 bolt plate and M12 bolt/nut plate with retainers.

Step 3 A: Secure Driver-Side Front Bracket (2015+)

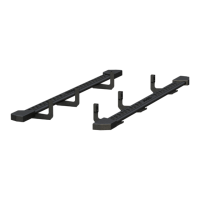
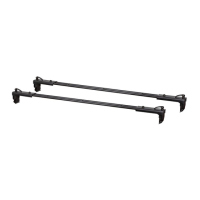
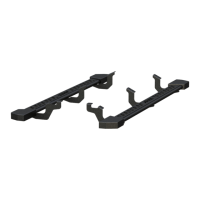
Attach driver-side front bracket using M12 hardware and M8 hex bolts with washers.

Step 3 B: Secure Driver-Side Front Bracket (Older)

Align M10 nut for rocker panel and secure bracket with M10 bolt, lock washer, and nut.

Step 4: Install Rear Bracket

Insert M12 bolt/nut plate for rear bracket, secure with retainer and hardware.

Step 5: Attach Side Bar to Brackets

Place side bar onto brackets, align holes, and attach with M10 bolts, lock washers, and washers.

Step 6: Adjust and Tighten

Adjust and level the side bar, then tighten all bracket and side bar connections.

Step 7: Locate Passenger-Side Mounting

Insert M12 bolt/nut plate and M8 bolt plate with retainers into passenger-side body panel.

Step 8: Secure Passenger-Side Front Bracket

Attach passenger-side front bracket using M8 and M12 hardware as specified.

Step 9: Complete Passenger Installation

Repeat steps 4-6 for the passenger side bar installation.

Overview

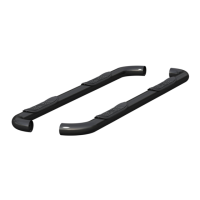
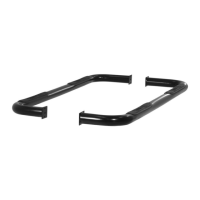
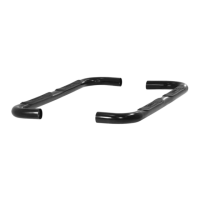
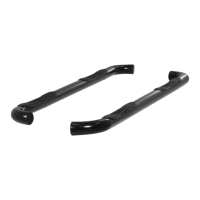
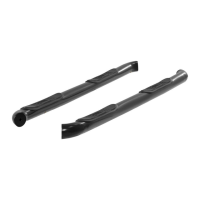
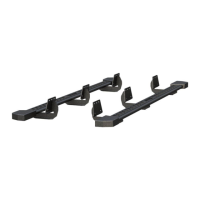
This document is an installation manual for ARIES 3" round side bars, part number 205041. These side bars are designed to be installed on a vehicle, providing a step for easier entry and exit, and potentially offering some side protection.

Function Description:

The ARIES 3" round side bars serve as an accessory for vehicles, primarily functioning as a step to facilitate ingress and egress. They are installed along the side of the vehicle, beneath the doors, providing a stable platform for users to step on. The design also contributes to the aesthetic appeal of the vehicle. The installation process involves securing mounting brackets to the vehicle's frame or rocker panels, and then attaching the side bars to these brackets. The manual details specific steps for both driver and passenger sides, and accounts for variations in vehicle models (e.g., 2015 and newer with factory inserts vs. older models without).

Important Technical Specifications:

  • Part Number: 205041
  • Product Type: 3" round side bars
  • Level of Difficulty: Easy (for installation)
  • Hardware: The installation utilizes a variety of bolts, washers, nuts, and bolt plates. Key hardware includes:
    • M6, M8, M10, and M12 hex bolts
    • M8, M10, and M12 flat washers
    • M8, M10, and M12 lock washers
    • M8, M10, and M12 hex nuts
    • M8 bolt plates
    • M12 bolt / M10 nut plates
    • M12 bolt / M12 stud plates
    • Plastic retainers (for holding bolt plates/studs in place during installation)
  • Torque Specifications: Specific torque values are provided for different bolt sizes to ensure proper and secure installation:
    • M6 bolt: 3 ft.-lbs.
    • M8 bolt: 7 ft.-lbs.
    • M12 bolt (first specification): 16 ft.-lbs.
    • M12 bolt (second specification): 28 ft.-lbs.
    • 1/4" bolt: 3 ft.-lbs.
    • 5/16" bolt: 7 ft.-lbs.
    • 3/8" bolt: 16 ft.-lbs.
    • 7/16" bolt: 20 ft.-lbs.
    • 1/2" bolt: 28 ft.-lbs. These torque settings are crucial for preventing damage to the product or vehicle and ensuring the long-term stability of the side bars.
  • Components: The system includes:
    • Driver / left side bar (1)
    • Passenger / right side bar (1)
    • Driver / left front mounting bracket (1)
    • Passenger / right front mounting bracket (1)
    • Rear mounting brackets (2)
    • Various fasteners as listed above.

Usage Features:

  • Enhanced Vehicle Access: The primary usage feature is providing a convenient step for easier entry and exit from the vehicle, especially for taller vehicles or individuals with mobility challenges.
  • Vehicle-Specific Fit: The installation instructions indicate a tailored fit for specific vehicle models, differentiating between "2015 and newer with factory inserts" and "2015 and older without factory inserts" for bracket installation, ensuring optimal compatibility and secure mounting.
  • Robust Construction: While not explicitly detailed, the use of various steel fasteners and the "3" round side bar" description imply a sturdy construction capable of supporting user weight.
  • Aesthetic Enhancement: The side bars are designed to complement the vehicle's appearance, adding a rugged or refined look depending on the vehicle style.
  • DIY Installation: The "Easy" level of difficulty and detailed step-by-step instructions suggest that the product is designed for do-it-yourself installation by individuals with basic mechanical skills and tools.

Maintenance Features:

  • Regular Waxing: To protect the product's finish, regular waxing is recommended after installation. This creates a protective layer that helps maintain the appearance and longevity of the side bars.
  • Abrasive Avoidance: Users are explicitly warned against using polishes or waxes that contain abrasives, as these can damage the finish. Similarly, dish detergent, abrasive cleaners, abrasive pads, and wire brushes should be avoided for cleaning.
  • Cleaning Recommendations: Mild automotive detergent is recommended for cleaning the product. For polished, gloss, and other smooth finishes, polish can be used to clear small scratches and scuffs, indicating a degree of reparability for minor surface imperfections.
  • Periodic Inspection: After installation, periodic inspections are advised to ensure that all mounting hardware remains tight. This is critical for safety and to prevent the side bars from becoming loose or detaching over time. The torque specifications provided are essential for these inspections.
  • Assistance Availability: The manual provides contact information (800.798.0813 and ARIESAUTOMOTIVE.COM) for assistance, indicating manufacturer support for maintenance and troubleshooting.
  • Tool Requirements: The maintenance and installation processes require common tools such as a torque wrench, utility knife, level, and various sockets (13mm, 16mm, 18mm), making it accessible for most users.

Aries 205041 Specifications

General IconGeneral
BrandAries
Model205041
CategoryAutomobile Accessories
LanguageEnglish

Related product manuals