EasyManua.ls Logo

Aries 2074140 - User Manual

Aries 2074140
2 pages
Print Icon
To Next Page IconTo Next Page
Loading...
PAGE 1 • 2074140-INS-RA • 800.798.0813 • NEED ASSISTANCE? ARIESAUTOMOTIVE.COM
Product Image
Notes and Maintenance
Before you begin installation, read all instructions thoroughly.
Proper tools will improve the quality of installation and reduce the time required.
For black finishes, mild soap may be used to clean the product.
Refer to the table to the left when securing hardware during the
installation process to help prevent damage to the product or vehicle.
Level of Difficulty
Easy
Parts List
1 Driver / left side rocker step
1 Passenger / right side rocker step
12 Flat washer, M8
12 Serrated flange hex nut, M8
Tools Required
Torque wrench Socket, 13mm
Scan
for helpful
install tips
Front
Rear
INSTALLATION MANUAL 2074140
Torque Specifications
METRIC
M6 bolt 3 ft.-lbs.
M8 bolt 7 ft.-lbs.
M10 bolt 16 ft.-lbs.
M12 bolt 28 ft.-lbs.
SAE
1/4" bolt 3 ft.-lbs.
5/16" bolt 7 ft.-lbs.
3/8" bolt 16 ft.-lbs.
7/16" bolt 20 ft.-lbs.
1/2" bolt 28 ft.-lbs.
Question and Answer IconNeed help?

Do you have a question about the Aries 2074140 and is the answer not in the manual?

Summary

Parts List

Driver; left side rocker step

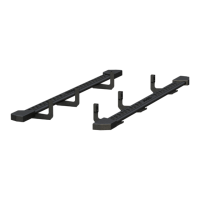
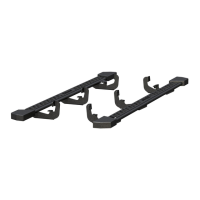
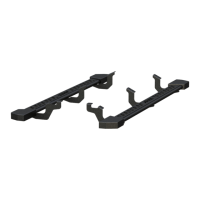
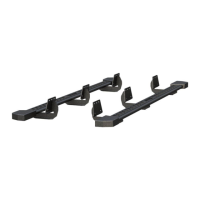
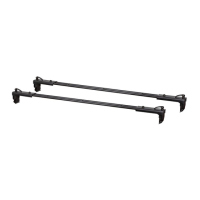
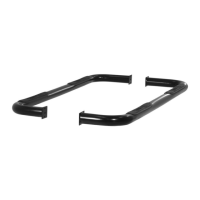
Component for the driver's side installation.

Passenger;right side rocker step

Component for the passenger's side installation.

Flat washer, M8

Hardware specification for mounting.

Serrated flange hex nut, M8

Hardware specification for mounting.

Tools Required

Torque wrench

Essential tool for proper hardware tightening.

Socket, 13 mm

Specific socket size for hardware.

Torque Specifications

M6 bolt

Torque setting for M6 bolts.

M8 bolt

Torque setting for M8 bolts.

M10 bolt

Torque setting for M10 bolts.

M12 bolt

Torque setting for M12 bolts.

1;4 bolt

Torque setting for 1/4 inch bolts.

5;16 bolt

Torque setting for 5/16 inch bolts.

3;8 bolt

Torque setting for 3/8 inch bolts.

7;16 bolt

Torque setting for 7/16 inch bolts.

1;2 bolt

Torque setting for 1/2 inch bolts.

Notes and Maintenance

Installation Instructions

Read all instructions thoroughly before beginning installation.

Tool Usage

Proper tools improve installation quality and reduce time.

Cleaning Black Finishes

Mild soap can be used to clean black finishes.

Hardware Securing

Refer to torque table to prevent damage during installation.

Overview

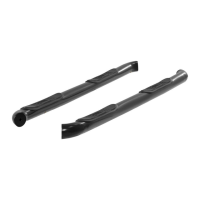
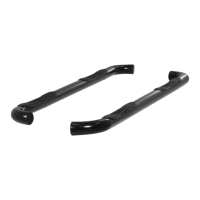
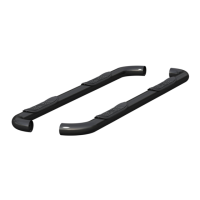
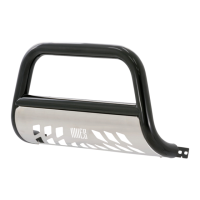
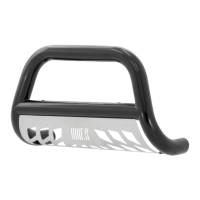
This document provides installation instructions for ARIES rocker steps, identified by part number 2074140. These rocker steps are designed to be mounted along the bottom edge of a vehicle's body, providing a convenient step for easier entry and exit. The installation process is rated as "Easy," suggesting it can be completed by individuals with basic mechanical skills.

Function Description

The ARIES rocker steps serve as an accessory that enhances vehicle accessibility and aesthetics. By providing a sturdy platform, they facilitate ingress and egress, particularly for taller vehicles or individuals who may benefit from an intermediate step. The steps are designed to integrate with the vehicle's existing structure, utilizing specific mounting points along the rocker panel. The kit includes components for both the driver and passenger sides of the vehicle, ensuring symmetrical functionality and appearance.

Important Technical Specifications

The installation kit includes the following parts:

  • 1 Driver / left side rocker step: The main stepping component for the driver's side.
  • 1 Passenger / right side rocker step: The main stepping component for the passenger's side.
  • 12 Flat washer, M8: Used to distribute the load of the fasteners and protect mounting surfaces.
  • 12 Serrated flange hex nut, M8: Self-locking nuts designed to resist loosening due to vibration, ensuring secure attachment.

The installation requires common tools:

  • Torque wrench: Essential for applying precise torque to fasteners, preventing over-tightening or under-tightening.
  • Socket, 13mm: The specific size required for the M8 fasteners included in the kit.

Torque Specifications (Crucial for secure and safe installation):

The manual provides a comprehensive table of torque specifications for various bolt sizes, both metric and SAE, to guide installers in properly securing the hardware. For the M8 bolts used in this installation, the recommended torque is 7 ft.-lbs. Adhering to these specifications is vital for the longevity of the product and the safety of the vehicle occupants.

  • Metric Bolts:
    • M6 bolt: 3 ft.-lbs.
    • M8 bolt: 7 ft.-lbs.
    • M10 bolt: 16 ft.-lbs.
    • M12 bolt: 28 ft.-lbs.
  • SAE Bolts:
    • 1/4" bolt: 3 ft.-lbs.
    • 5/16" bolt: 7 ft.-lbs.
    • 3/8" bolt: 16 ft.-lbs.
    • 7/16" bolt: 20 ft.-lbs.
    • 1/2" bolt: 28 ft.-lbs.

Usage Features

The installation process is broken down into four clear steps:

  1. Locate Mounting Points: The first step involves identifying the three designated mounting points along the bottom edge of the vehicle body. This ensures proper alignment and secure attachment of the rocker steps.
  2. Install Driver Side Front: Starting on the driver's side, the front mounting point is addressed. The rocker step is lifted into position and secured using two M8 flat washers and two M8 serrated flange hex nuts. At this stage, the hardware should only be "snugged," not fully tightened, to allow for adjustments.
  3. Install Driver Side Middle and Rear & Final Tightening: This step extends the process to the middle and rear mounting brackets on the driver's side, repeating the securing procedure from Step 2. Once all brackets are in place and the rocker step is properly positioned, all mounting hardware is then tightened to the recommended torque specifications (7 ft.-lbs. for M8 bolts) using a torque wrench.
  4. Repeat for Passenger Side: The entire process (Steps 1 through 3) is then duplicated for the passenger side of the vehicle, ensuring both sides are installed correctly and securely.

The "Easy" level of difficulty suggests that the installation is straightforward and does not require specialized tools beyond a torque wrench and a 13mm socket. The step-by-step instructions, accompanied by images, aim to guide the installer through the process efficiently.

Maintenance Features

The manual provides important notes regarding maintenance to ensure the longevity and proper functioning of the ARIES rocker steps:

  • Thorough Reading of Instructions: Before beginning installation, it is crucial to read all instructions thoroughly to understand the process and avoid potential errors.
  • Proper Tools: Using the correct tools, particularly a torque wrench, is emphasized to improve the quality of installation and reduce the time required. This also helps prevent damage to the product or the vehicle.
  • Cleaning Black Finishes: For rocker steps with black finishes, the recommendation is to use mild soap for cleaning. This suggests that harsh chemicals or abrasive cleaners should be avoided to preserve the finish.
  • Periodic Inspections: After installation, periodic inspections are recommended to ensure that all mounting hardware remains tight. This is a critical safety measure, as vibrations and road conditions can potentially loosen fasteners over time. Regular checks help maintain the structural integrity of the installation and prevent accidents.
  • Torque Specification Adherence: The manual reiterates the importance of referring to the provided torque table when securing hardware. This prevents damage to the product or vehicle from over-tightening or under-tightening, which could lead to premature wear, failure, or unsafe conditions.

In summary, the ARIES rocker steps (part number 2074140) are an easy-to-install vehicle accessory designed to improve accessibility. The installation process is well-documented with clear steps and specific torque requirements. Proper tool usage, adherence to torque specifications, and routine maintenance checks are highlighted as key factors for a successful and lasting installation.

Aries 2074140 Specifications

General IconGeneral
BrandAries
Model2074140
CategoryAutomobile Accessories
LanguageEnglish

Related product manuals