38
Roof Trim Caps are positioned as shown.
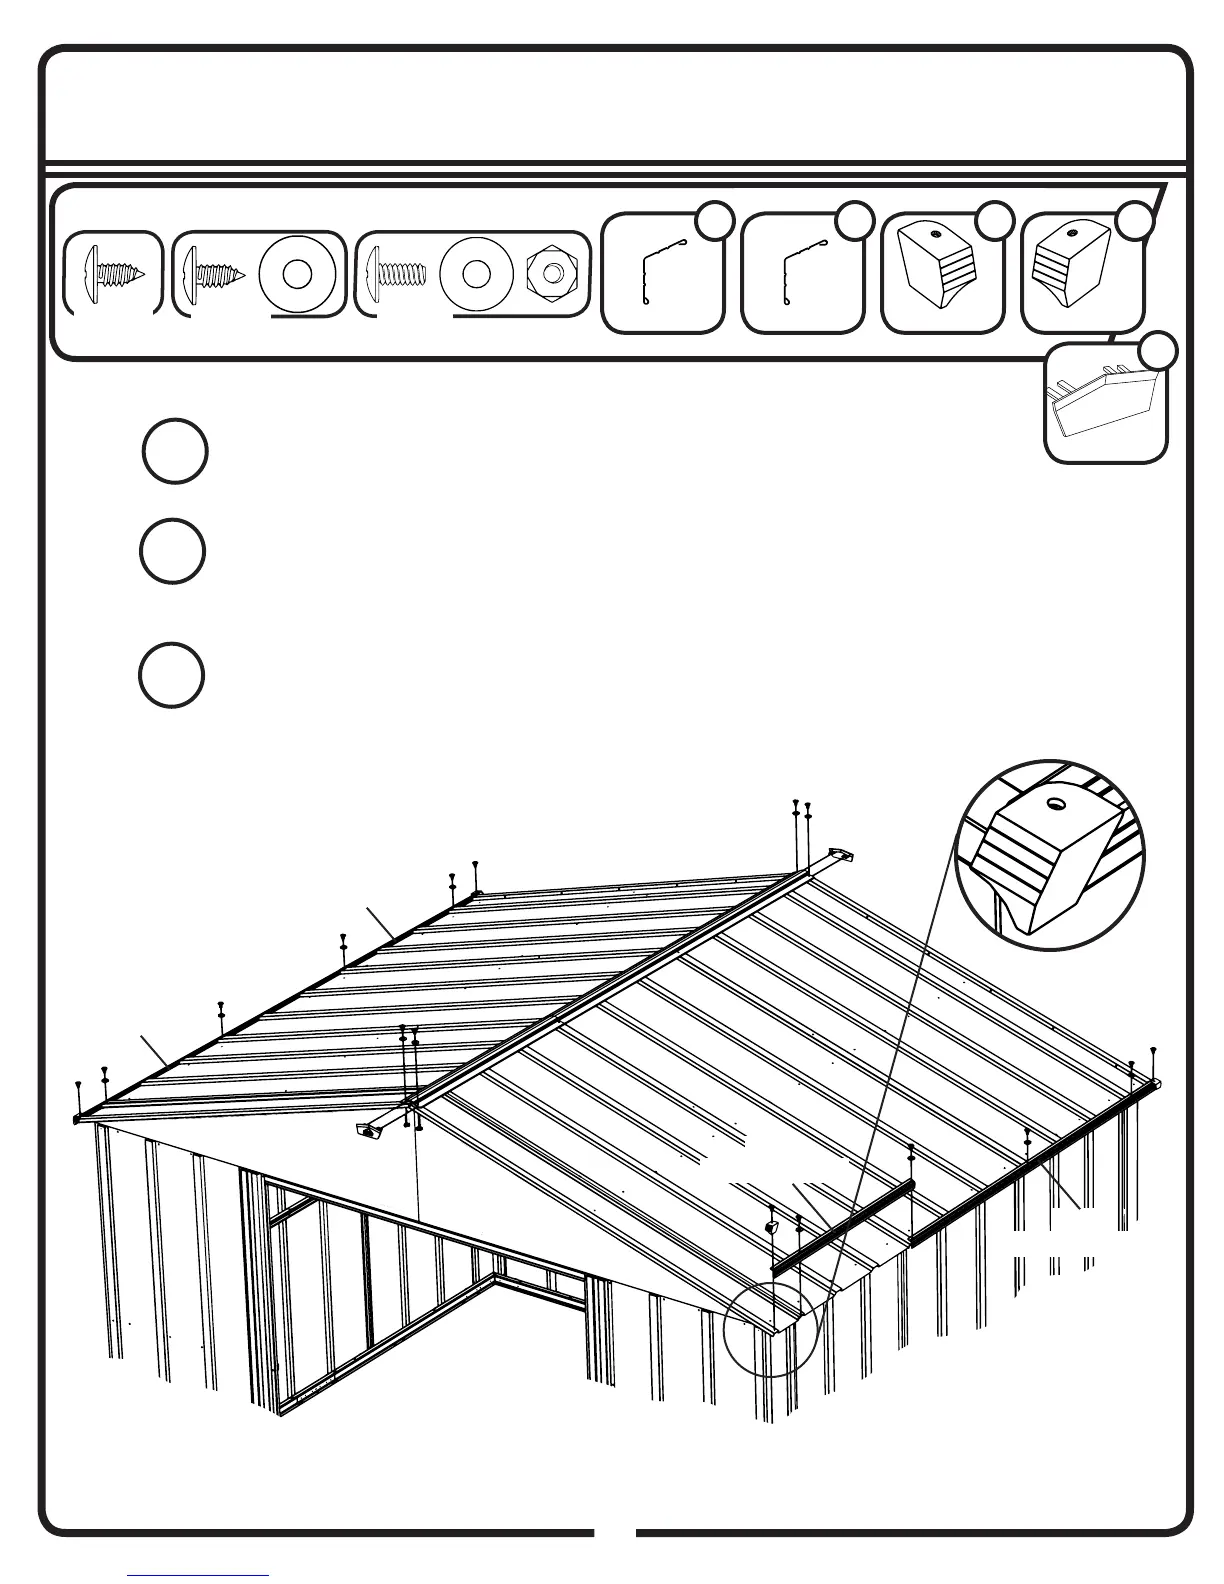
You will need for this page:
Step 15: Roof Trim
Slide Peak Cap legs under Ridge Cap and secure
with two (2) bolts and nuts on each end.
Position the Roof Trim Caps as shown below
and secure with a screw.
Position Roof Trim as shown below and secure
with screws. Do not fasten the last screw on
each end. Pay close attention to where the Left
and Right Roof Trim pieces are located.
Left Trim
2
8485
Right Trim
2
8836
Trim Cap (L)
2
Trim Cap (R)
2
Peak Cap
2
(QTY: 8)
(QTY: 4)
8485
Left Roof Trim
8485
Left Roof Trim
8836
Right Roof Trim
8836
Right Roof Trim
(QTY: 4)
38BH
39
(QTY: 3)
(QTY: 2)
Vert. Brace
1
6300
Secure Door Handle and Handle Brace
to Door with two (2) bolts and nuts.
Align angled end of Brace
with upper Door Handle hole.
Place tab end of Brace
under Vertical Door Brace.
Do not fully tighten the bolts that hold on the Door
Handle until the Vertical Door Brace is in place.
Attach Vertical Door Brace to
Door with three (3) screws.
Handle
1
You will need for this page:
Step 15: Door Assembly
Handle Brace
1
3719
1
10477
Door
10477
3719
10497
10497
6300
Attach the Door Handle and Door
Handle Brace to the Door with two
(2) bolts and nuts as shown. Do not
fully tighten the bolts that hold in the Door
Handle until the Vertical Door Brace is in
place.
Rotate the Door Handle Brace to
align it with the Vertical Door Brace
as shown. Secure the Vertical Door
Brace with three (3) screws. Tighten the
Door Handle bolts.
10477
6300
3719
Outside of Door
Install the Door Braces
on the interior (gray)
side of the Door.
39AW