for 3 seconds until the LED comes
on, the valve will now be in the Drainage position.
2º Turn the switch in the control box to the “I” position, thus activating the pump and starting
the drainage process.
These operations are to be carried out when the valve is in the “fi ltration” position. If the wash or
rinse cycles are running, please wait until they have fi nished.
Appliance users should watch for when this operation fi nishes. Once the appliance has stopped,
proceed as follows:
1º Turn switch to “II” position in the control box in order to stop pump
2º Press “WASTE / VACIADO” on the electronic module
for 3 seconds until the LED goes
off, the valve will now be in the fi ltration position.
4.5 DRAINAGE (forced while timer program running)
1º Press
3 seconds until the led lights up. The electronic module will stop the pump and
the valve will turn to “WASTE” position. The pump will start up again.
2º To stop the process press
again. The module will stop the pump and the valve will
turn to “FILTRATION” position.
4.6 TEST.
This is used in order to:
1º Know when the appliance is connected to the mains (LED lit).
2º Flashing LED indicates possible operational problem:
- Two fl ashes: Stop microswitch not found, the microswitch may be broken.
- Four fl ashes: excessive motor consumption due to bell braking, possibly caused by incorrect
fi lter operation which is allowing sand to pass through the system.
- Six fl ashes: Failure of the bell elevation microswitch.
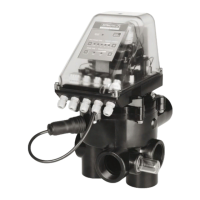
4.7 BACKWASH PRESS BUTTON
On this valve there is a push button (see Photo) which enables the backwash routine to be started
(wash + rinse) without having to use the pressure switch or the return valve. The valve must be
correctly connected to the electrical cabinet and the program timer activated.
In order to start the operation, press the button and maintain the pressure for at least 7 seconds.
Once the routine is fi nished, the valve returns to the fi lter position. The backwash and rinse times
are in accordance with the indications on the valve.