IPIBL-LA(Berkeley-GL8E) 7
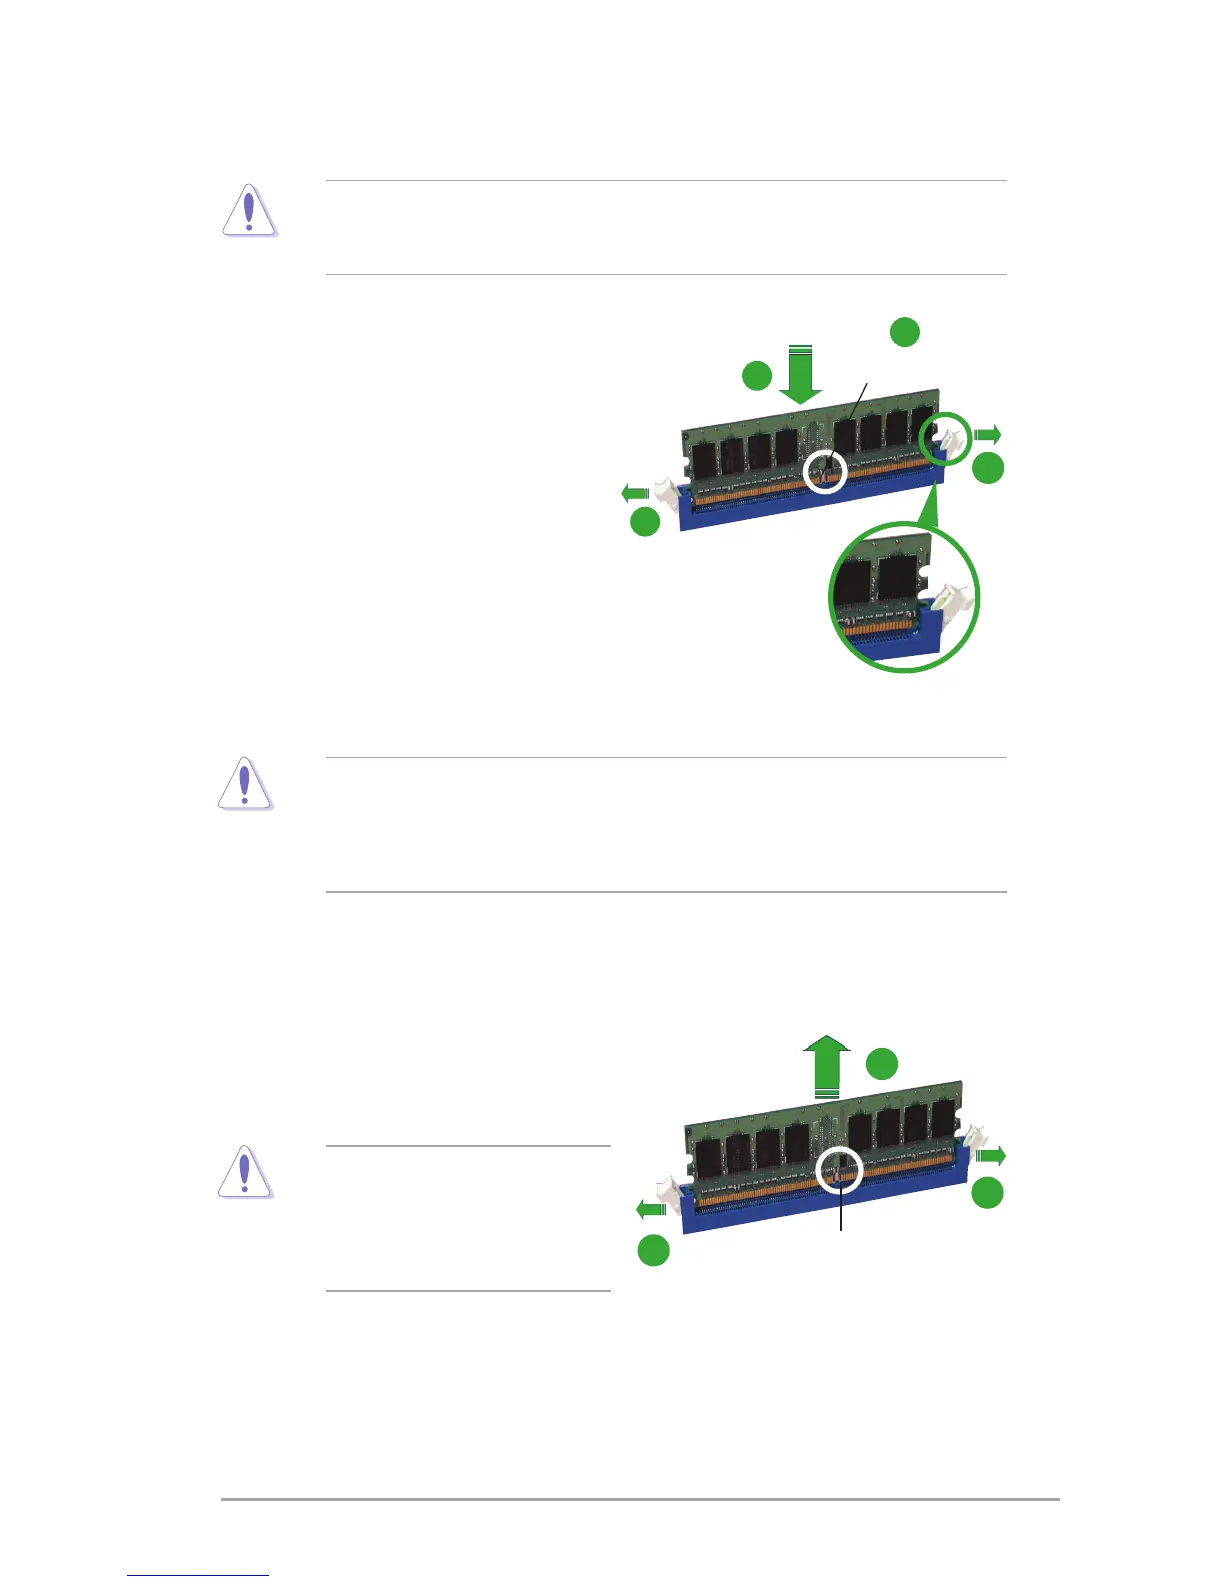
3.3 Removing a DDR2 DIMM
Follow these steps to remove a DIMM.
1. Simultaneouslypresstheretaining
clipsoutwardtounlocktheDIMM.
2. Remove the DIMM from the socket.
• ADDR2DIMMiskeyedwithanotchsothatittsinonlyonedirection.Do
not force a DIMM into a socket to avoid damaging the DIMM.
• TheDDR2DIMMsocketsdonotsupportDDRDIMMs.DonotinstallDDR
DIMMs to the DDR2 DIMM sockets.
SupporttheDIMMlightlywith
yourngerswhenpressingthe
retainingclips.TheDIMMmight
getdamagedwhenitipsout
with extra force.
DDR2 DIMM notch
1
2
1
3.2 Installing a DDR2 DIMM
UnplugthepowersupplybeforeaddingorremovingDIMMsorother
systemcomponents.Failuretodosocancauseseveredamagetoboththe
motherboard and the components.
ToinstallaDIMM:
1. Unlock a DIMM socket by
pressing the retaining clips
outward.
2. Align a DIMM on the socket
suchthatthenotchontheDIMM
matches the break on the socket.
3. Firmly insert the DIMM into the
socketuntiltheretainingclips
snap back in place and the DIMM
is properly seated.
Unlocked retaining clip
DDR2 DIMM notch
1
2
3
1