2 G16CH SSD HEAR SINK(WITH SCREW)
2.0±0.2
2 PD500TC M2 SSD SINK(WITH SCREW) (M2*0.4,L=5mm)
2.0±0.2
1 SCREW M2*7.5L (4.5,0.8) #1
2.0±0.5
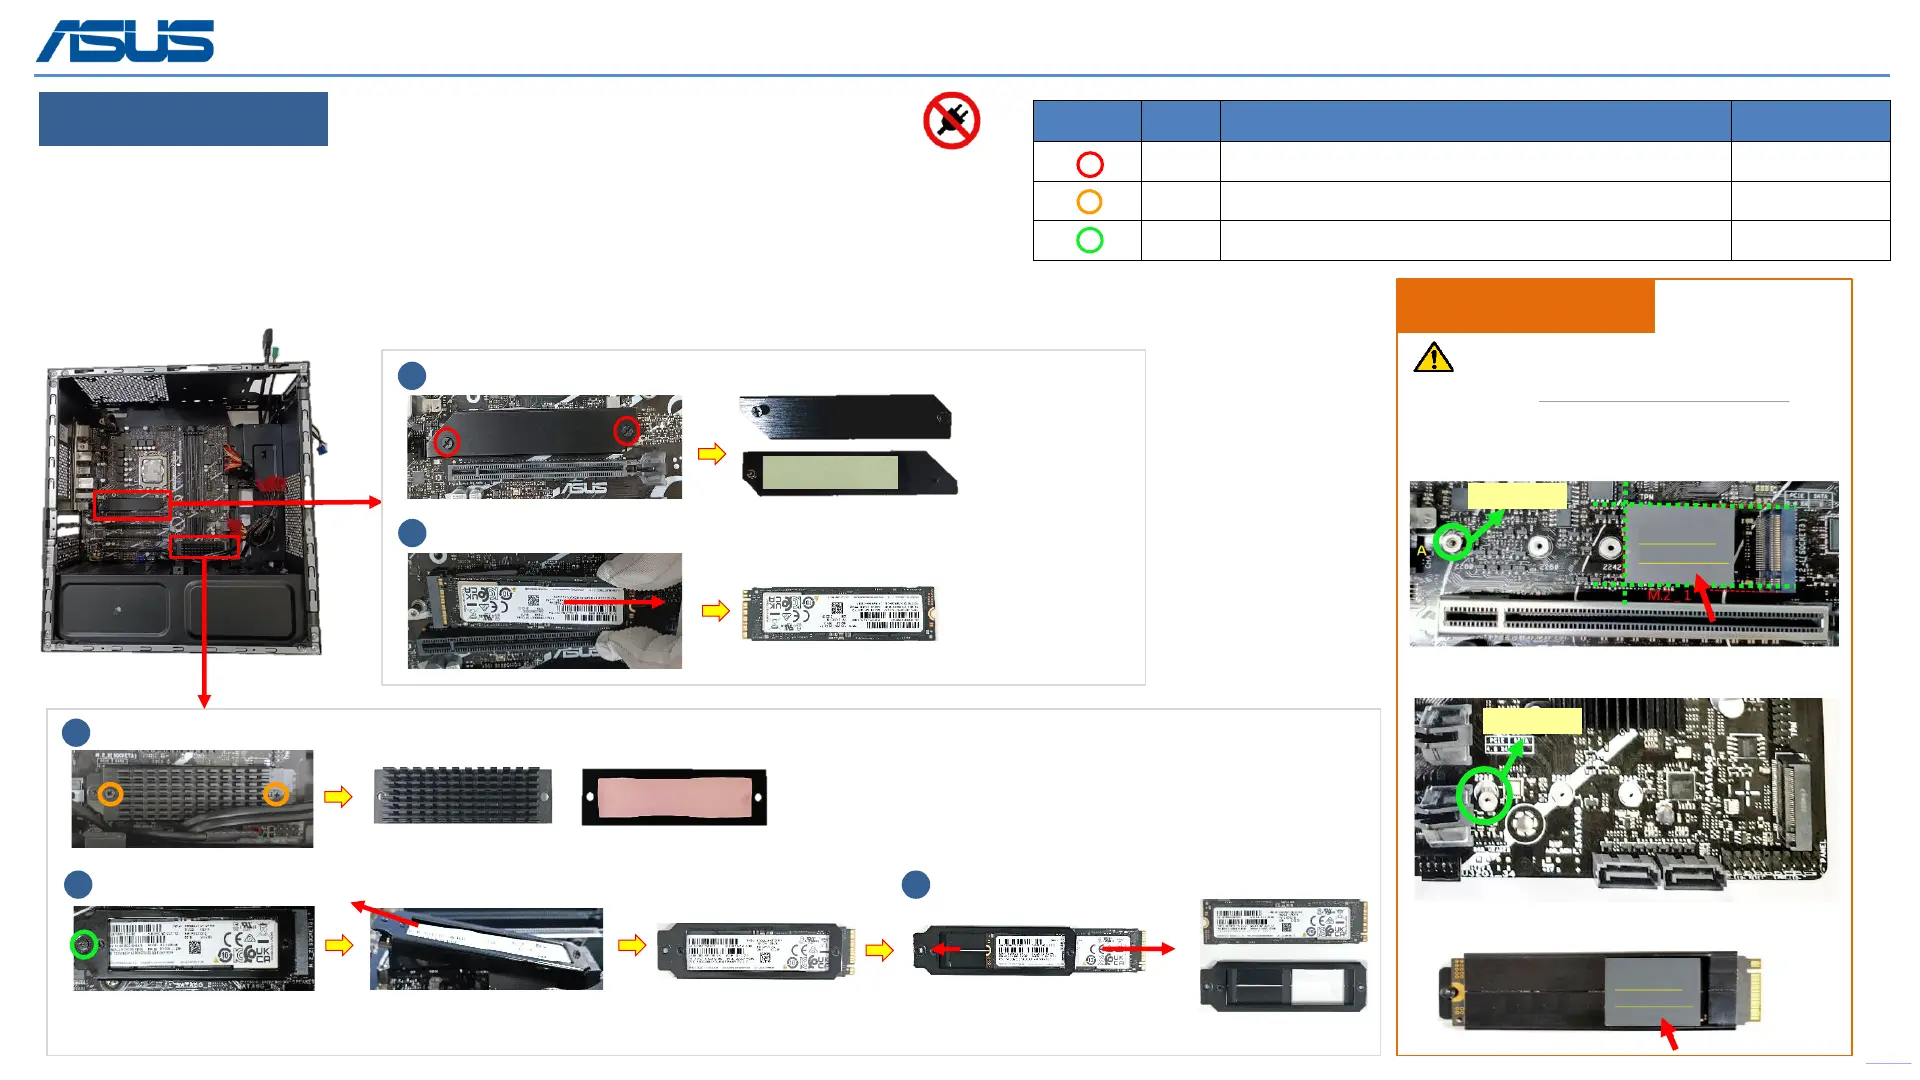
Step 1 : (SSD1) Release screws *2pcs and take out the SSD HEAR SINK.
Step 2 : (SSD1) Remove SSD *1pc.
Step 3 : (SSD2) Remove screws *2pcs and take out the M2 SSD SINK.
Step 4 : (SSD2) Remove screw *1pc and take out the SSD with TH BRACKET.
Step 5 : Take out the SSD from the TH BRACKET.
Back
24
Disassembly Notice
Please be sure to pull out AC POWER CORD.
1
Assembly Notice
Please according to below image to
assemble D700TA M2 PAD 25X20X7 &
STAND OFF.
● SSD2 location
● SSD1 location
SSD1
SSD2
2
4
3
5
G16CH
SSD HEAR SINK
PD500TC M2 SSD SINK
TH BRACKET
D700TA M2
PAD 25X20X7
● SSD2 with TH BRACKET module (Rear)
D700TA M2
PAD 25X20X7
STAND OFF
STAND OFF
 Loading...