2-5
ASUS TS110-E8-PI4
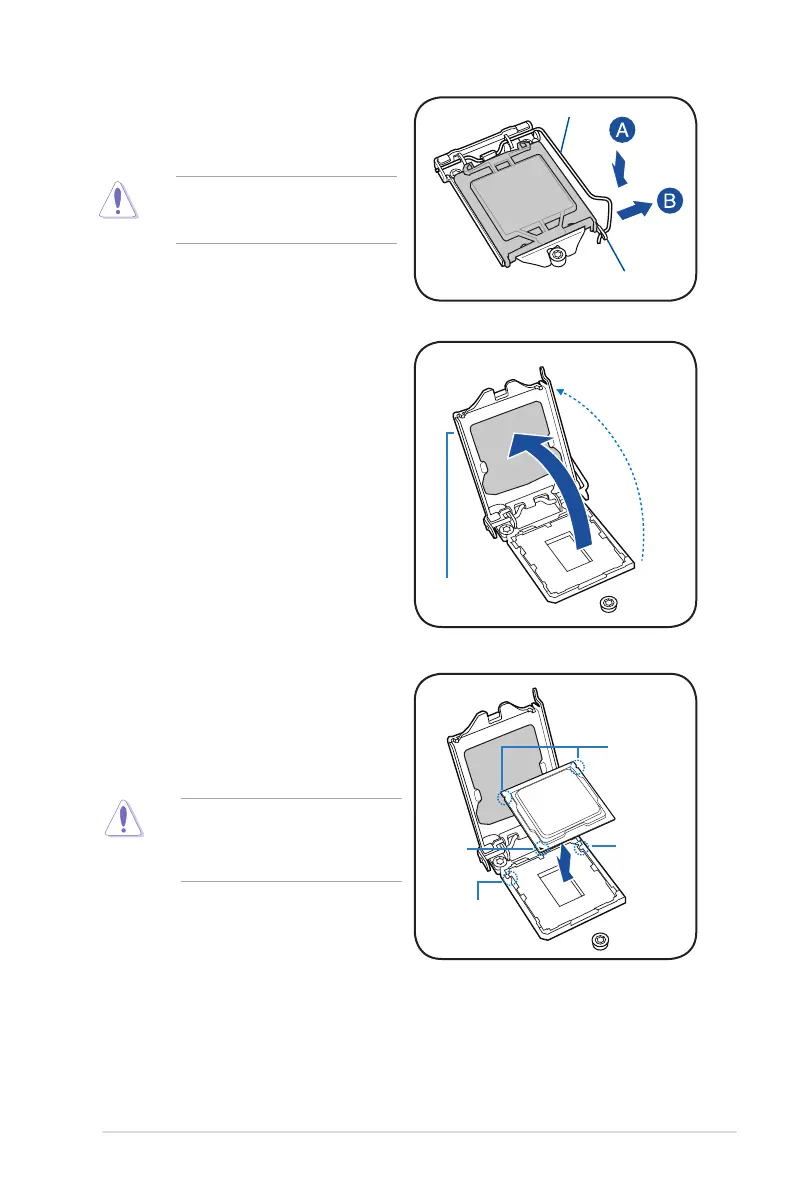
Do not remove the PnP cap yet from
theCPUsocket.Doingsomaybend
thepinsofthesocket.
Retention tab
Load lever
2. Press the load lever with your thumb
(A),thenmoveittotheright(B)untilitis
released from the retention tab.
3. Lift the load lever until the load plate is
completely lifted.
Load plate
4. PositiontheCPUabovethesocket,
ensuringthatthegoldtrianglemarkis
onthebottom-leftcornerofthesocket,
thenttheCPUnotchestothesocket's
alignmentkeys.
TheCPUtsinonlyoneorientation.
DO NOT force the CPU into the
sockettopreventbendingthepinson
thesocketanddamagingtheCPU.
Gold
triangle
mark
CPU notches
Alignment
key
Alignment
key