11
NT2508 / NT2504 / NT1308 / NT1304 / NT4004
English
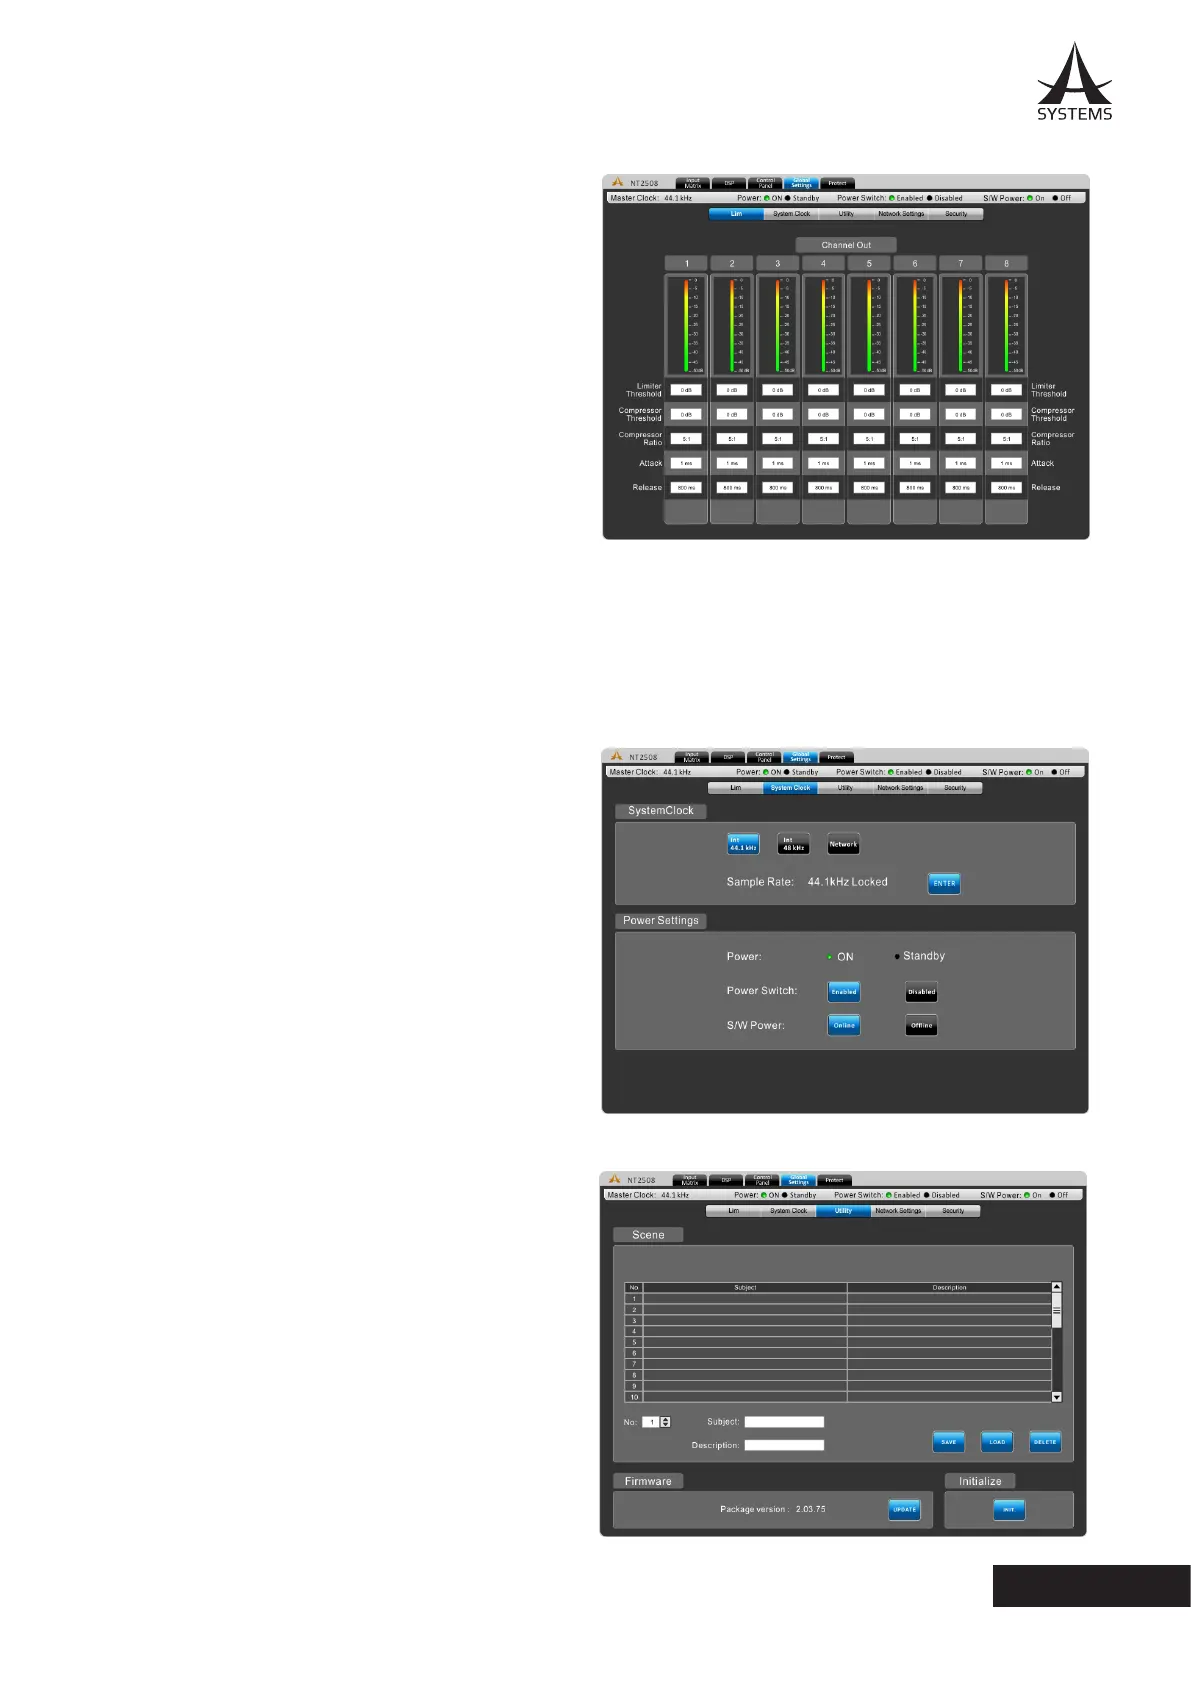
Global Settings
LIM - Limiter/Compressor Settings
This menu allows compressors and limiters to be applied to
channel outputs�
Limiter Threshold: This control determines the threshold
for the limiter function� This means that no signal will surpass
the selected threshold, being ‘compressed’ at a ratio of
innity:1.
Compressor Threshold: Use this control to set the threshold
of the compressor function� Any signals that surpass the
selected threshold will be compressed at the selected ratio.
Compressor Ratio: This control can be used to set
the ratio for the compressor. The ratio is expressed as
<input>:<output>.
Compressor Attack: This control adjusts the attack time of the compressor, essentially determining the time taken for the
compressor to kick in after it passes the selected threshold�
Compressor Release: The release control determines the time the NT will wait before disengaging the compressor when
the signal bypasses the selected threshold.
System Clock
System Clock: This menu allows you to select a master
clock source for digital devices. Selecting 44.1 or 48 kHz
will set the NT as the master clock source and determine
the sampling rate. Selecting AES/EBU, Network, or Word
Clock will set these as the master clock� Whenever a
new clock source is selected, the ENTER button must be
pushed to conrm.
Power Settings: There are three power settings on the NT�
The software power can be turned on and o, essentially
enabling the NT to be turned on and o via the software
– including event scheduling� The hardware power can
be selected on and o, essentially allow the unit to be
activated and deactivated using the hardwired switch on
the front of the NT�
Utility
All of the DSP processes can have their settings saved
for later use. While there are a number of factory presets
available, users are always encouraged to nd their own
settings and save them for later use. The NT has onboard
storage for a number of settings to be saved, or users can
connect USB ash drives to save settings.
Also available in the Utility menu is a rmware update
button. When a new version of rmware is available it can
be installed using the “Update” button. Place the rmware
update le on a formatted USB ash drive and insert it into
a USB port. The “Update” button should take care of the
rest�
After the rmware is updated, the initialize button can
be selected to reset the device. Save any settings (or
“scenes”) before initializing the system.